Leaving 2015. What Now?

What now? It's time to consider.

Seasonal orders are filled. Although two customers are not getting back to me, one has a deposit down and the other has to show up before Christmas to pick up the gifts she asked me to make, so I'm not worried. Everyone else has what they asked me for. What a relief!

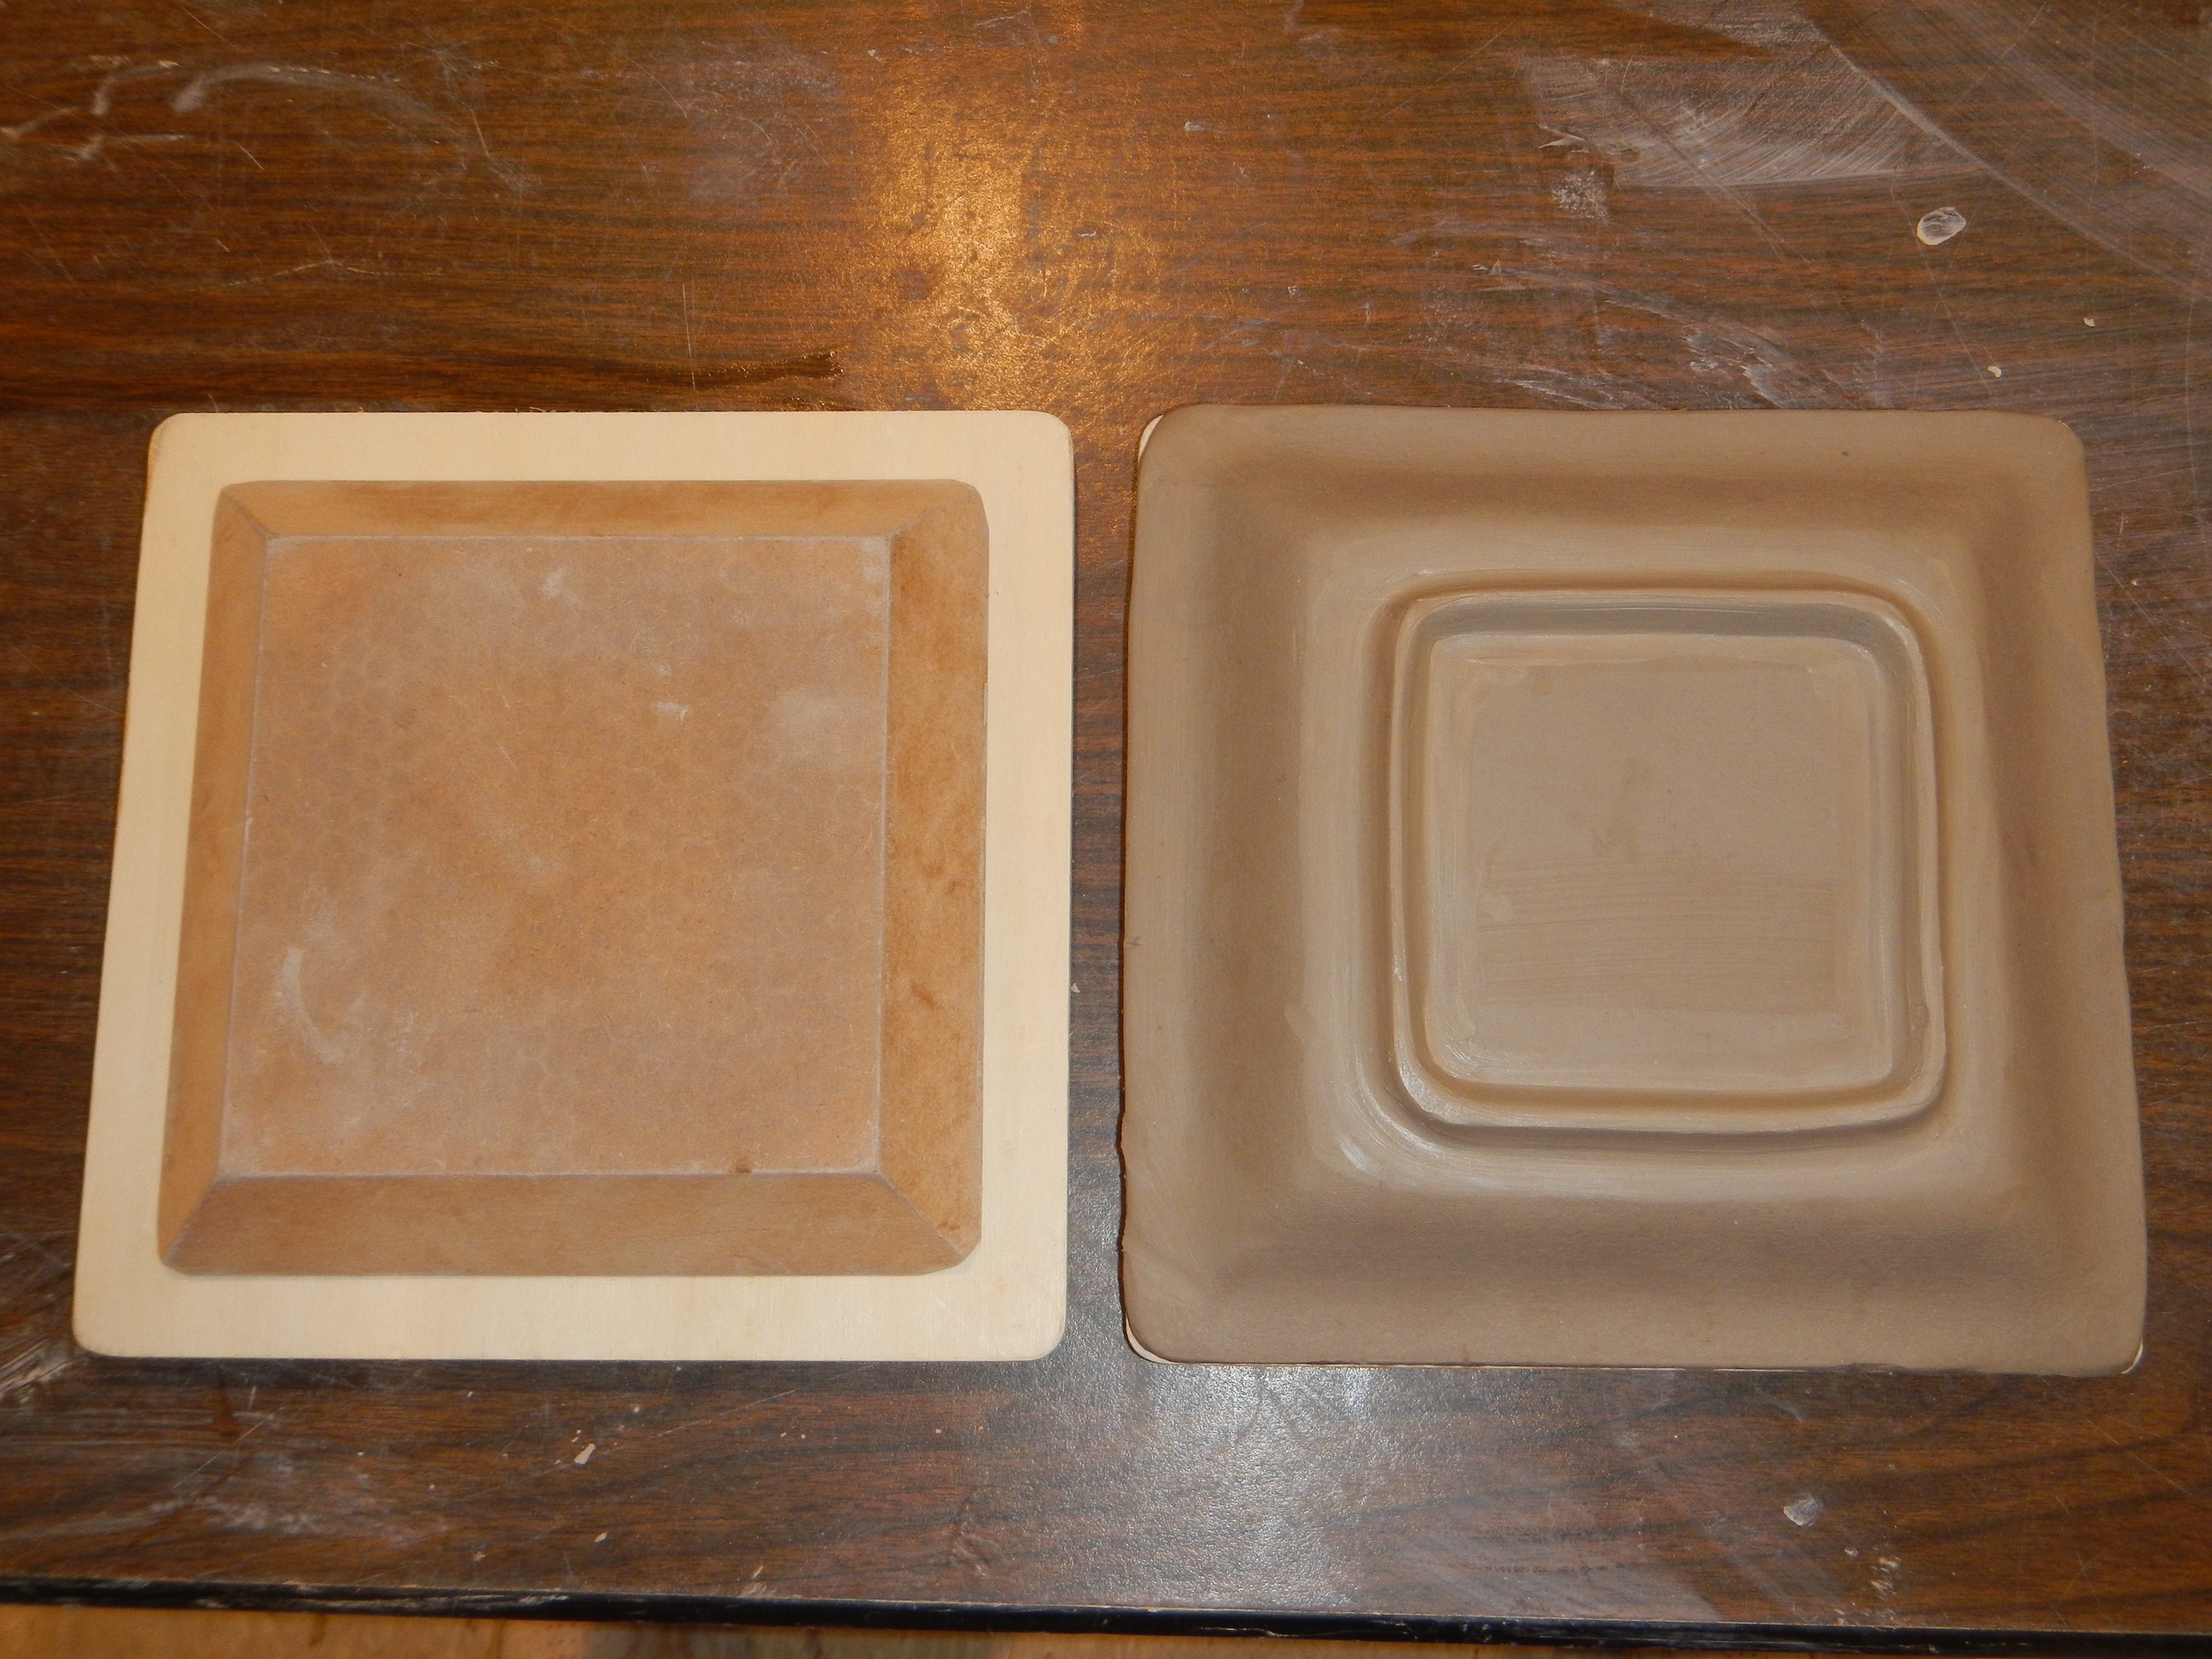
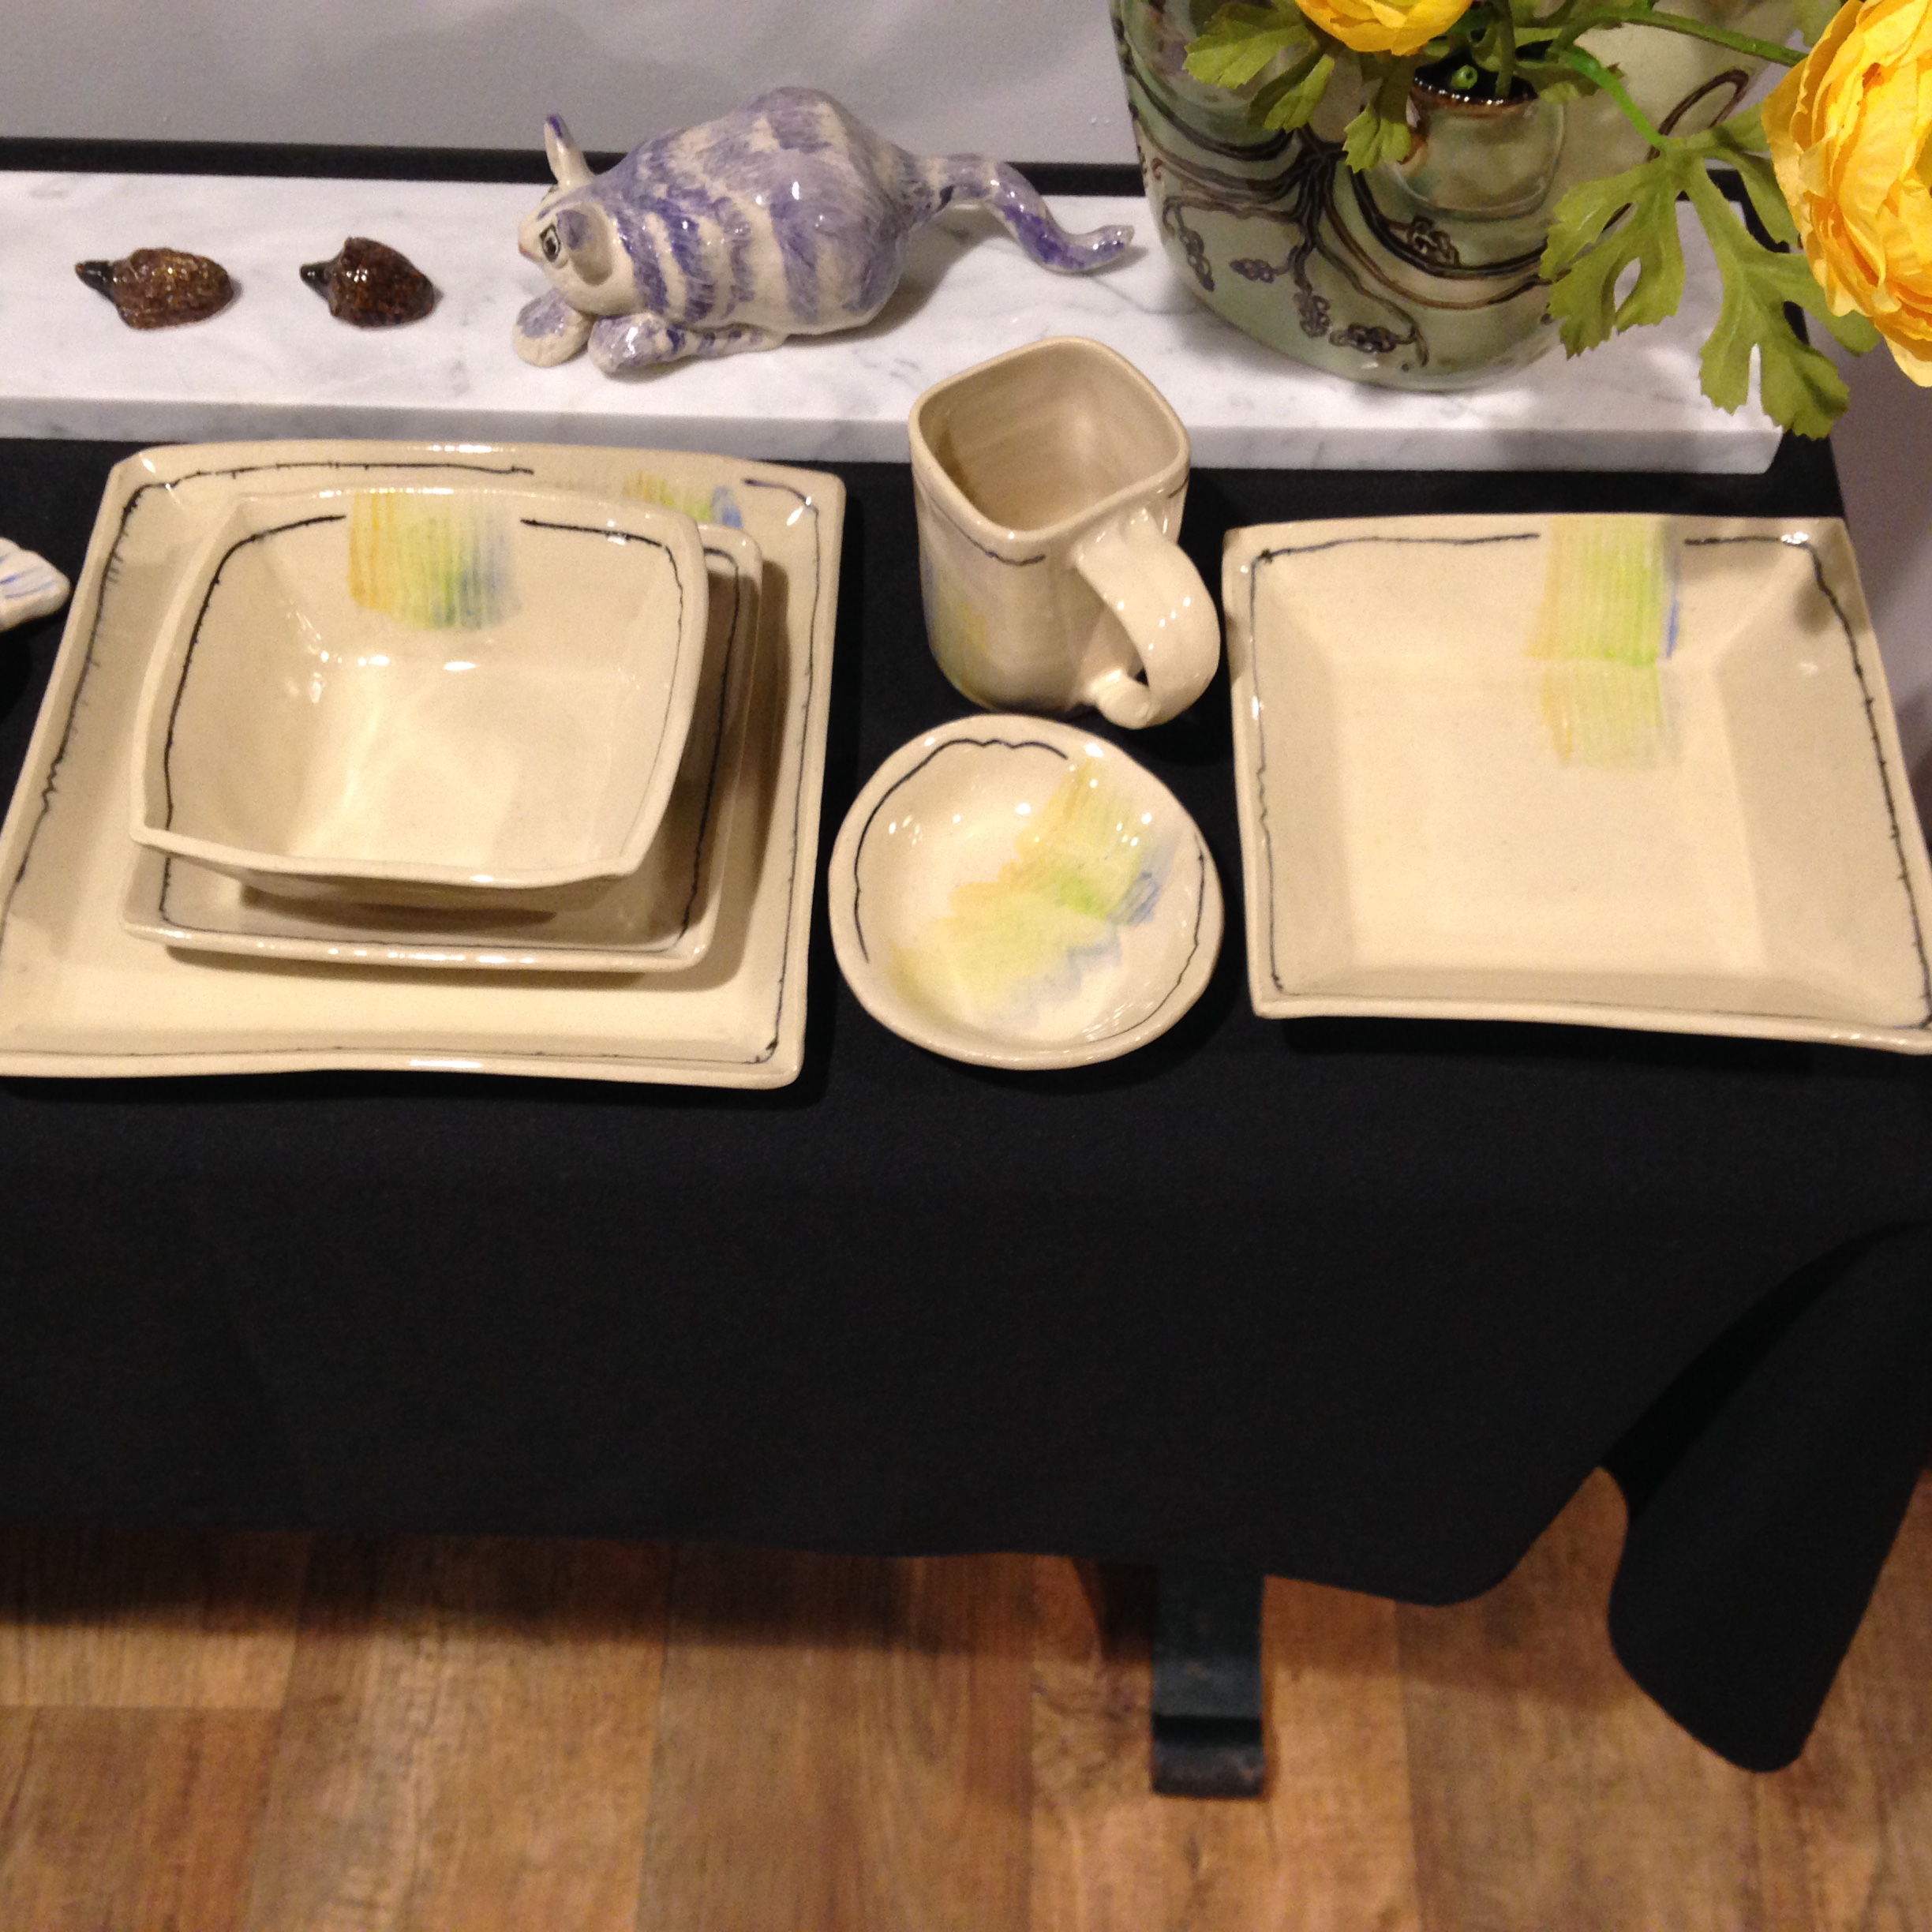
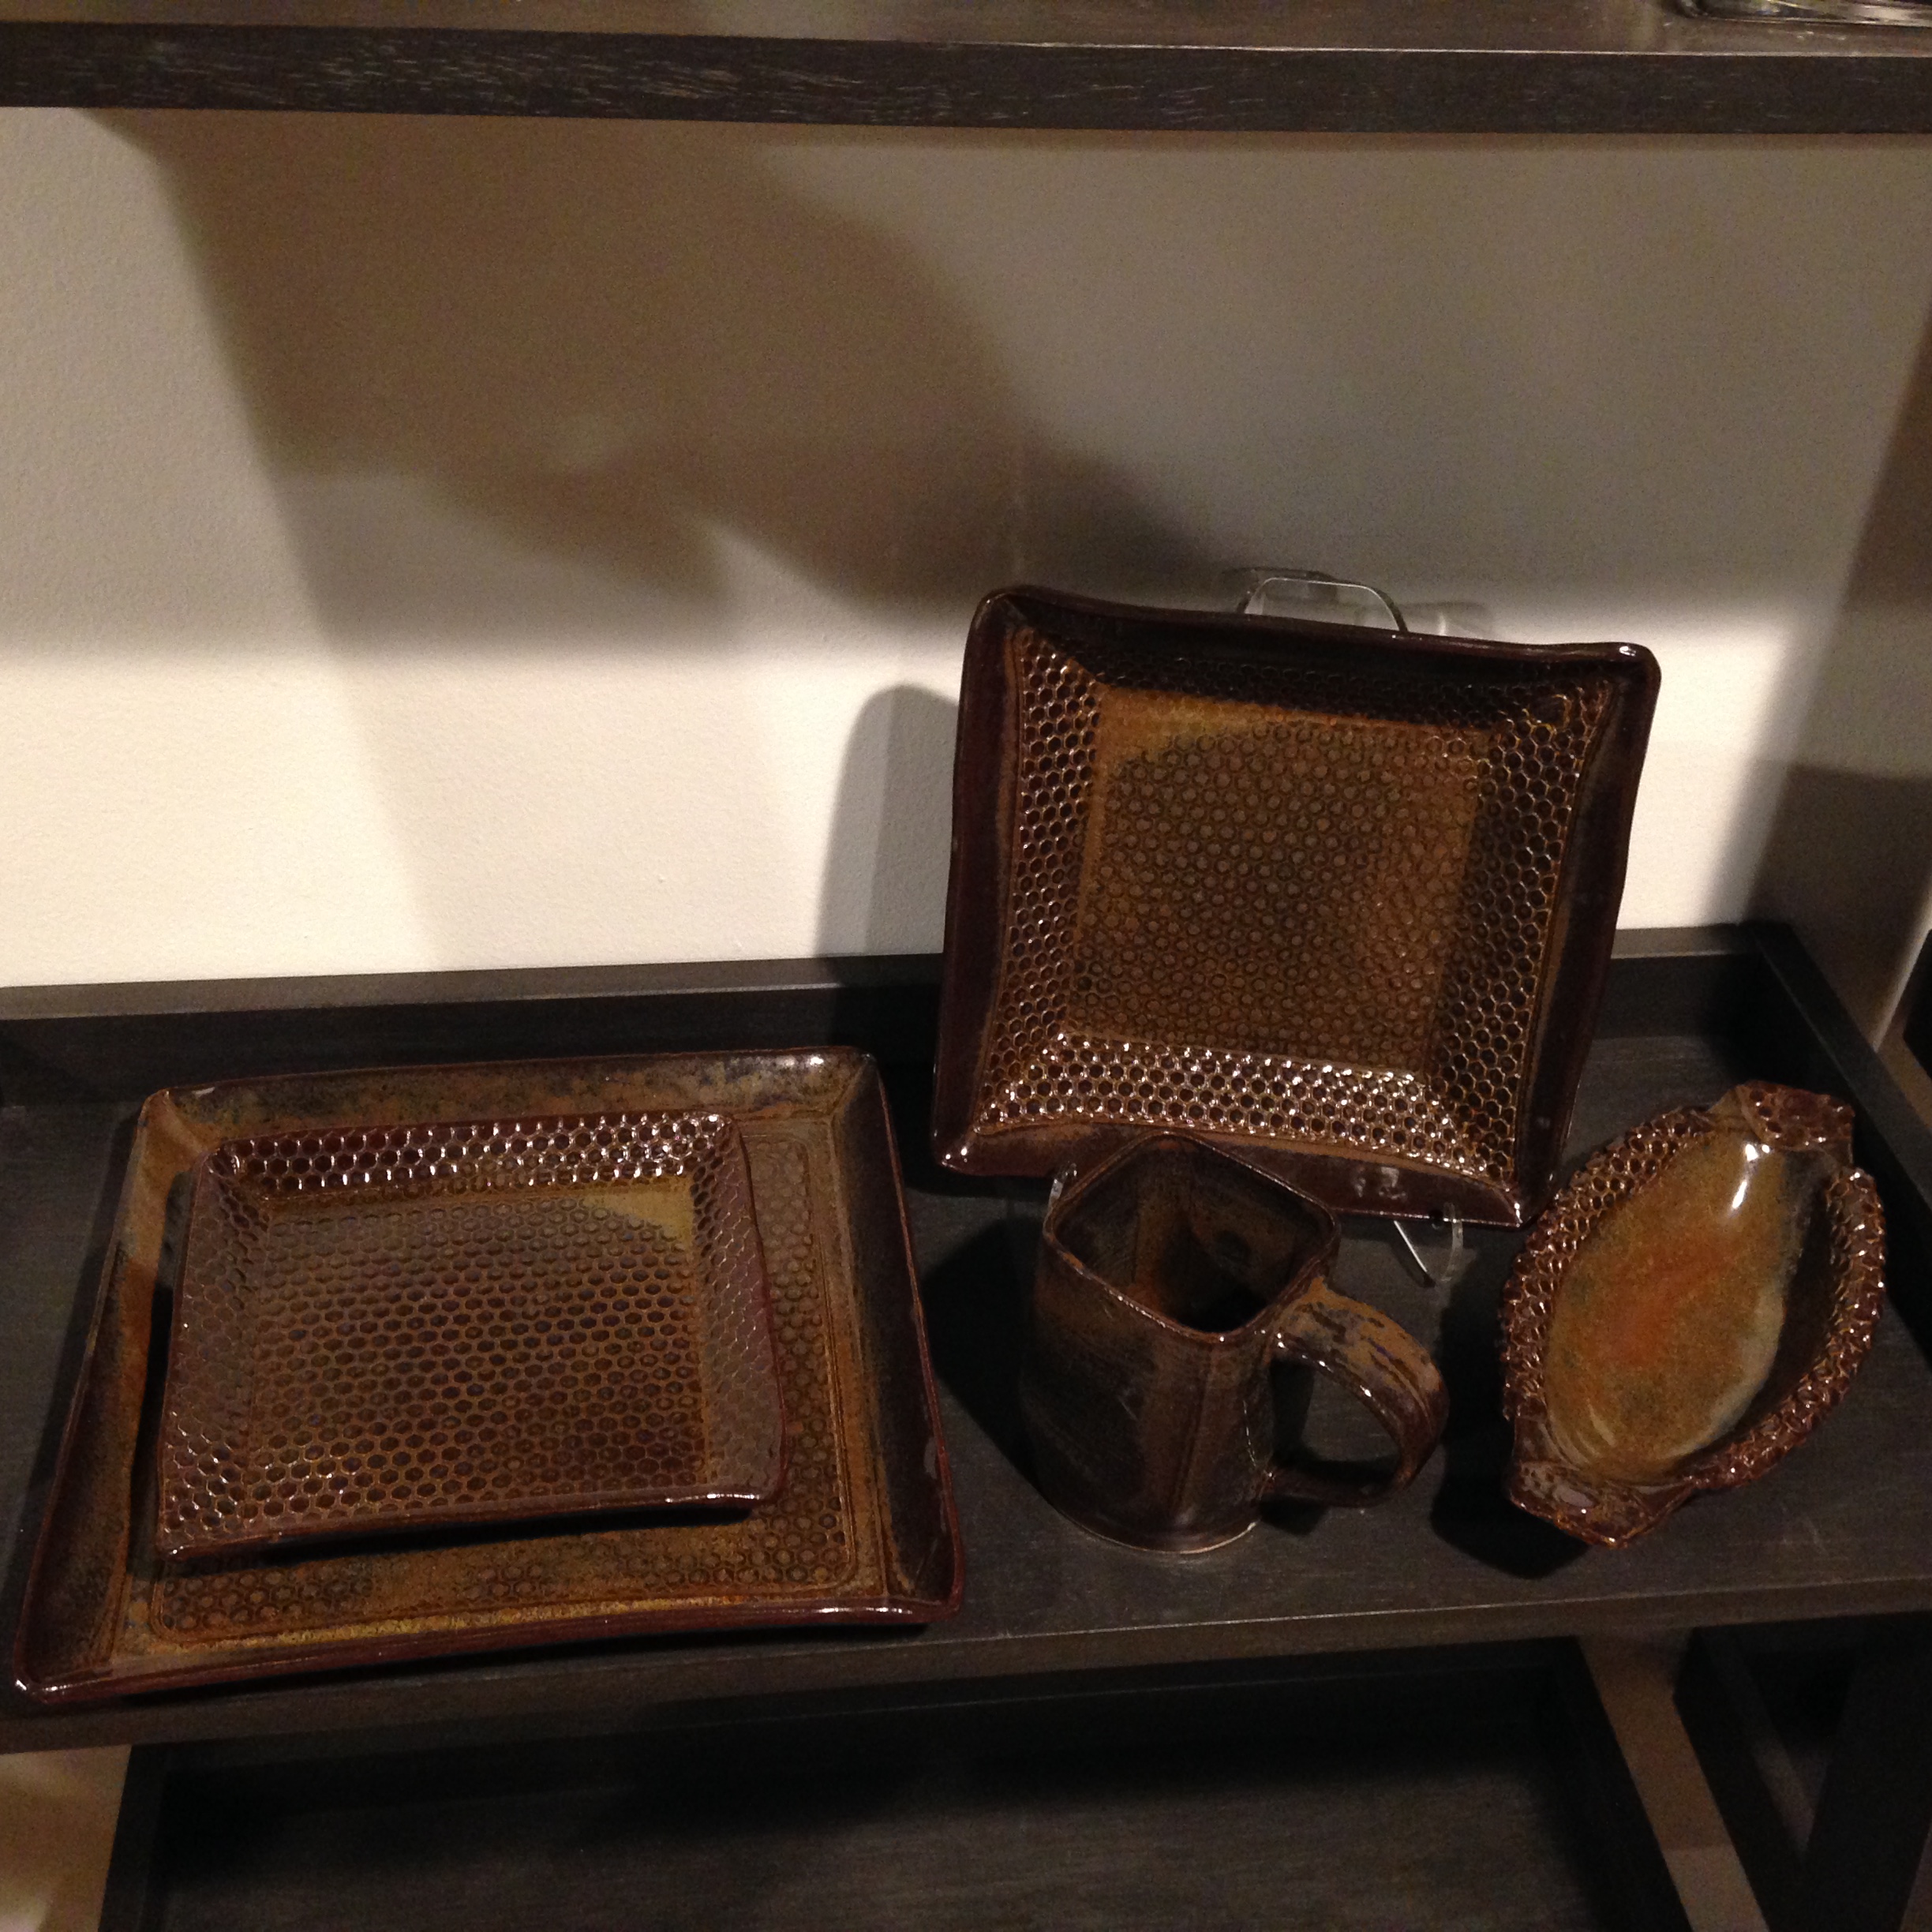
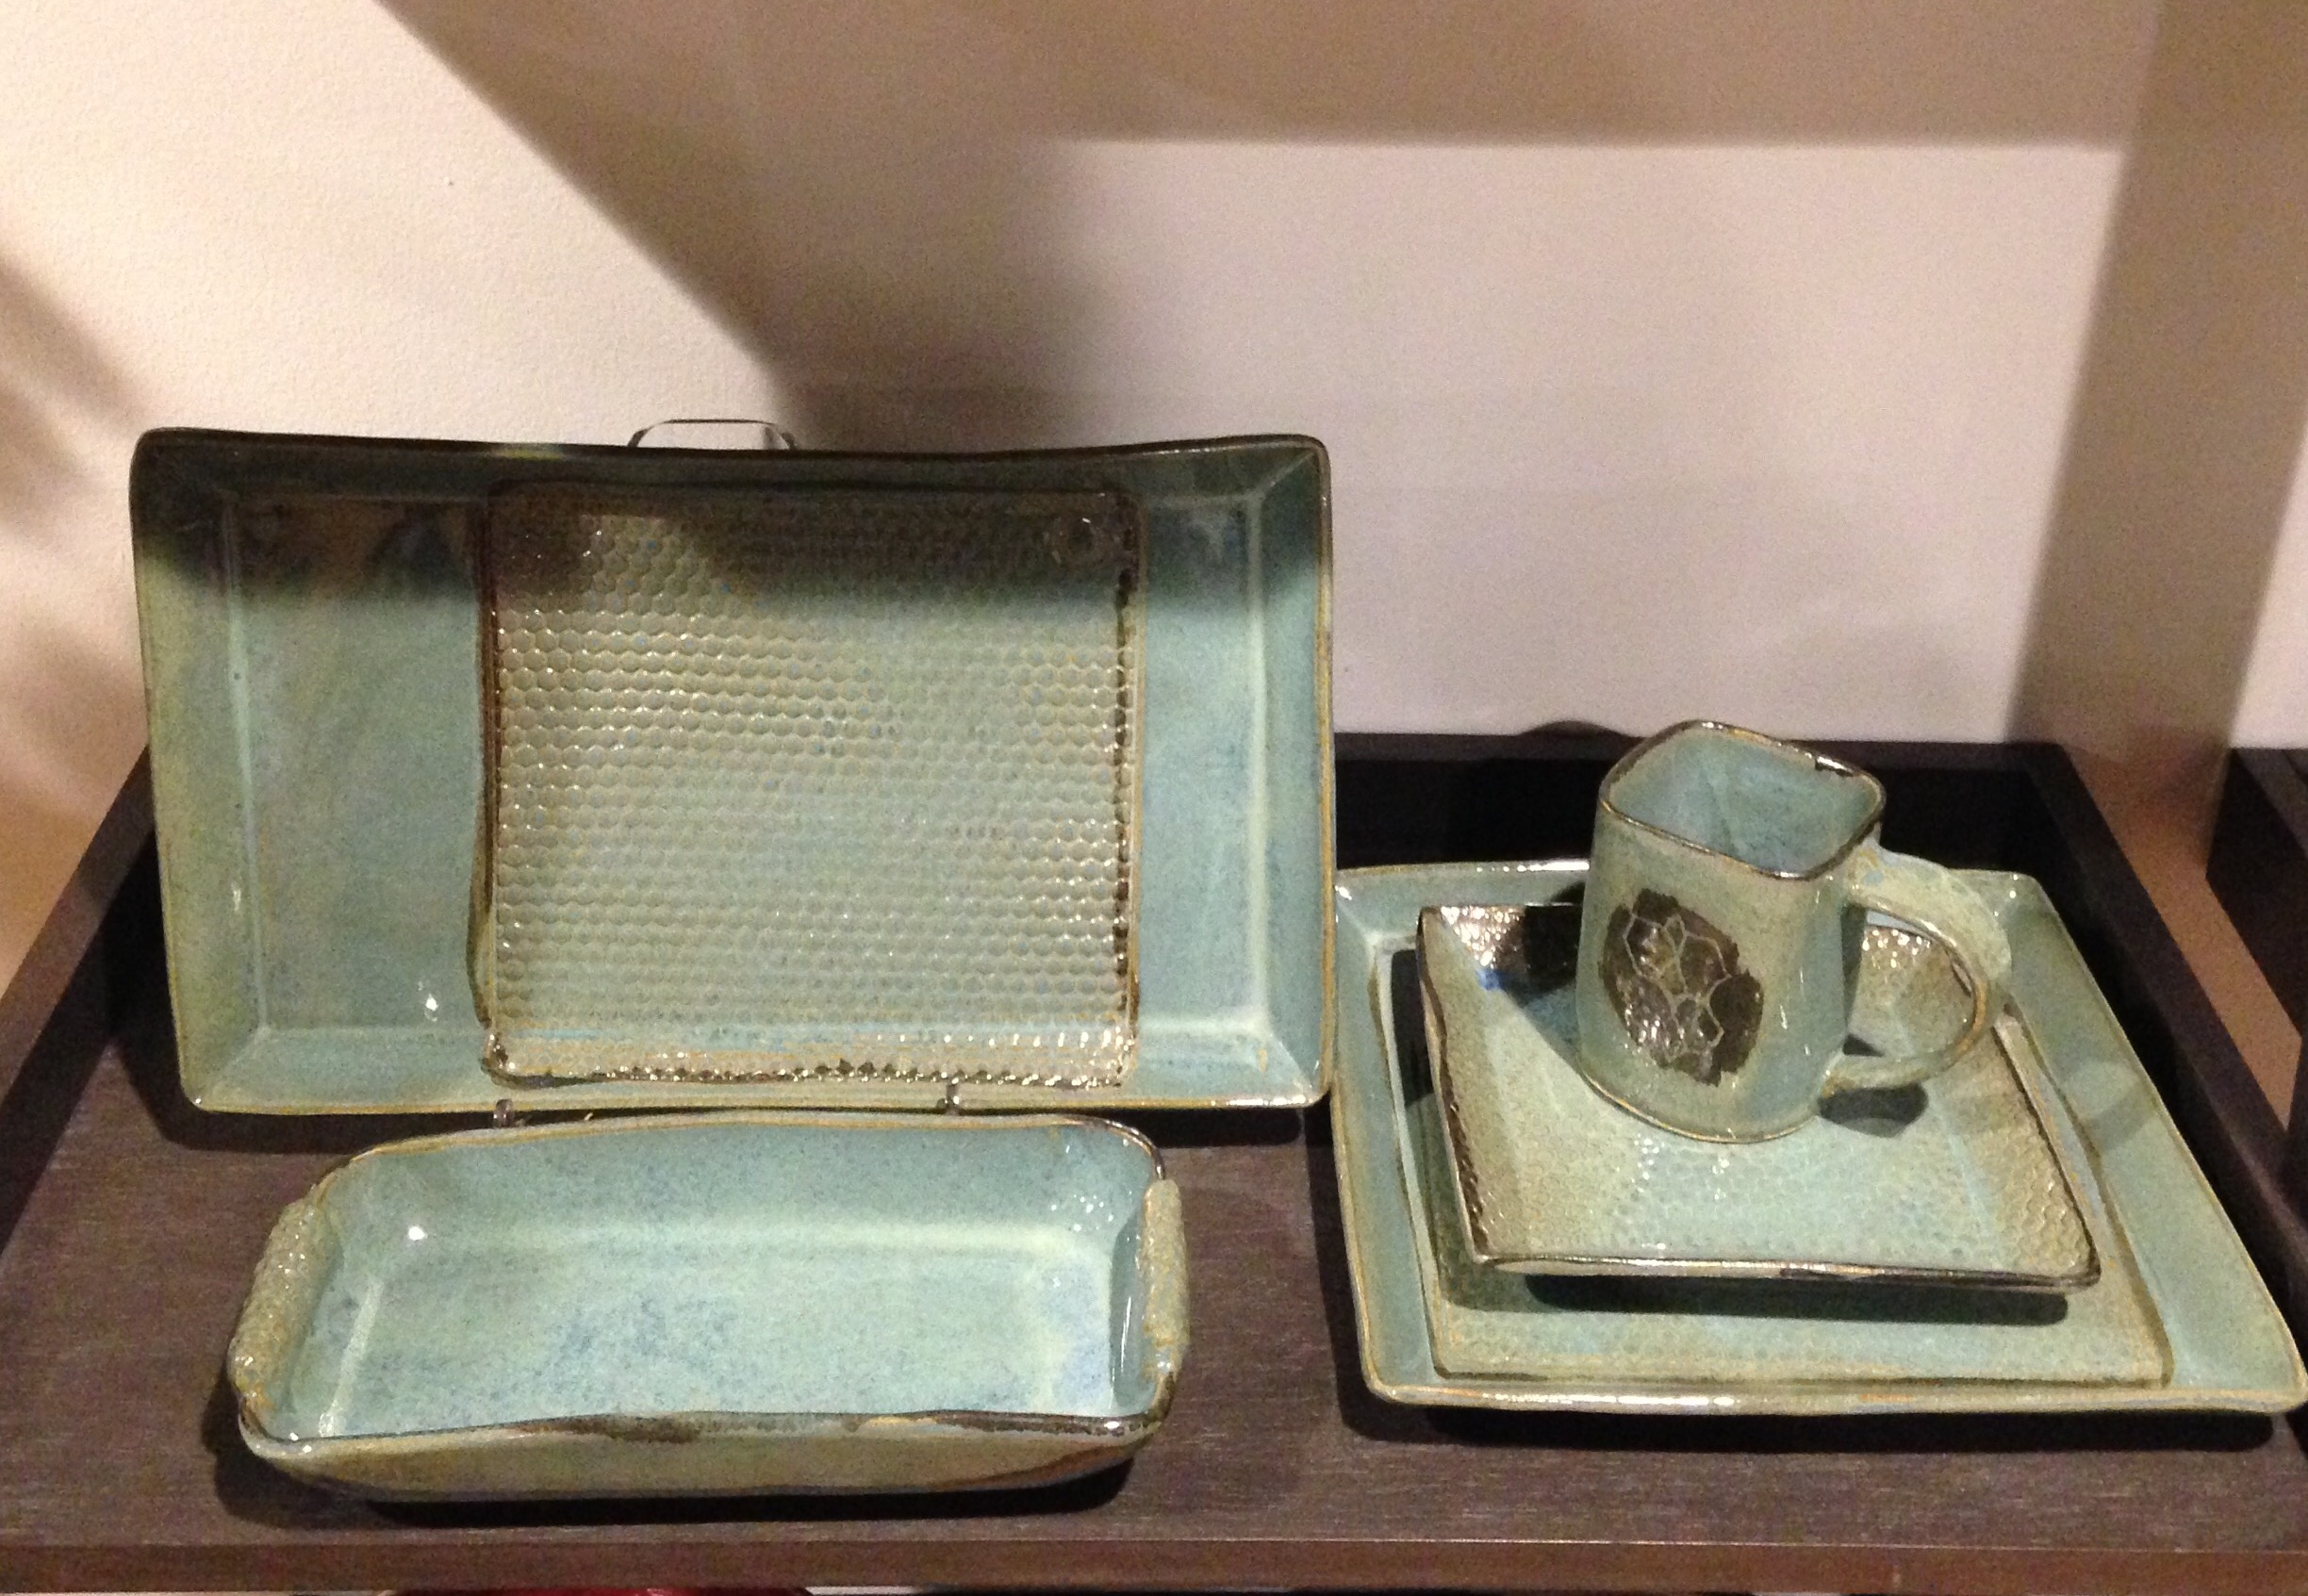
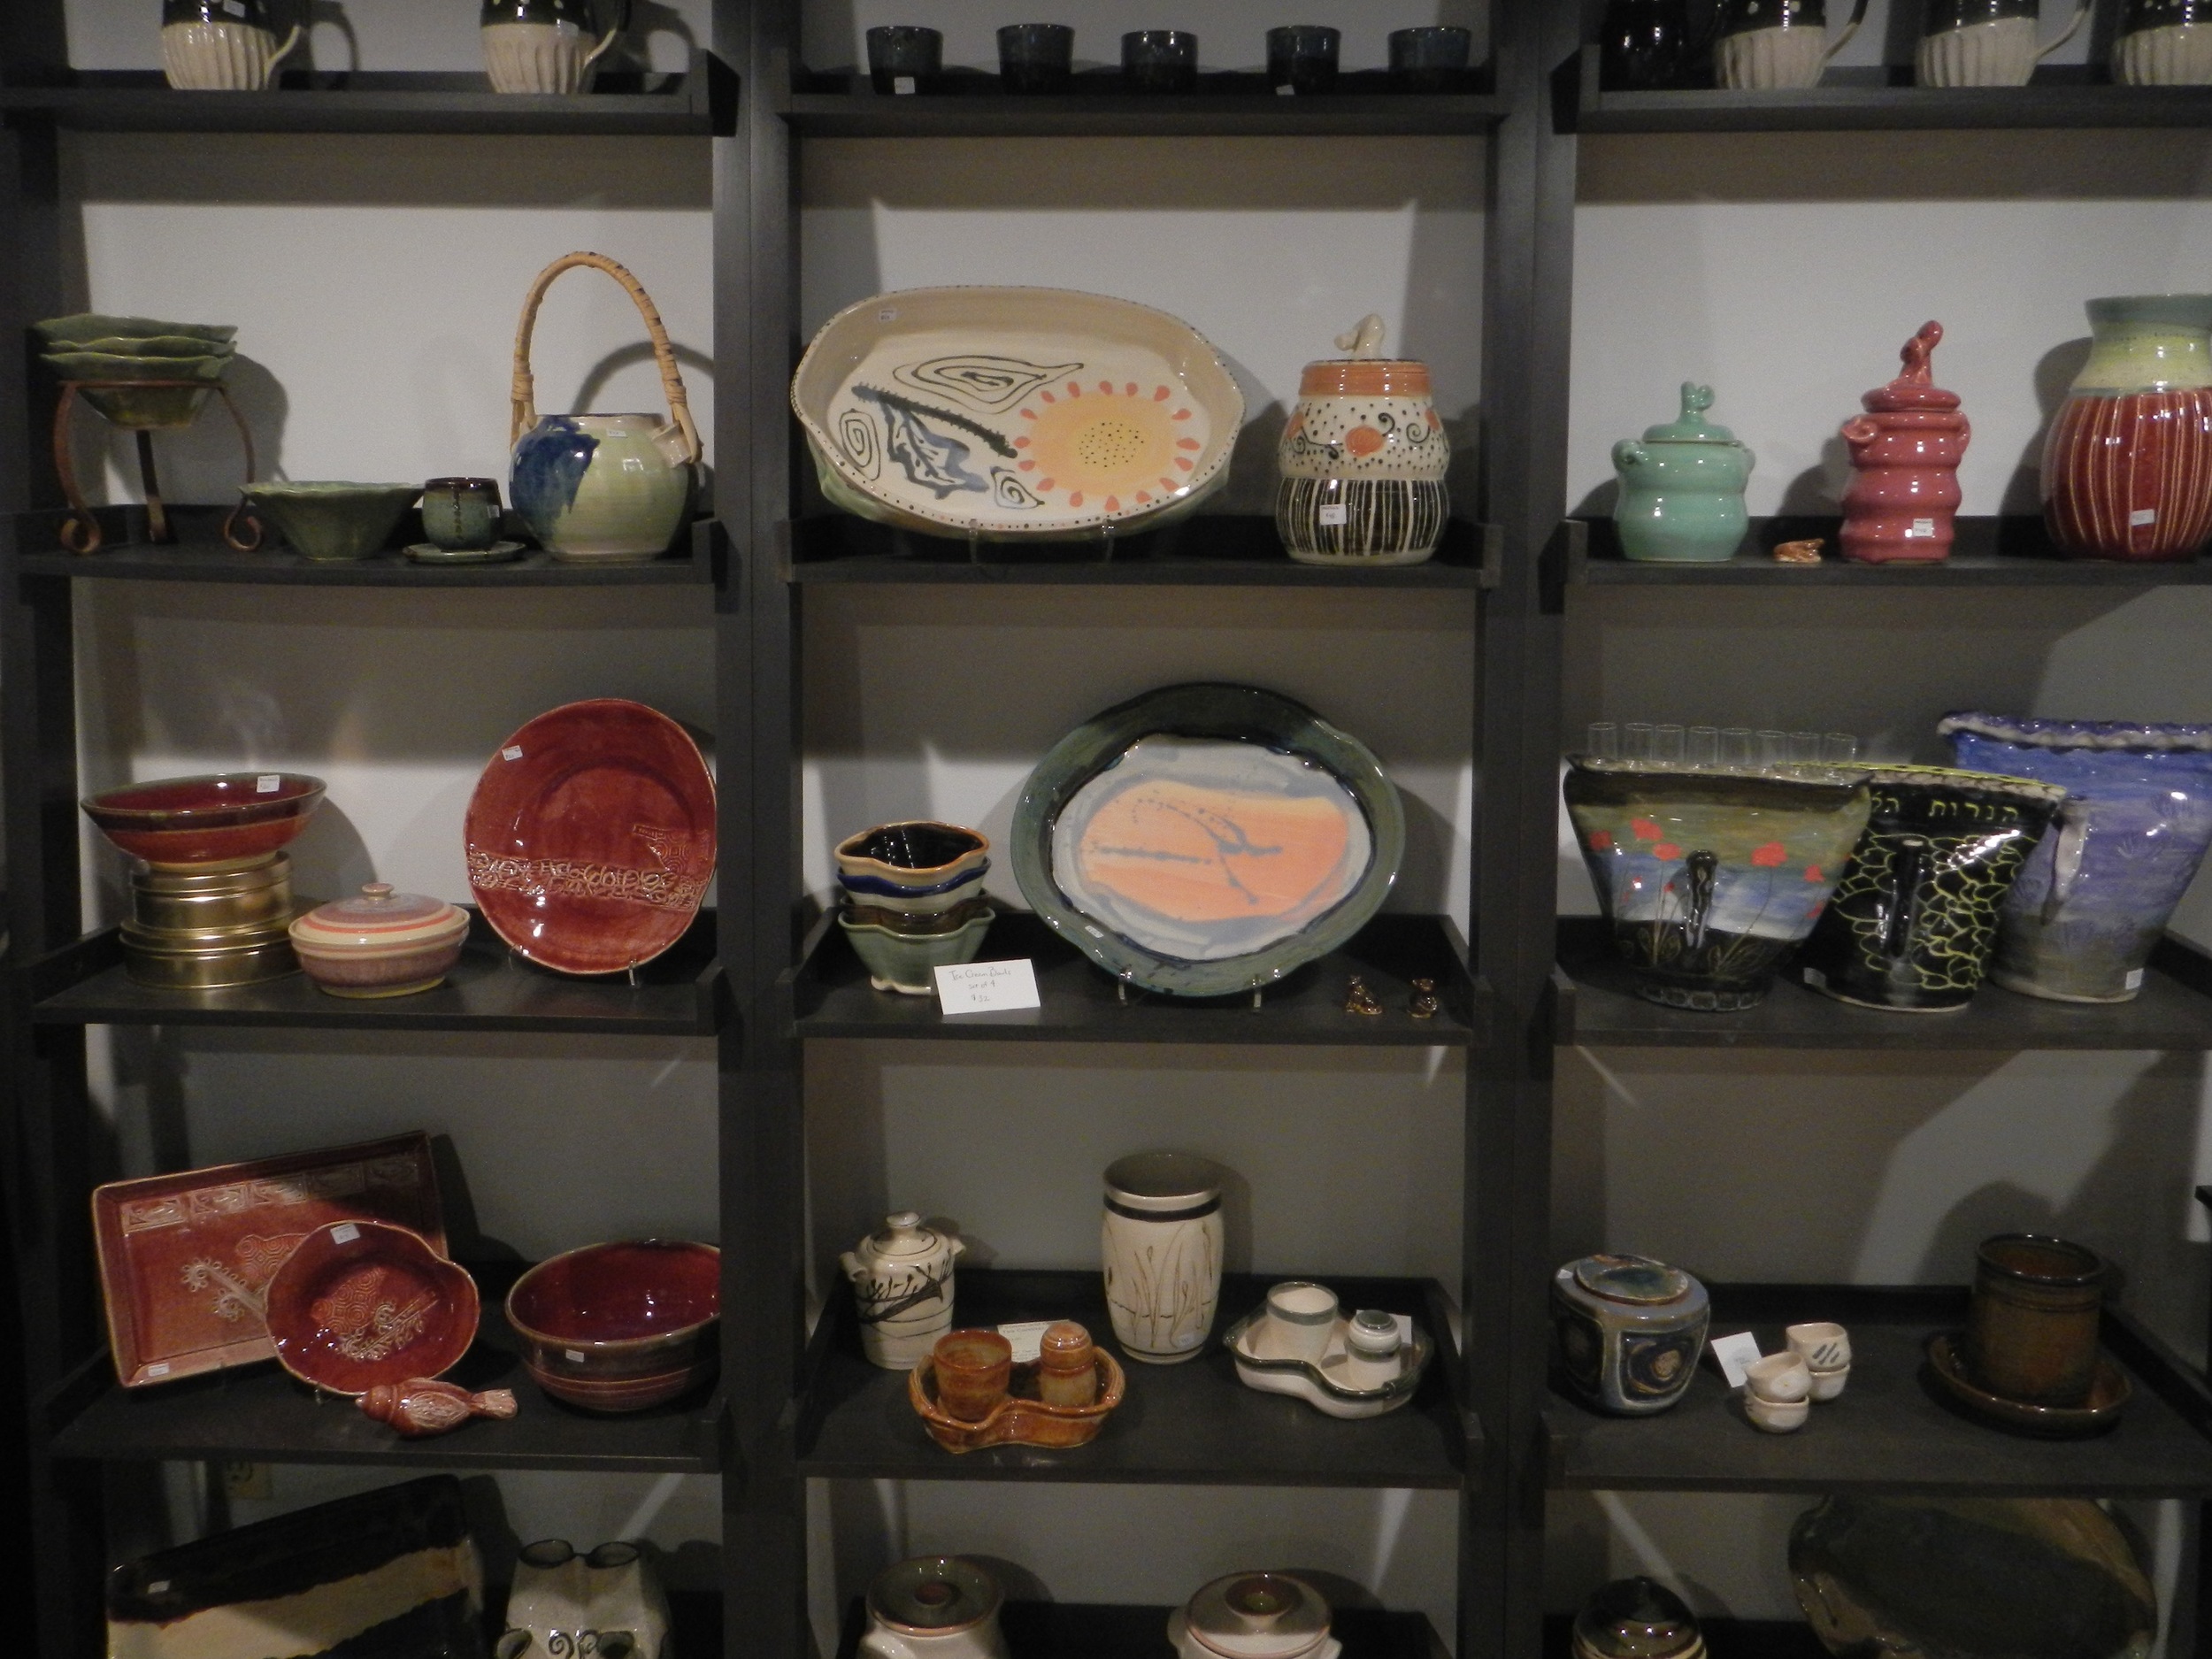
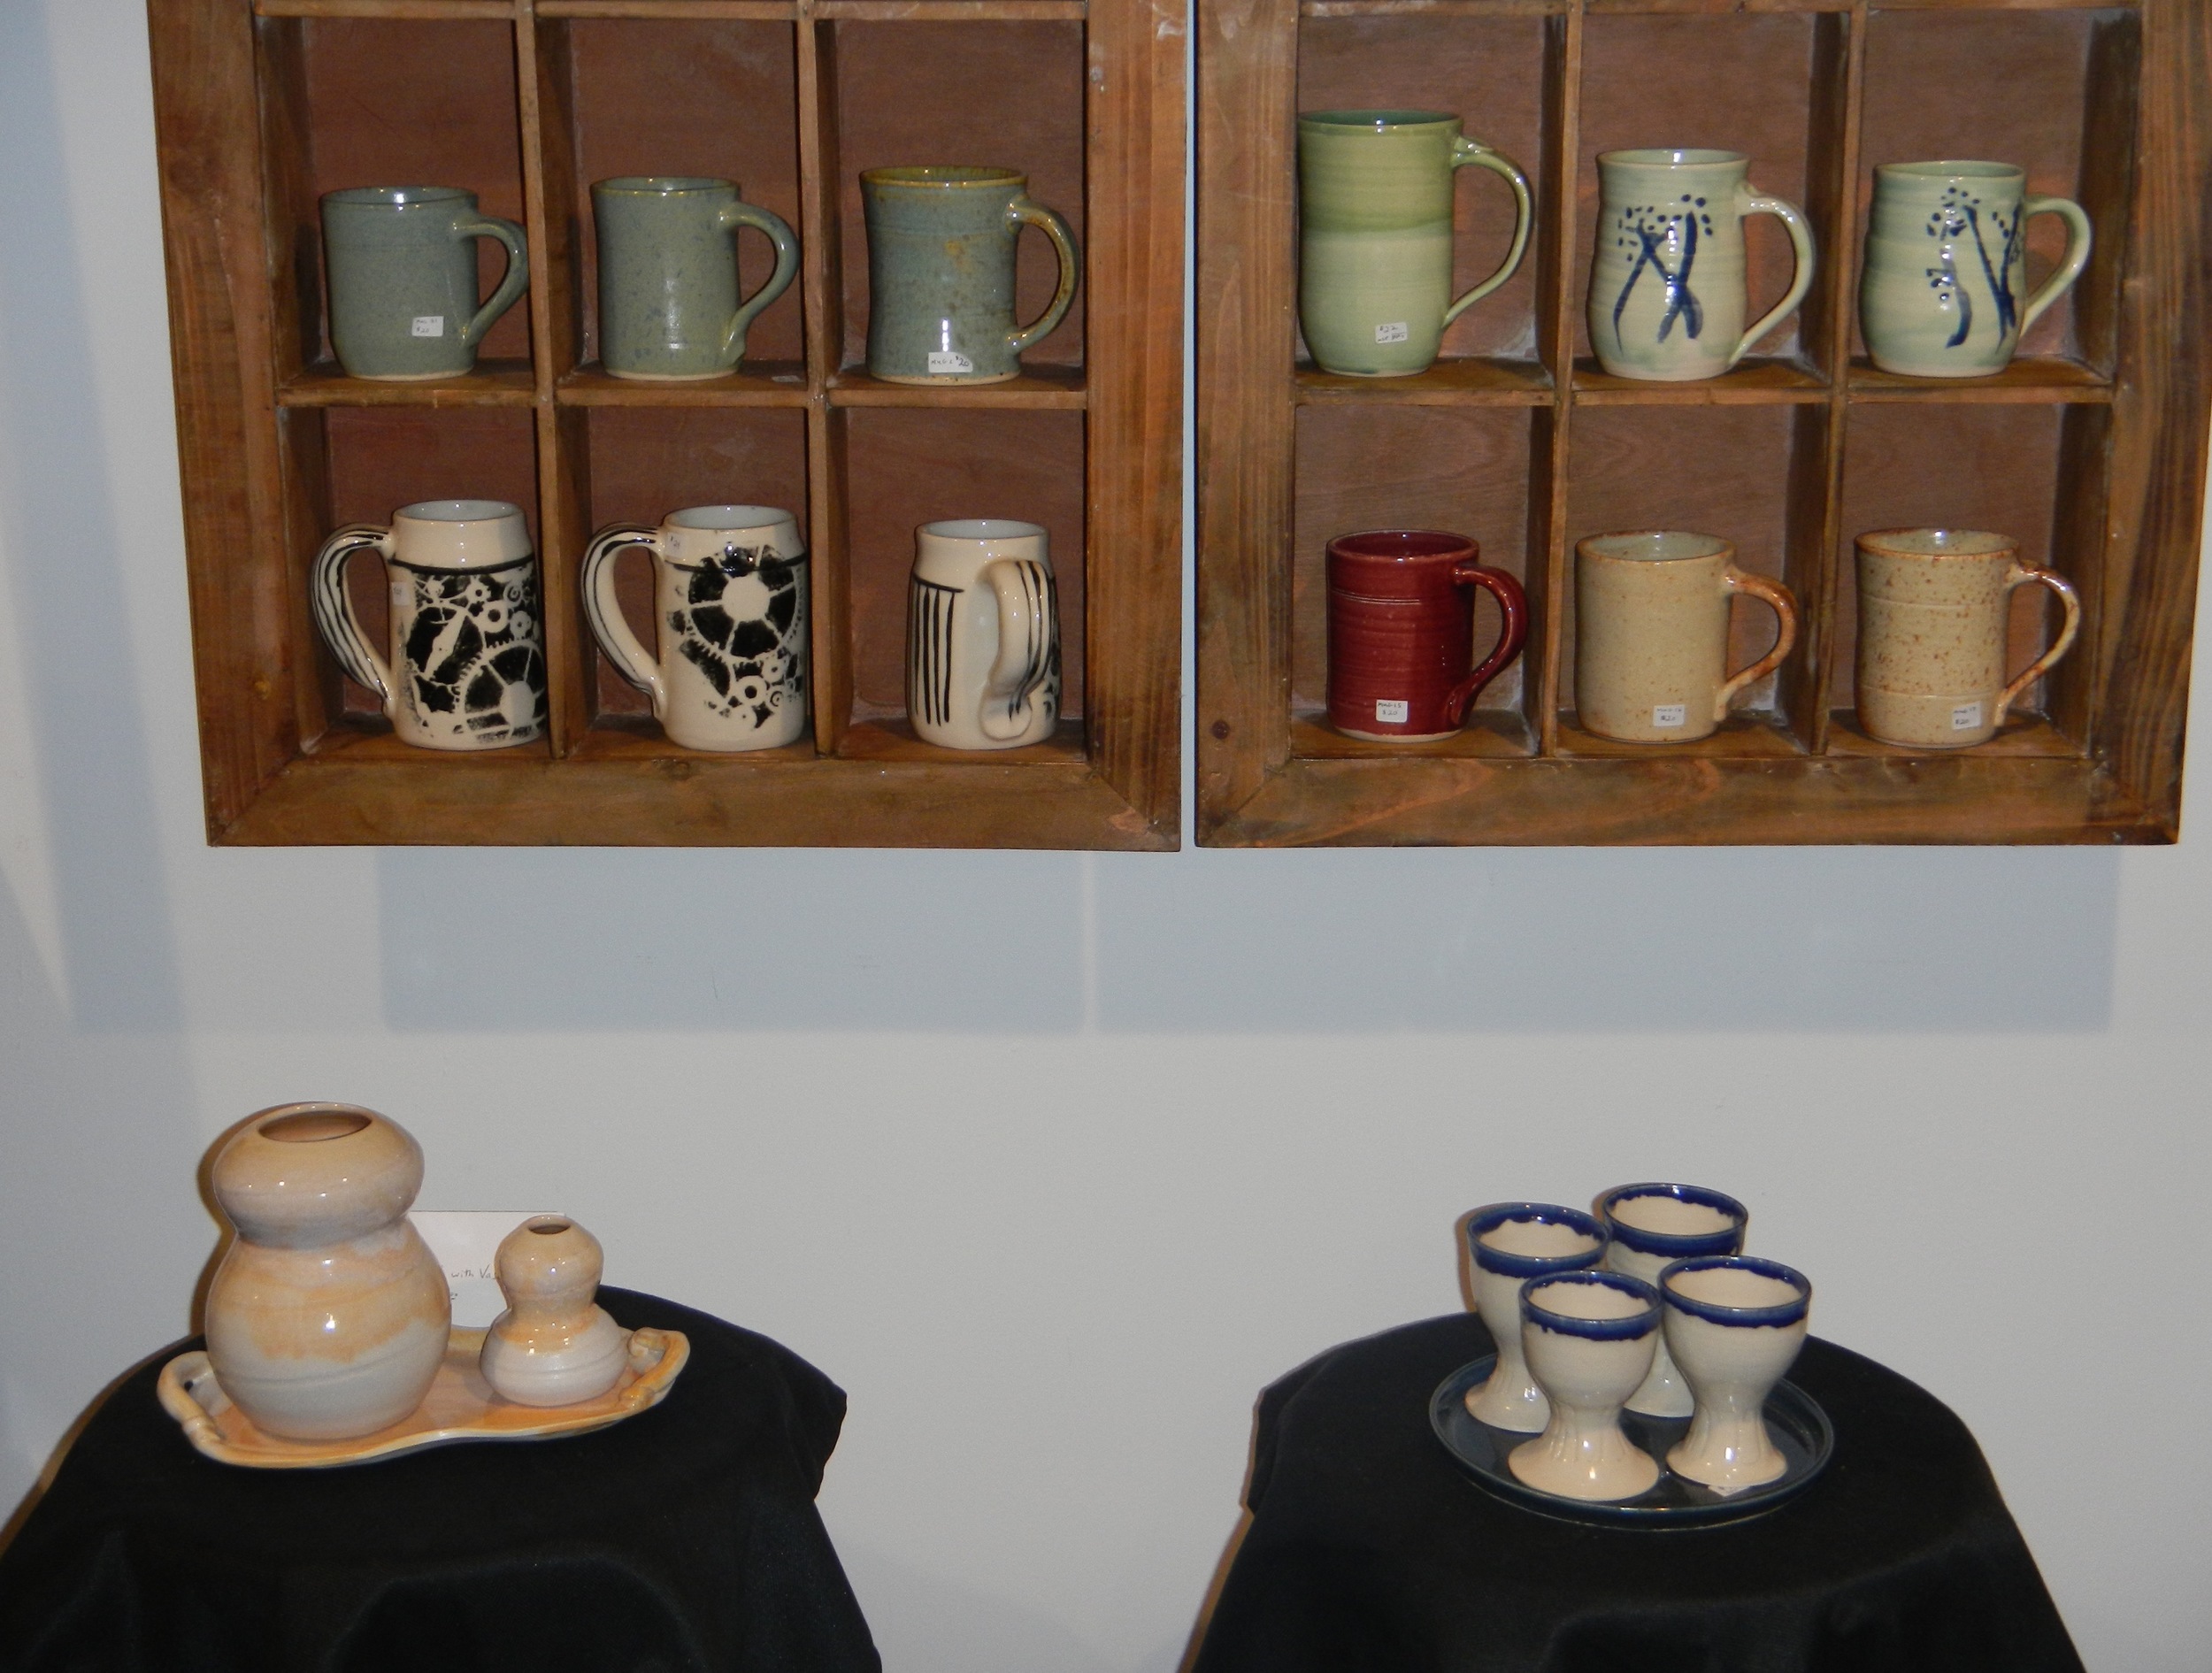
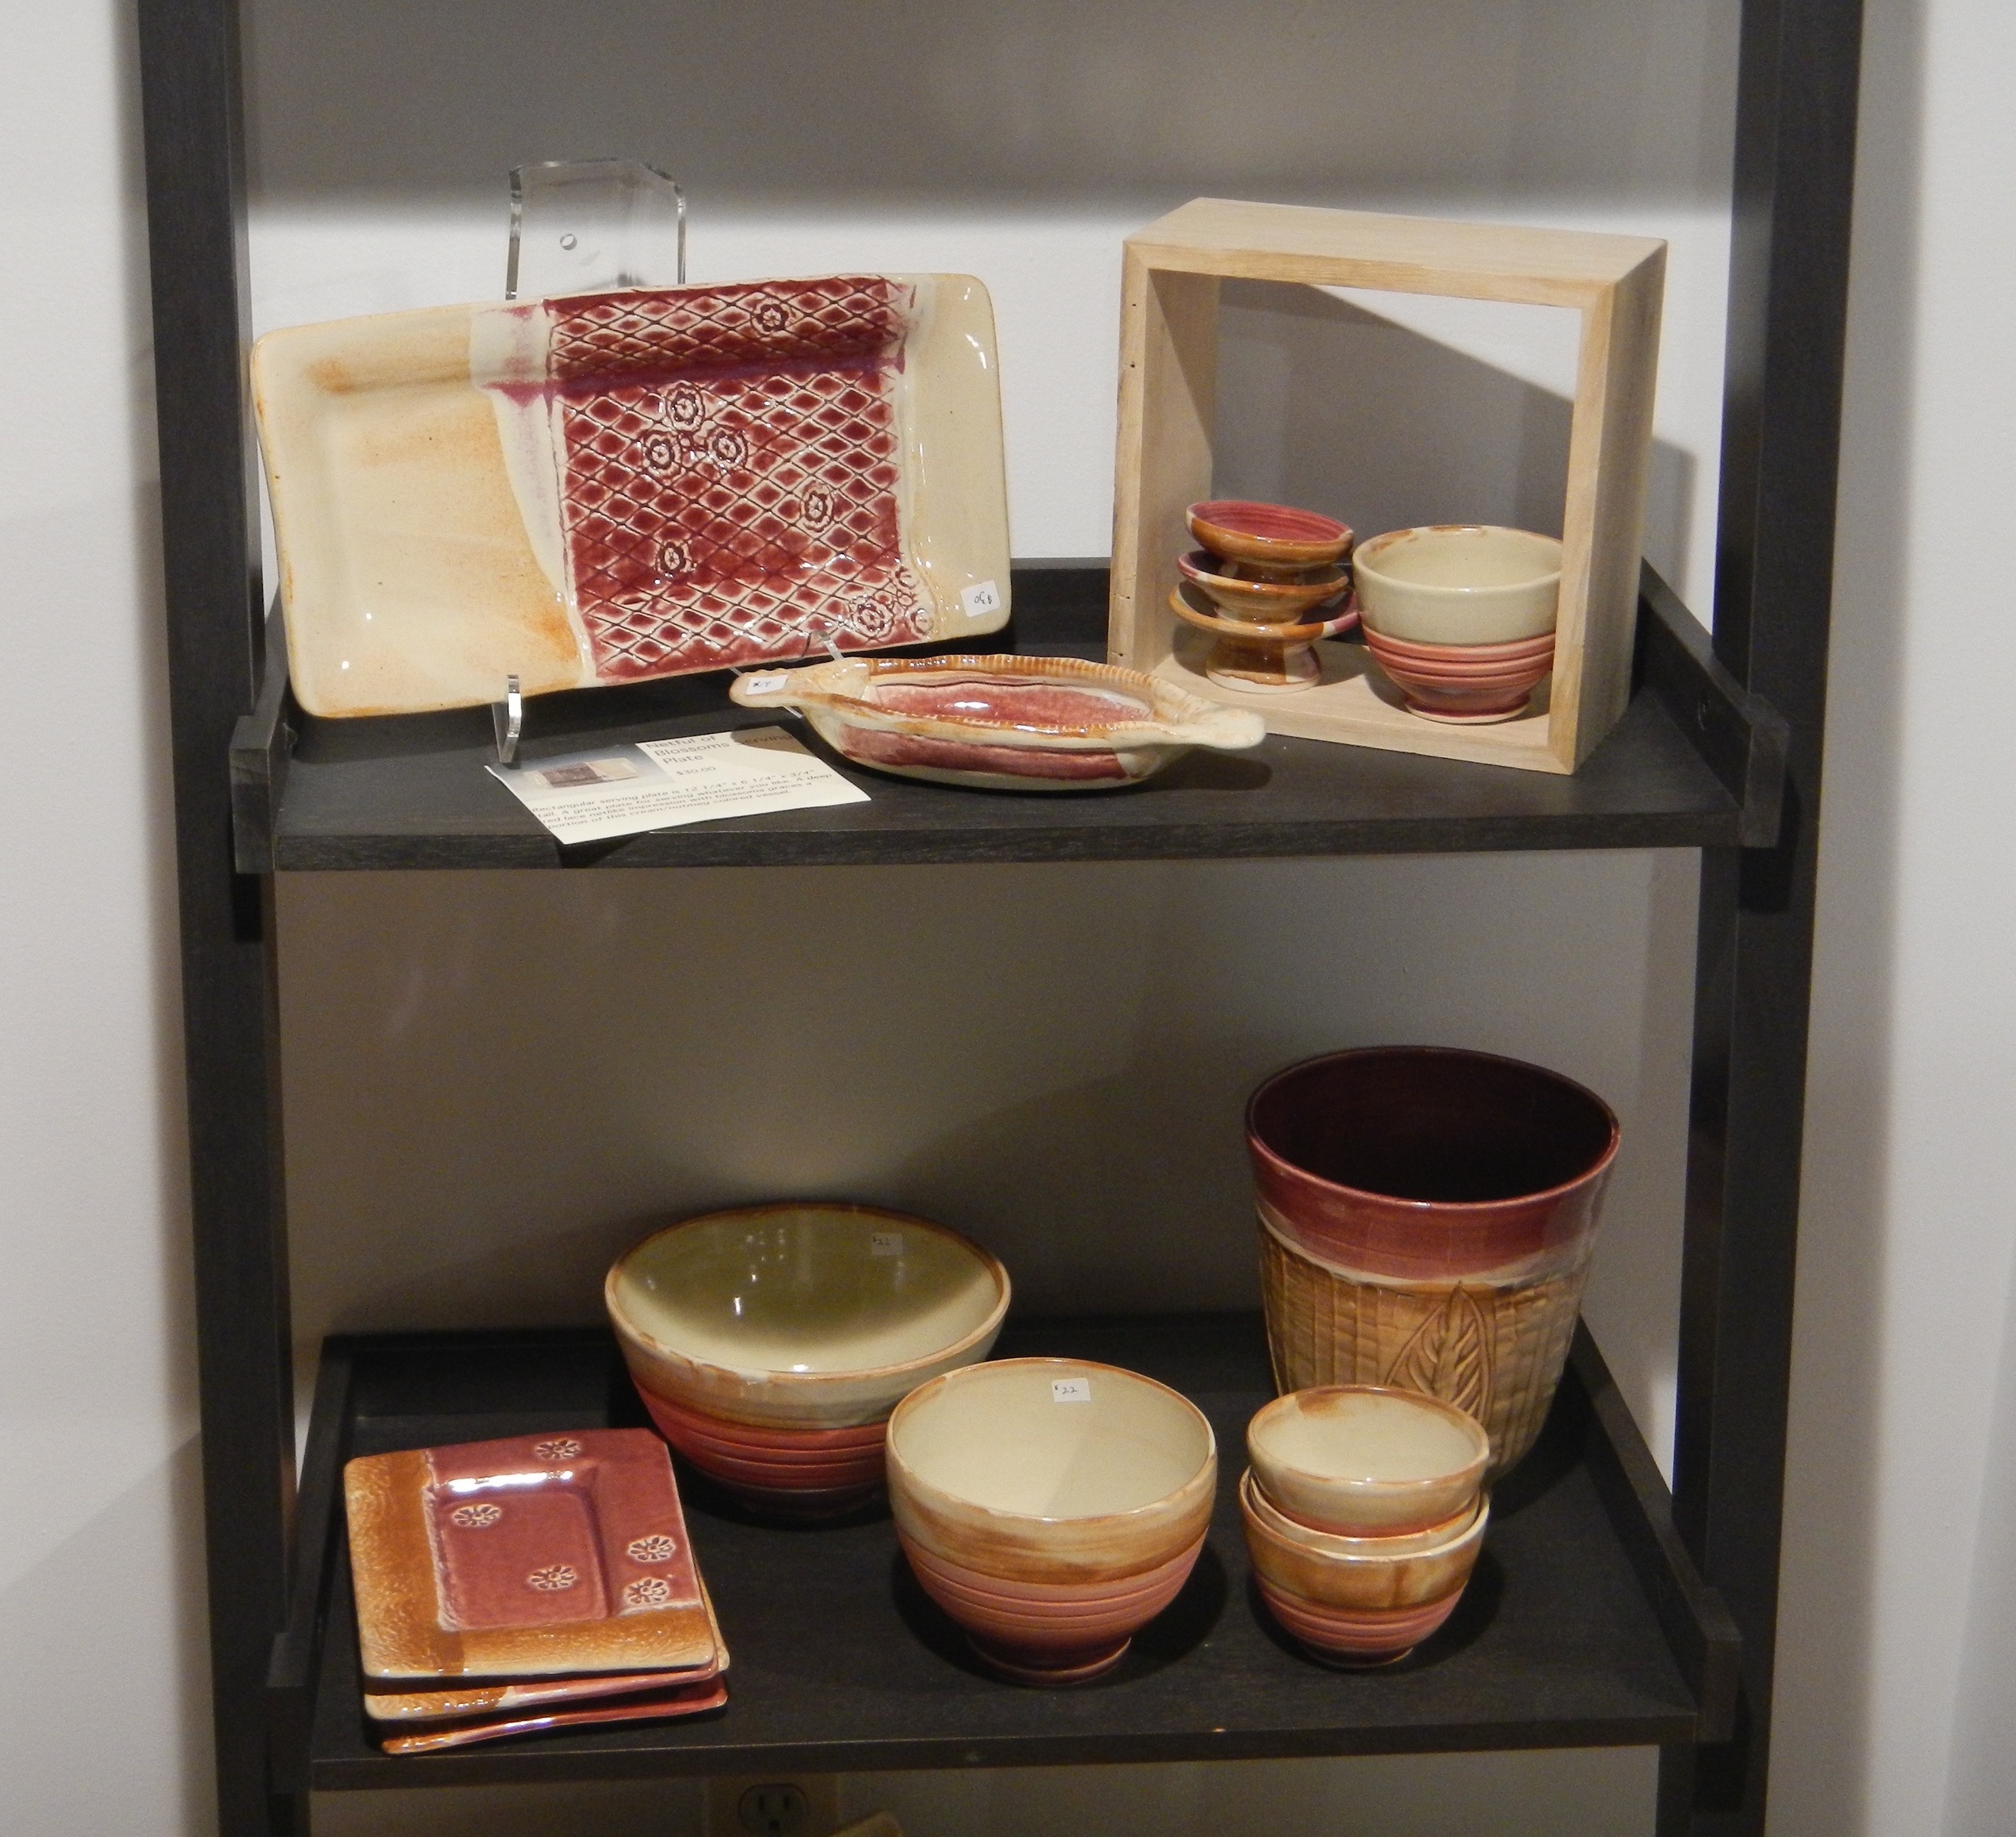
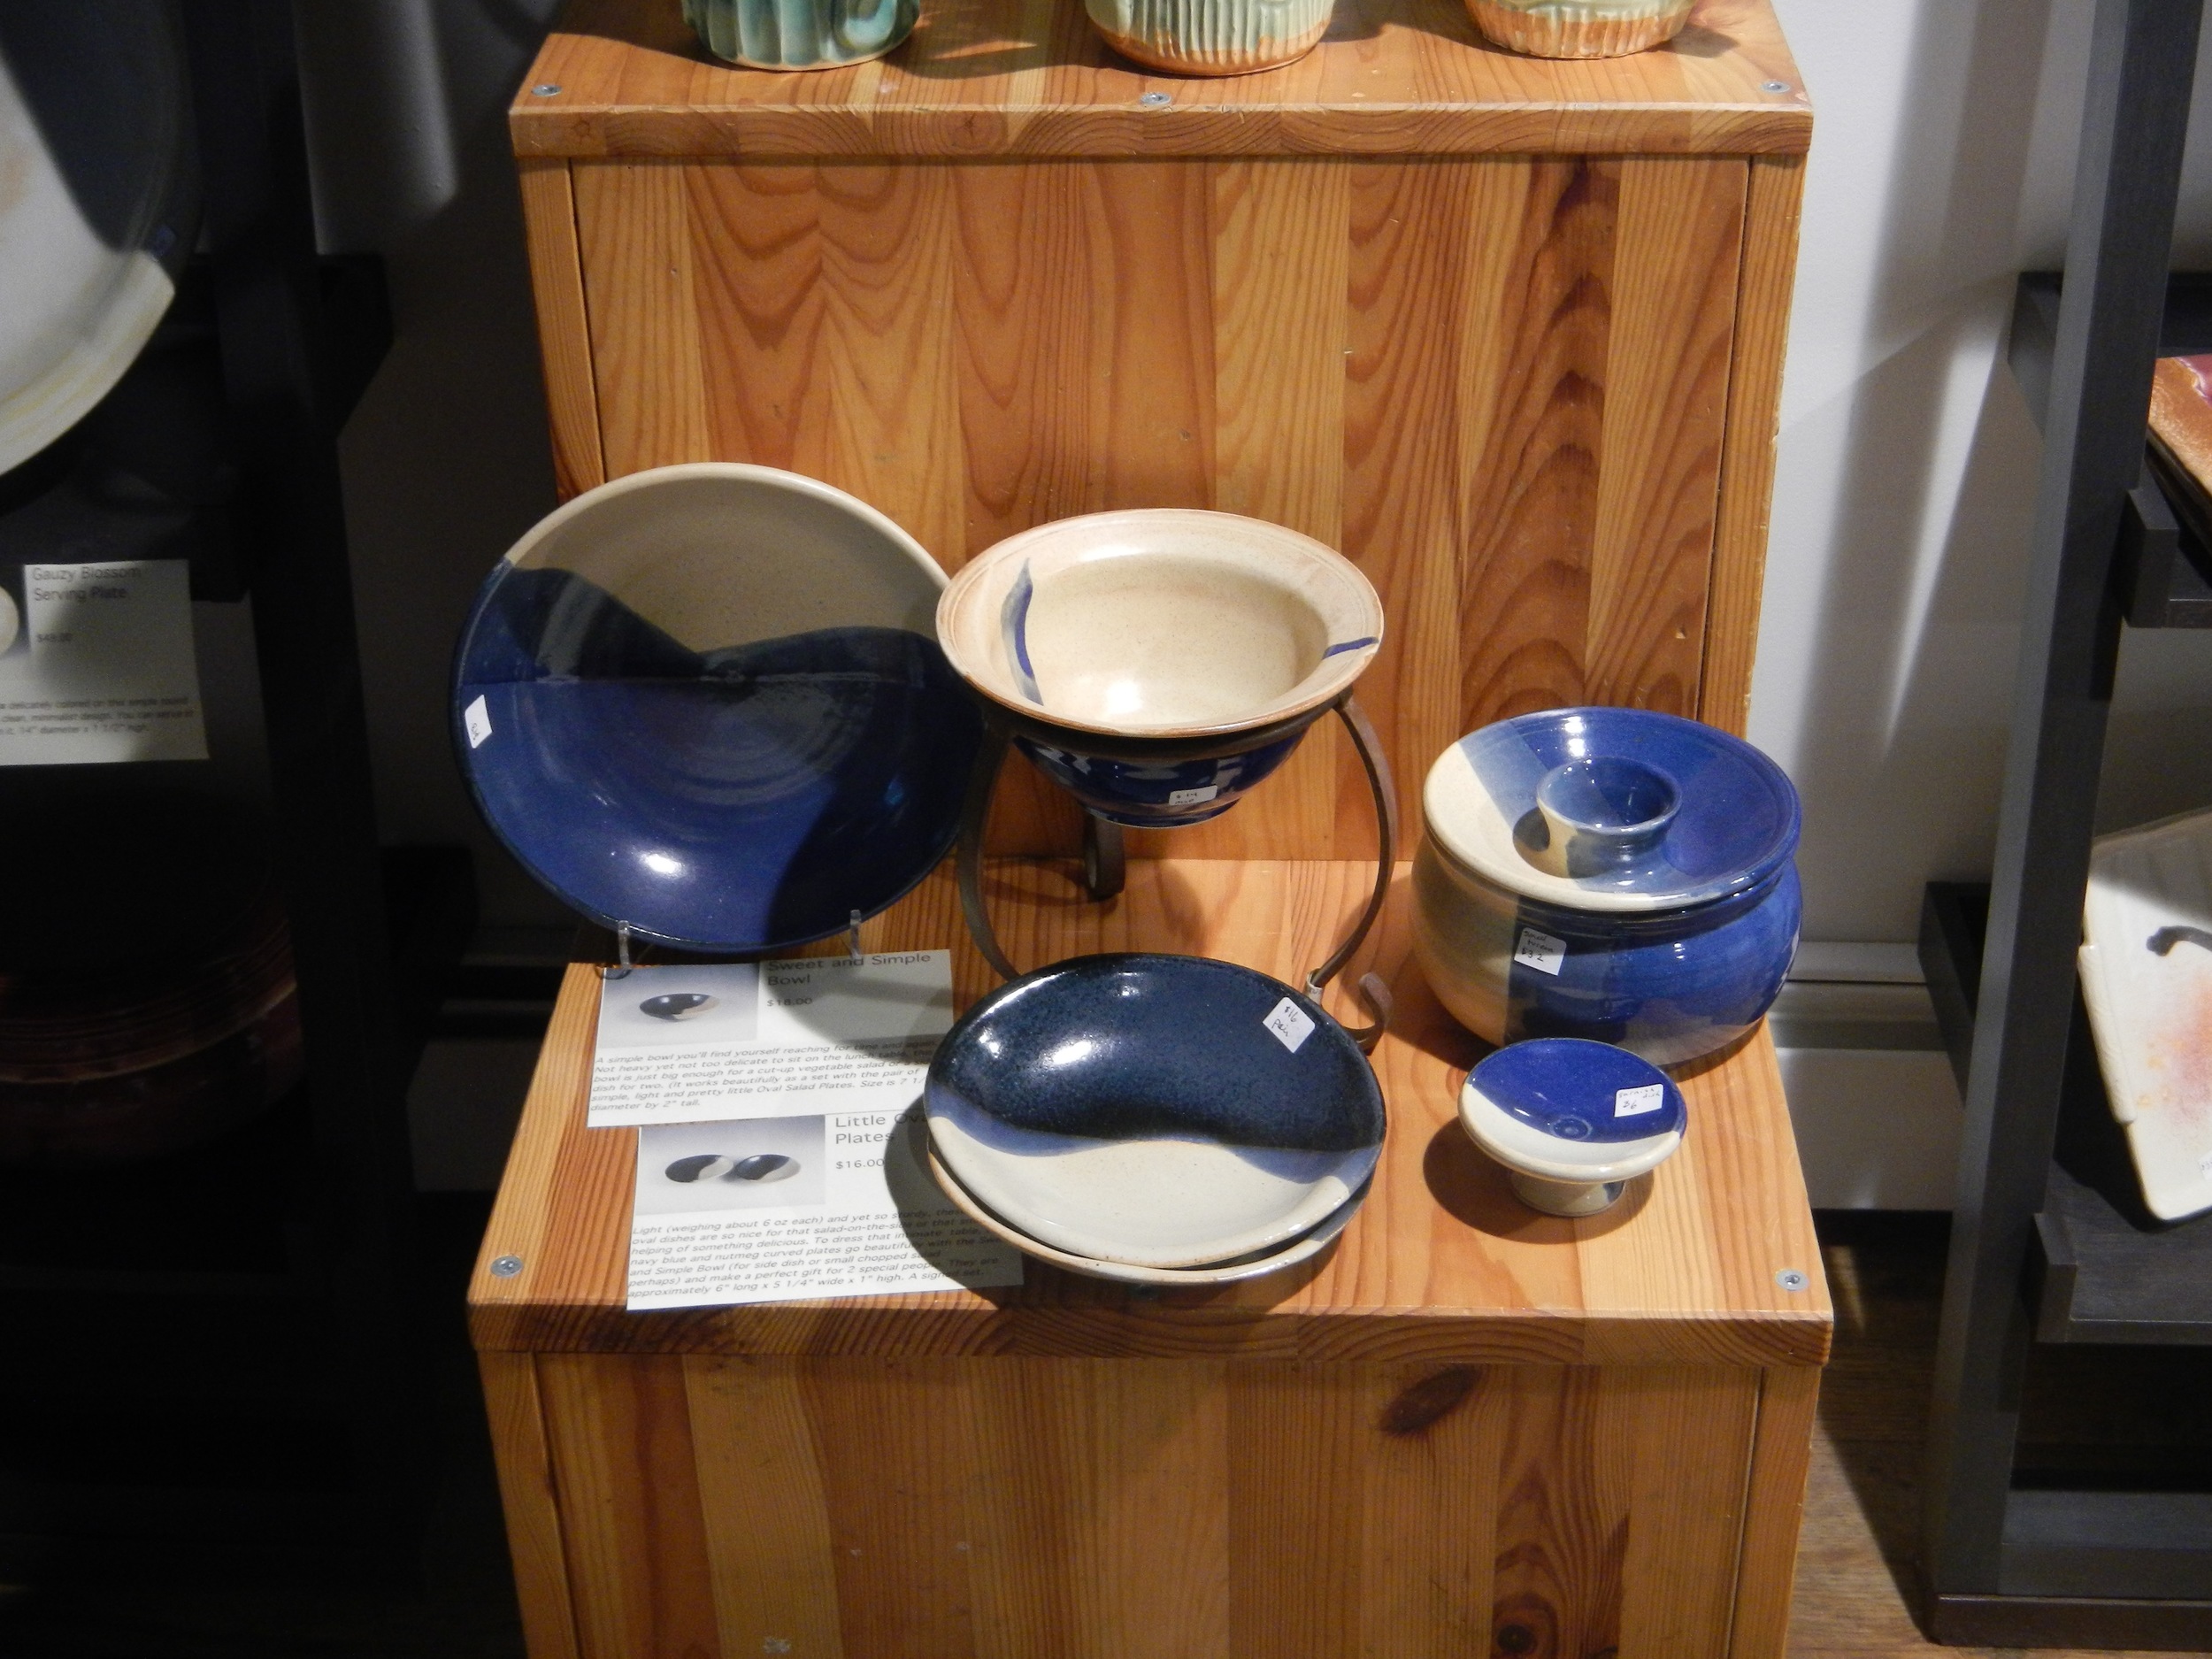
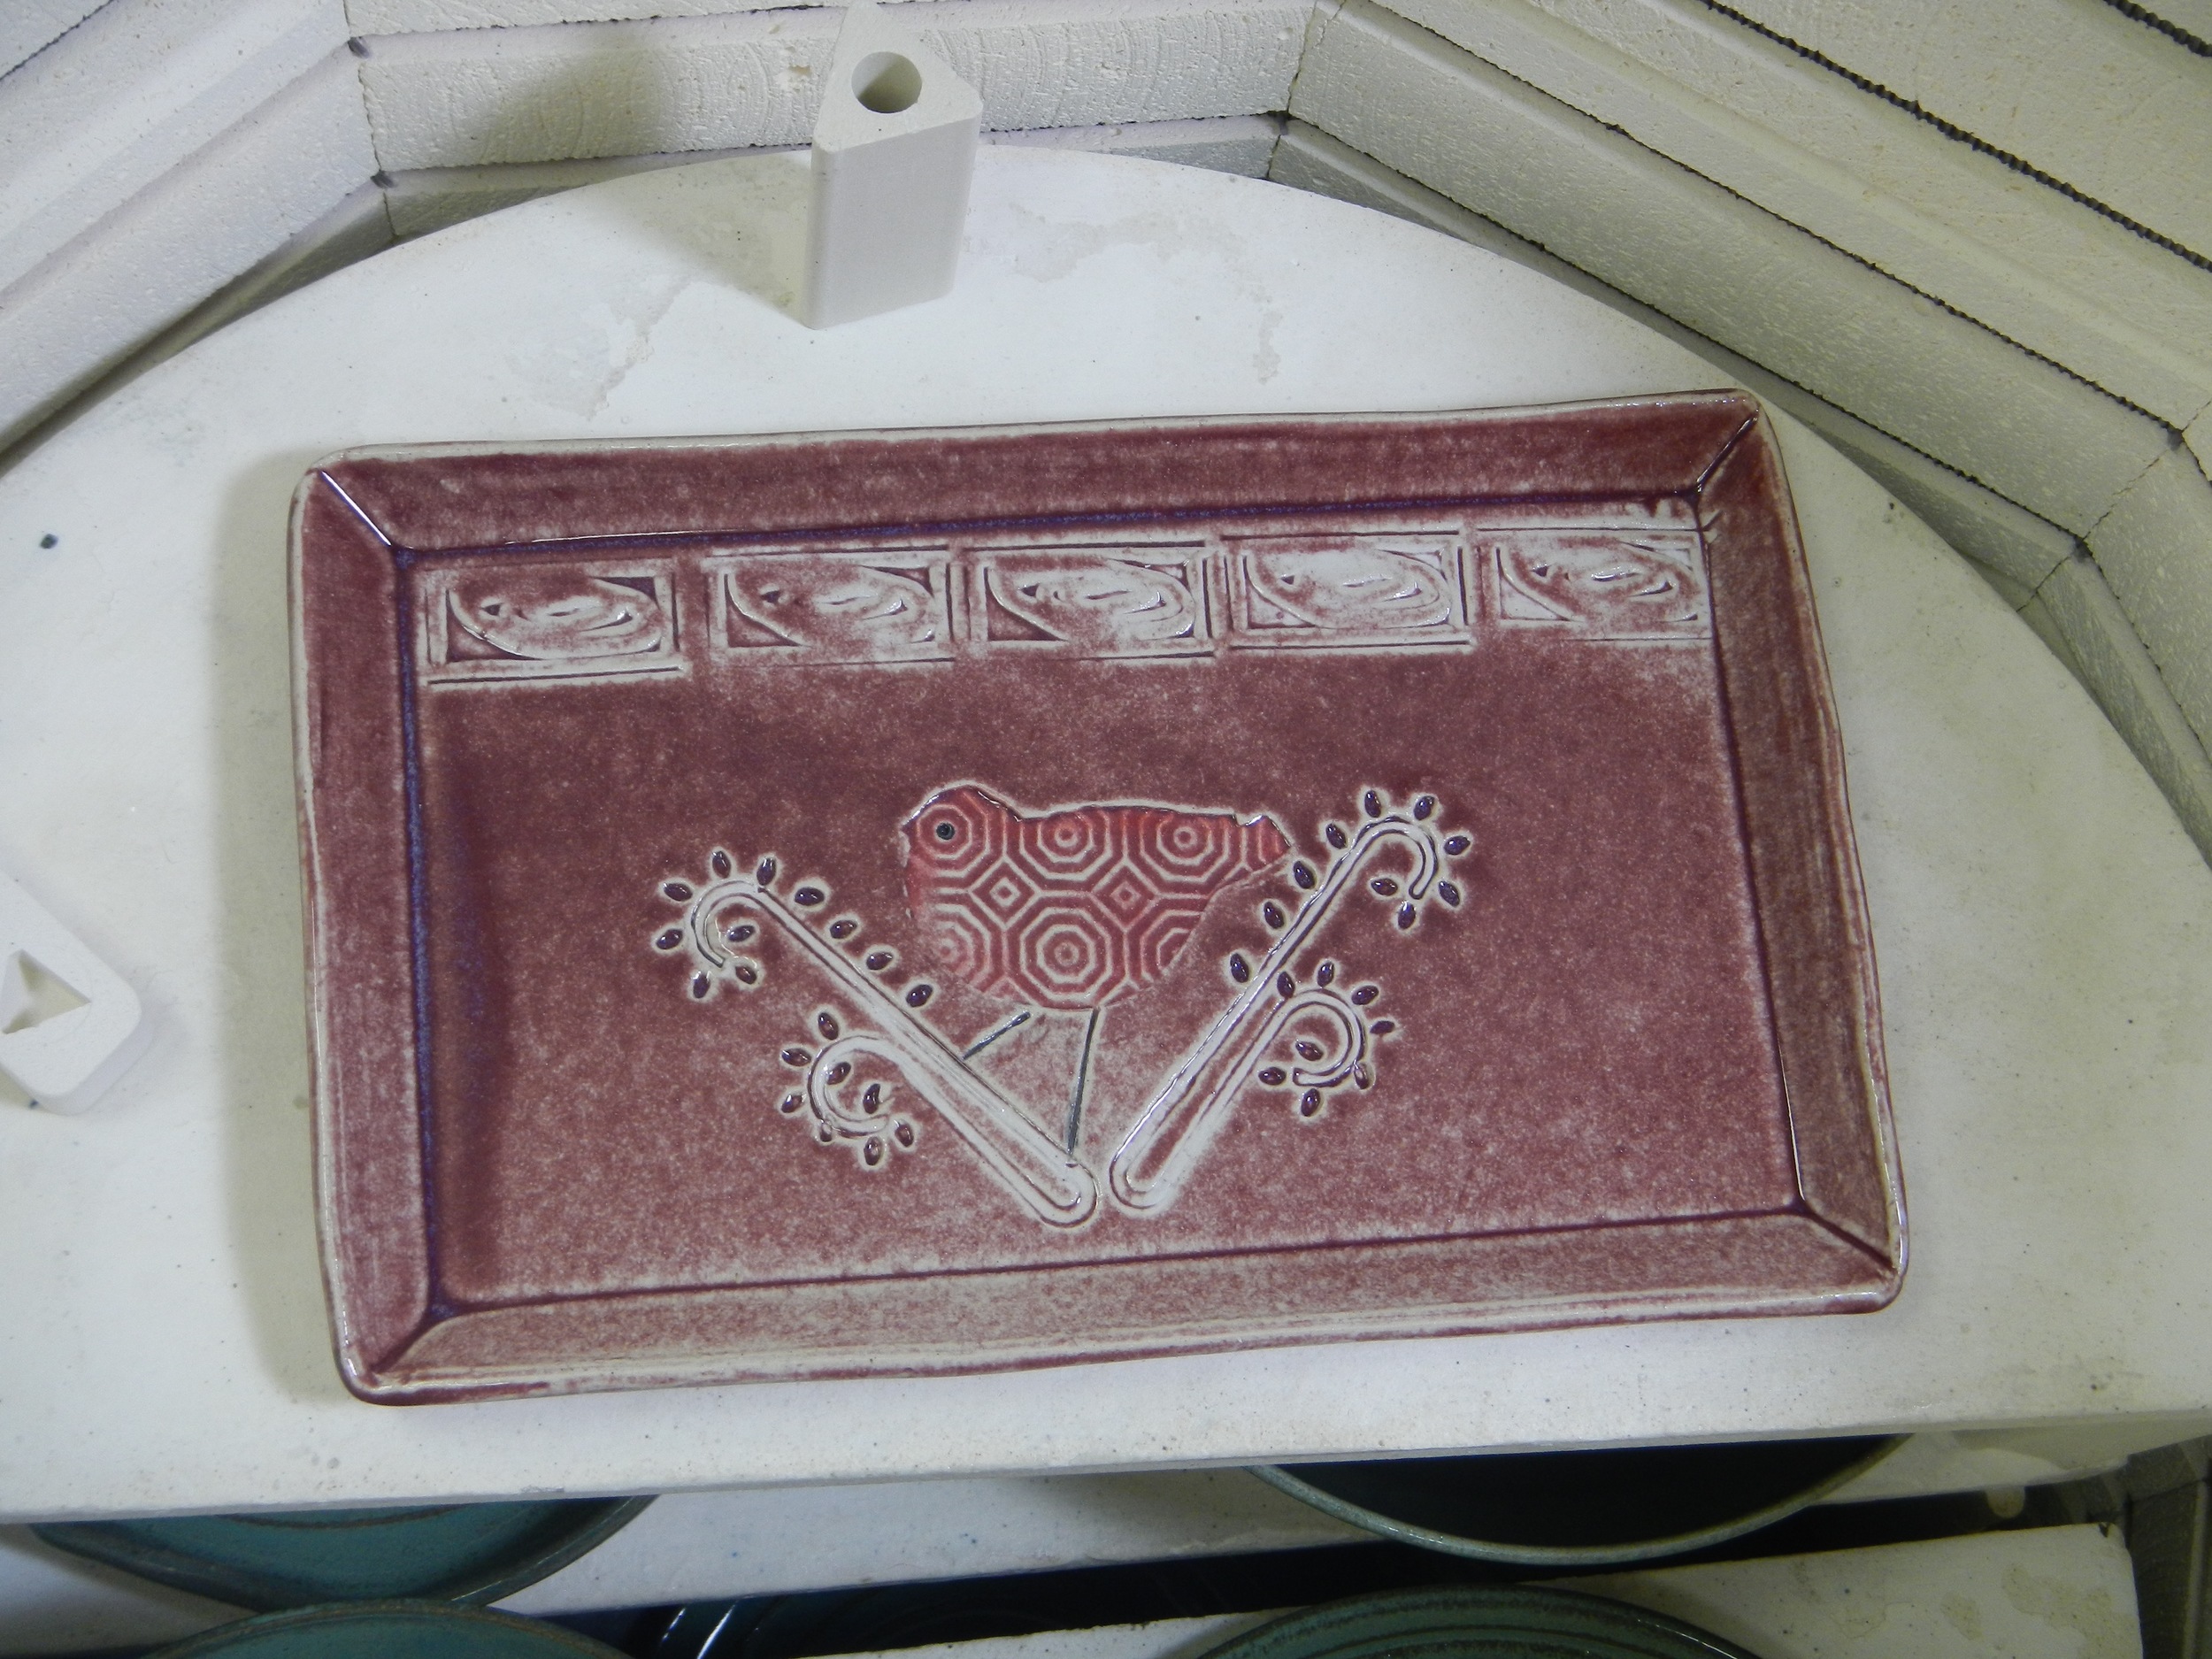
Meanwhile, what "after the holidays" means in this studio is, I'm heading on to the next holidays! I'm thinking Passover now. And there are always Sabbath items- that comes every week and these things make great gifts. And in between matzah and Seder plates for Passover, and challah/bread baskets for Sabbath, and because many of my customers are not Jewish and don't need those things, I'll make the bowls and salt & pepper shakers and goblets and serving platters I like to make. Salad bowls are in short supply here after the sales recently, and I really love making those. A customer friend wants a set of dinnerware. In short, I will not be bored, and the website and Gallery Downstairs will be replenished, and happy customers become returning customers and friends.

It was a good pre-holiday sale season for me. I did shows and made sales I wouldn't have if I didn't come up out of the studio and "get out there". I shipped out some things via website sales, too, more than I expected. Some more went out of The Gallery Downstairs with in-person visitors. I kept track - that's new for me- of hours and what I worked on, so I can do a productivity study after 6 months and again in a year. In general, I'm pretty happy with the work I make lately, and enough other people seem to be, too. I guess I'm sort of an overnight success after 30 years.  As long as I can do this work, and teach a little, and have friends and family to care about, "good" is 'not enough said'. Most of all, I have been married to my best friend for a long time now, and he helps dramatically to bring balance in my life, as well as provides health insurance and some essential solvency... Because it would be really hard to go it alone. Potters need friendships, and life balance to all that solo creating, and health insurance is irreplaceable. 

Going forward in January, I plan to add a second electric wheel to the studio, so I can have 2 wheel-students at a time. People learn better if they are with a friend or colleague, I believe. Since I already have my trusty Lockerbie kick wheel, my workhorse for the last nearly-30 years, and Lockerbie makes motors for these at about a third the price of a new electric wheel... I do believe there is a 2nd electric wheel in my very near future, and I now dub it "Trusty Old Model K".

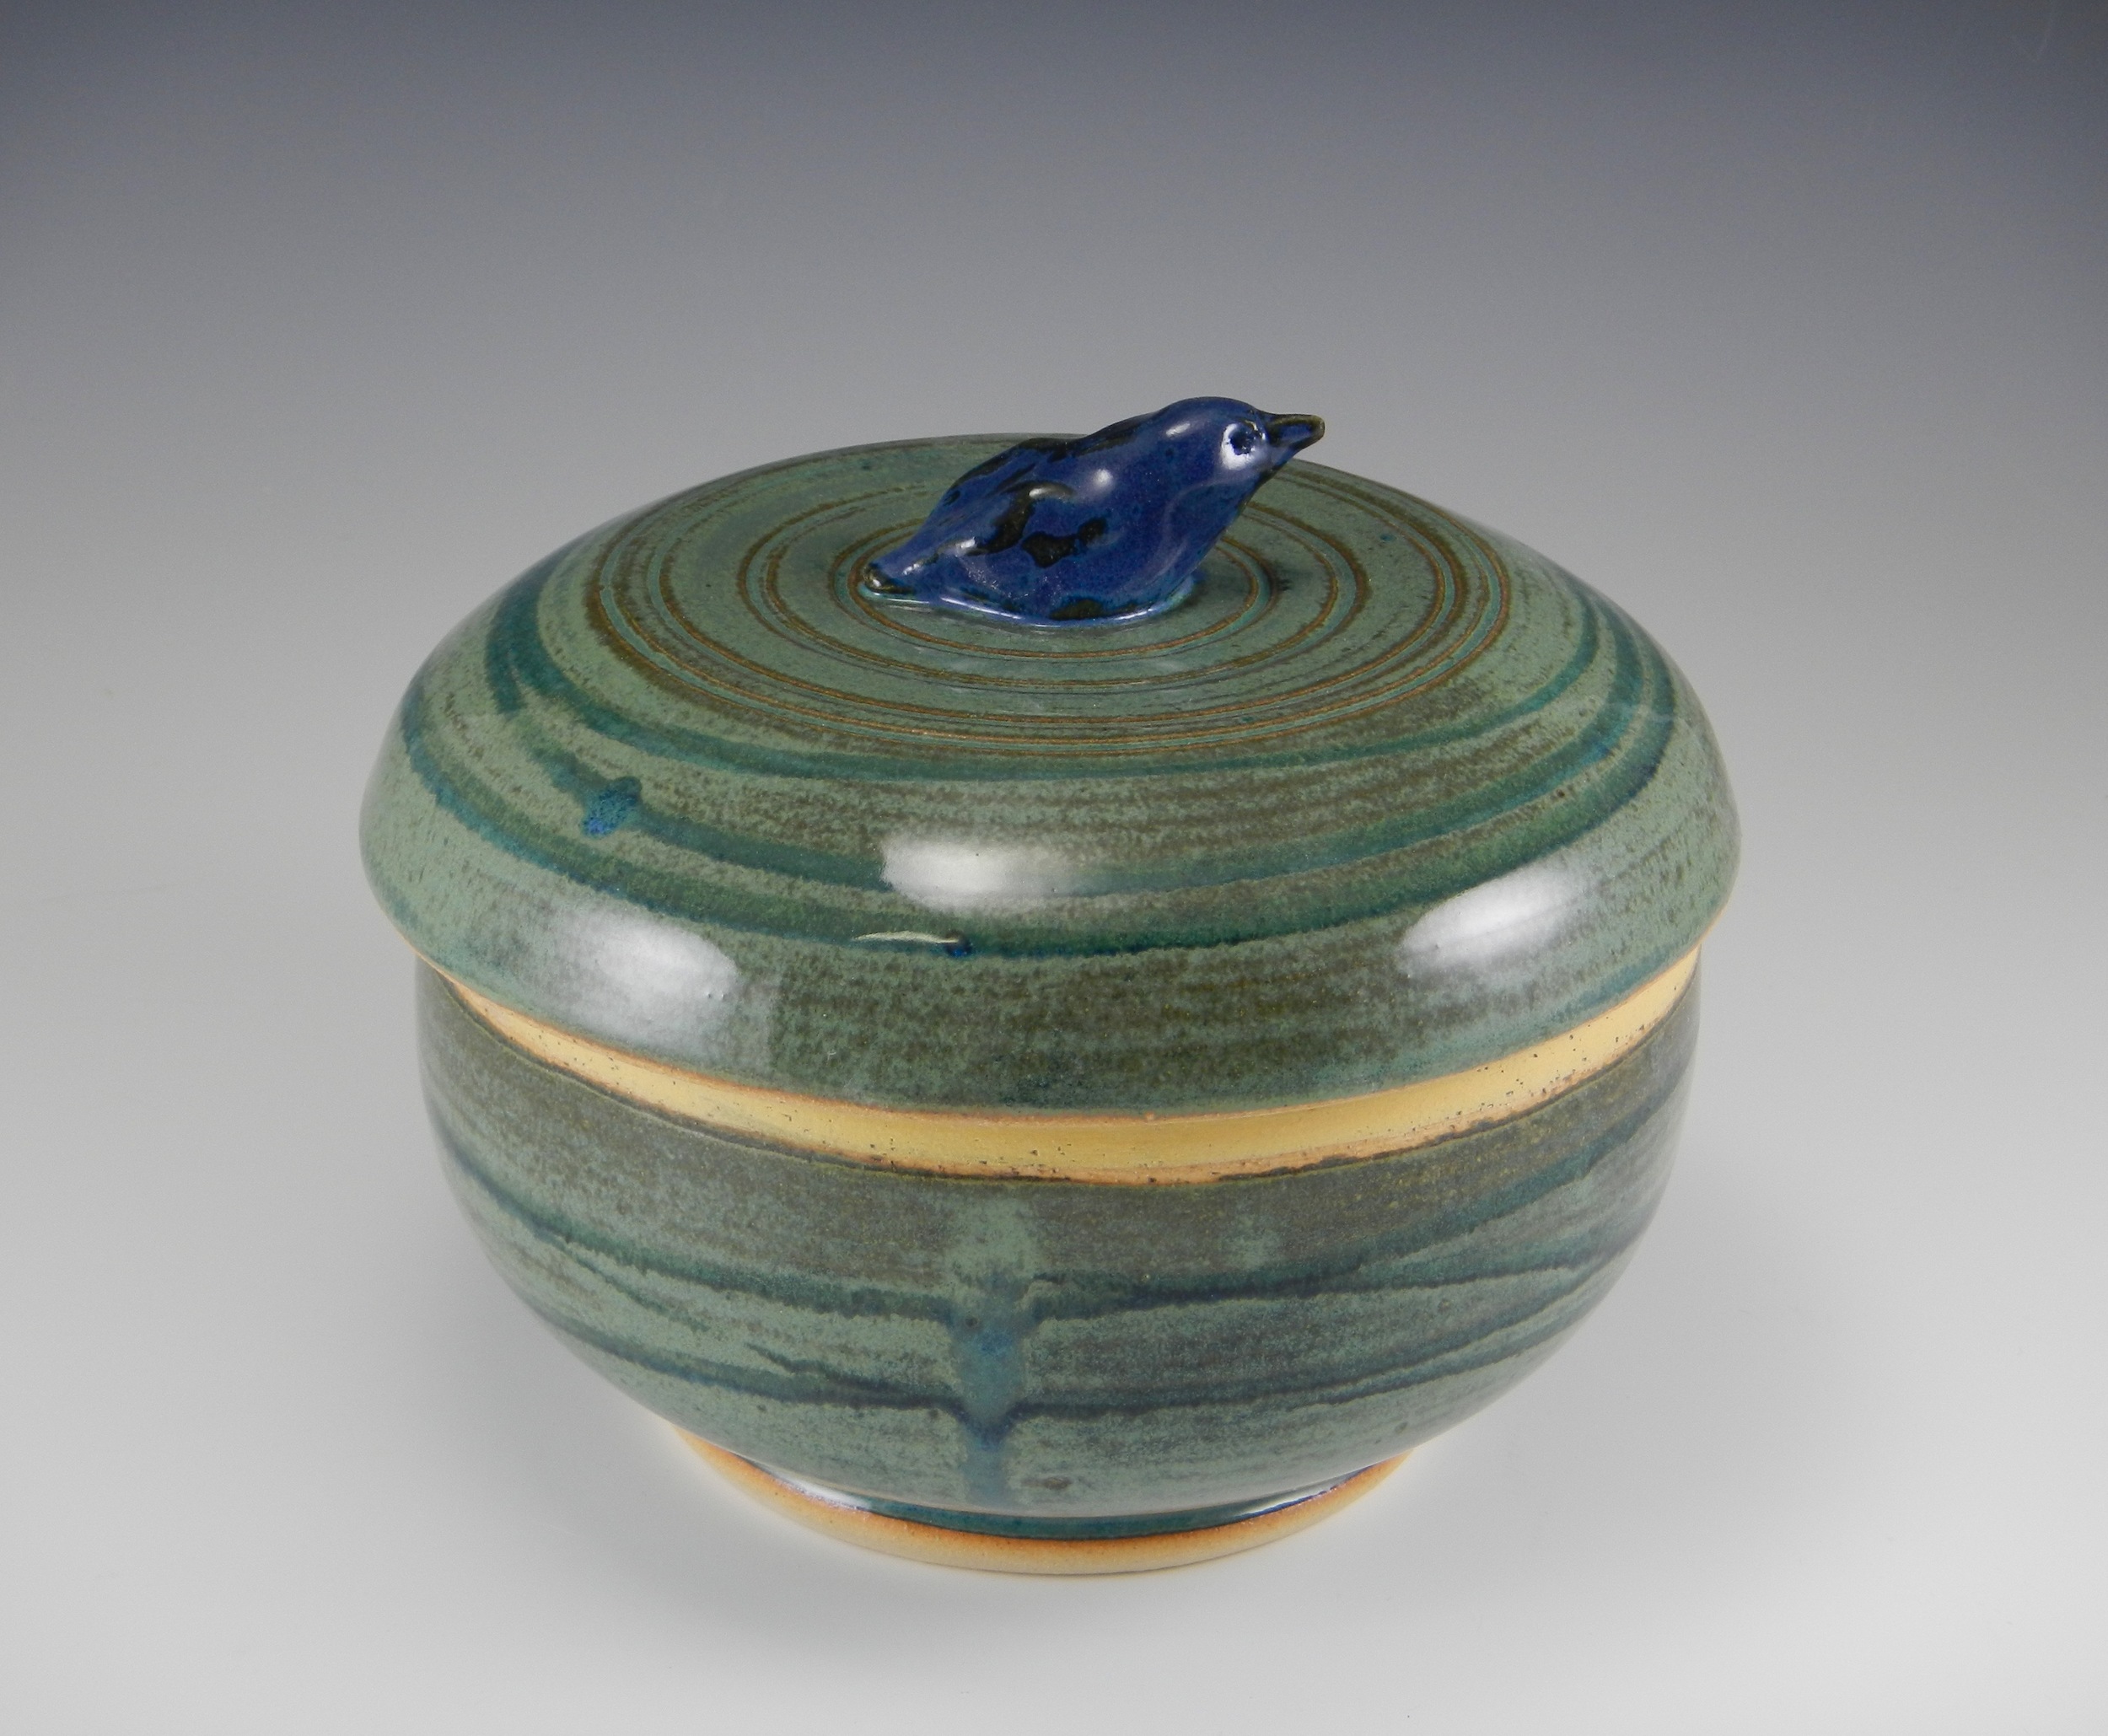
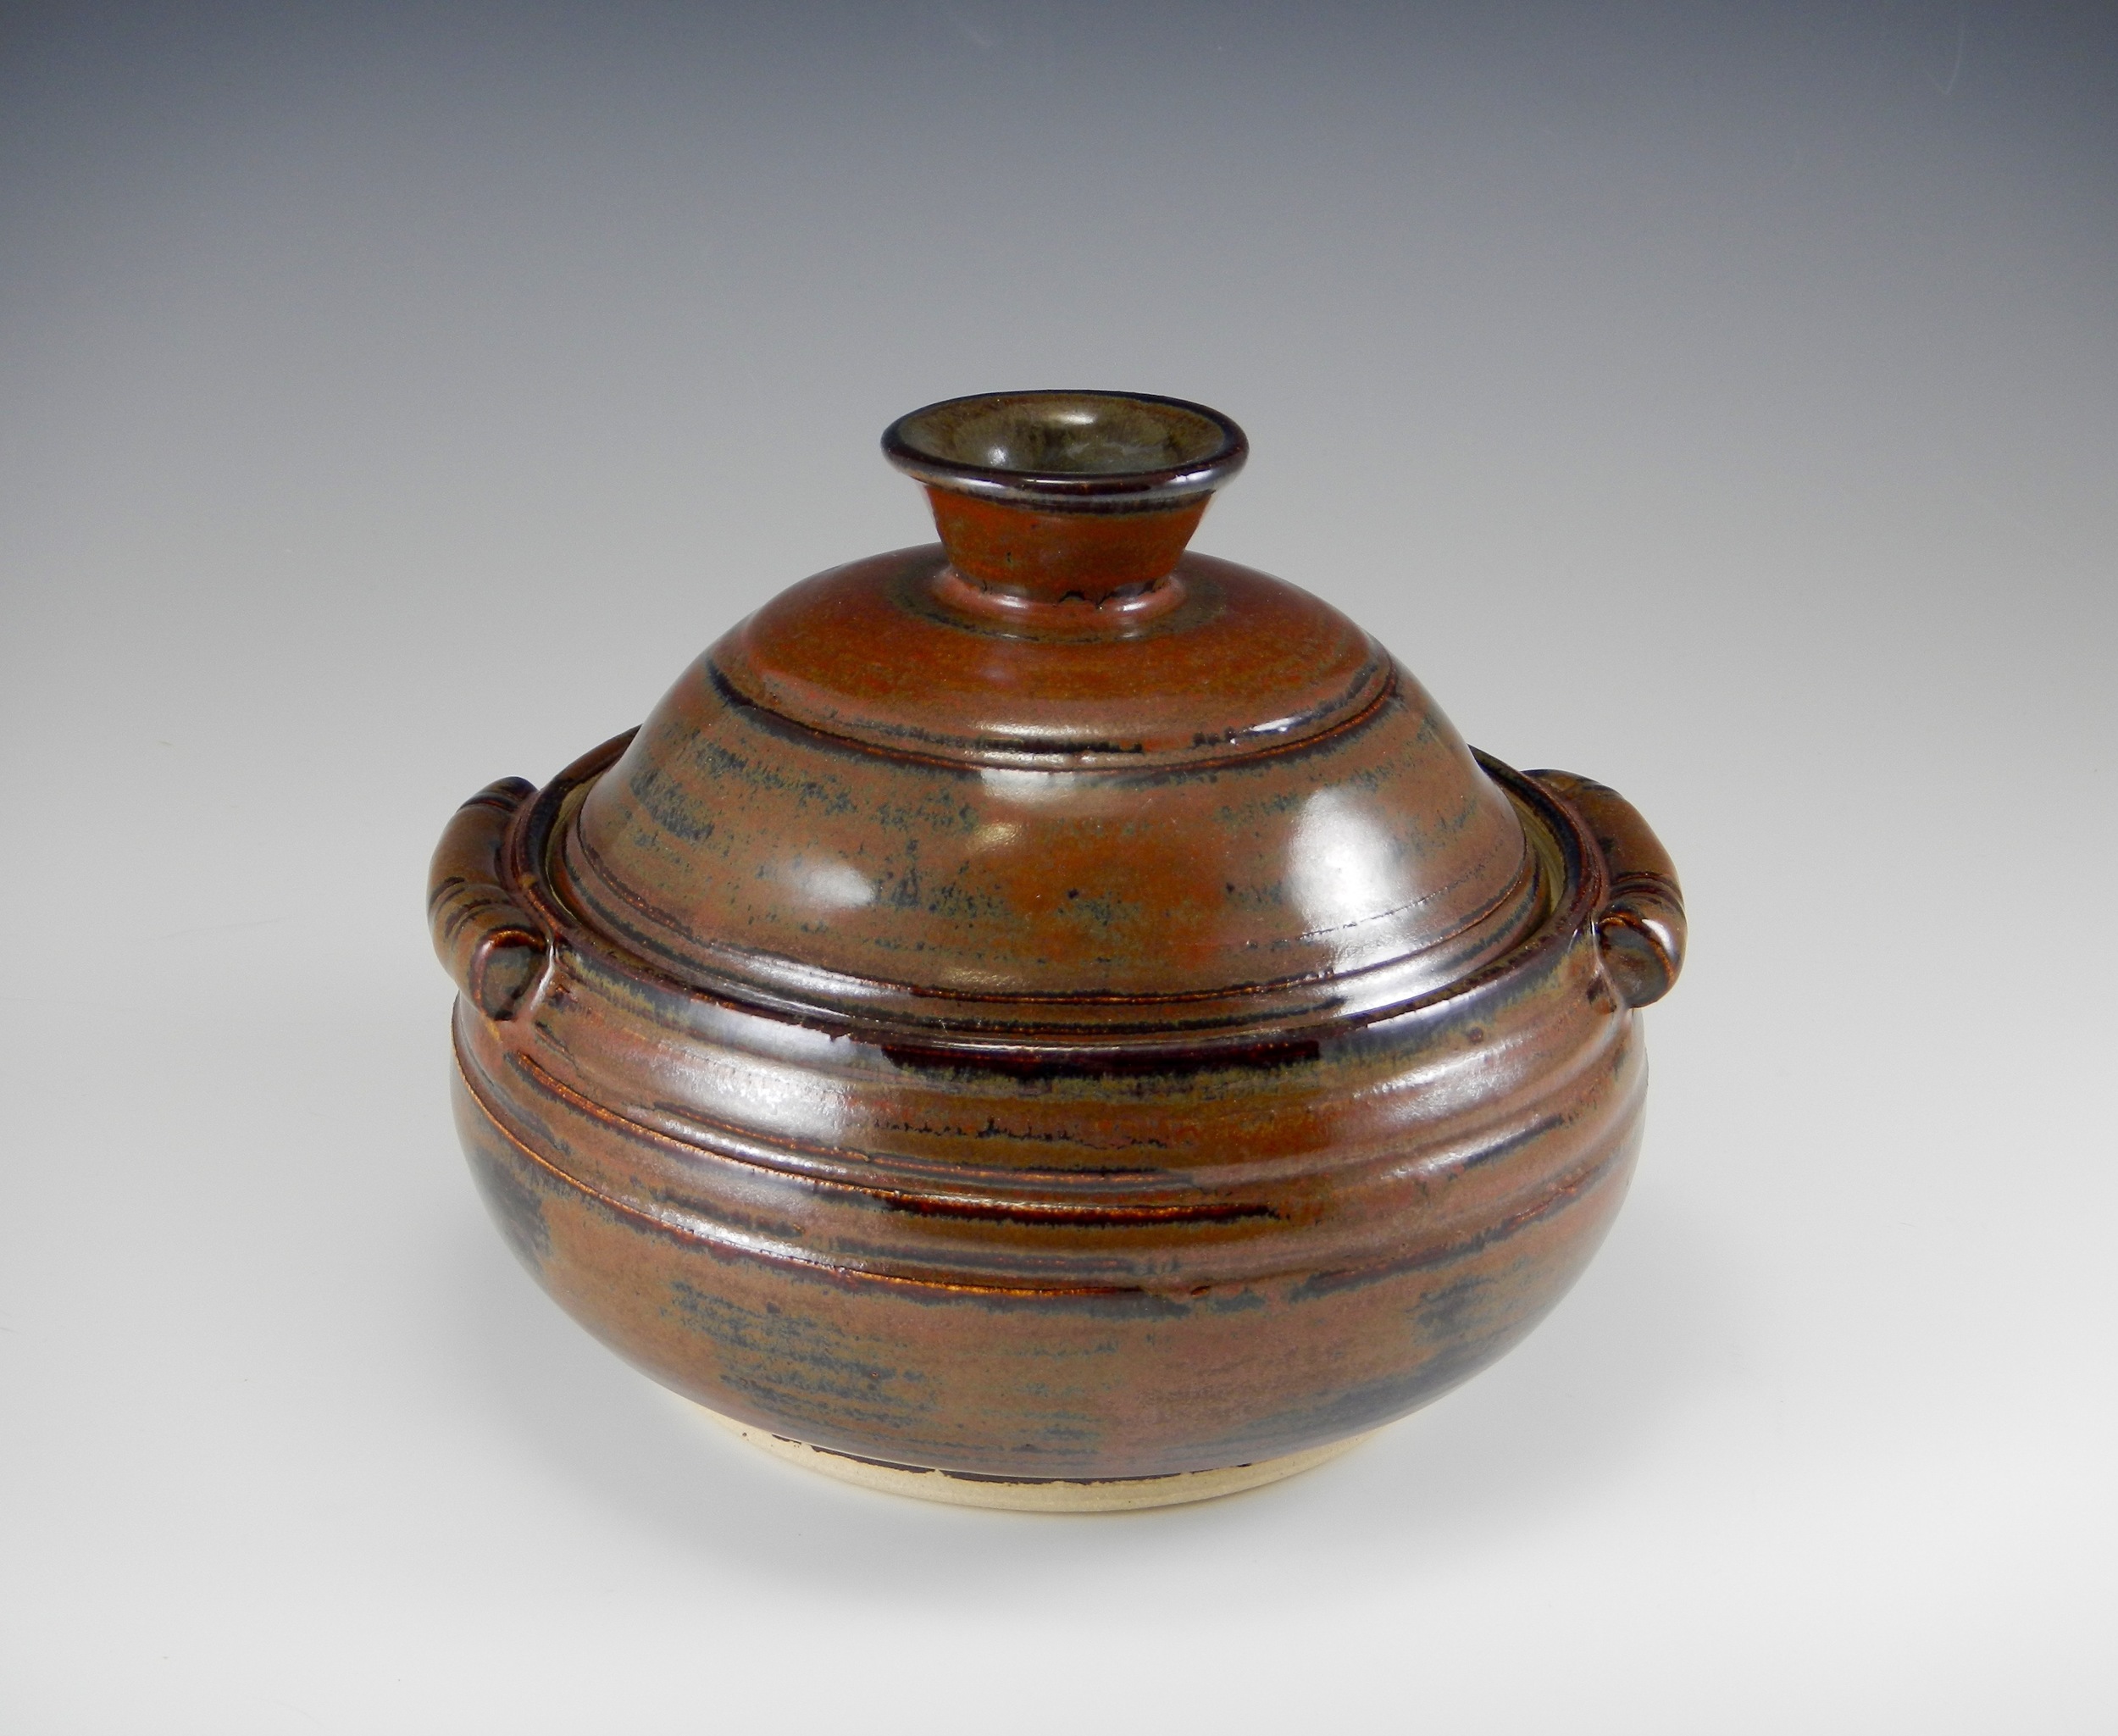
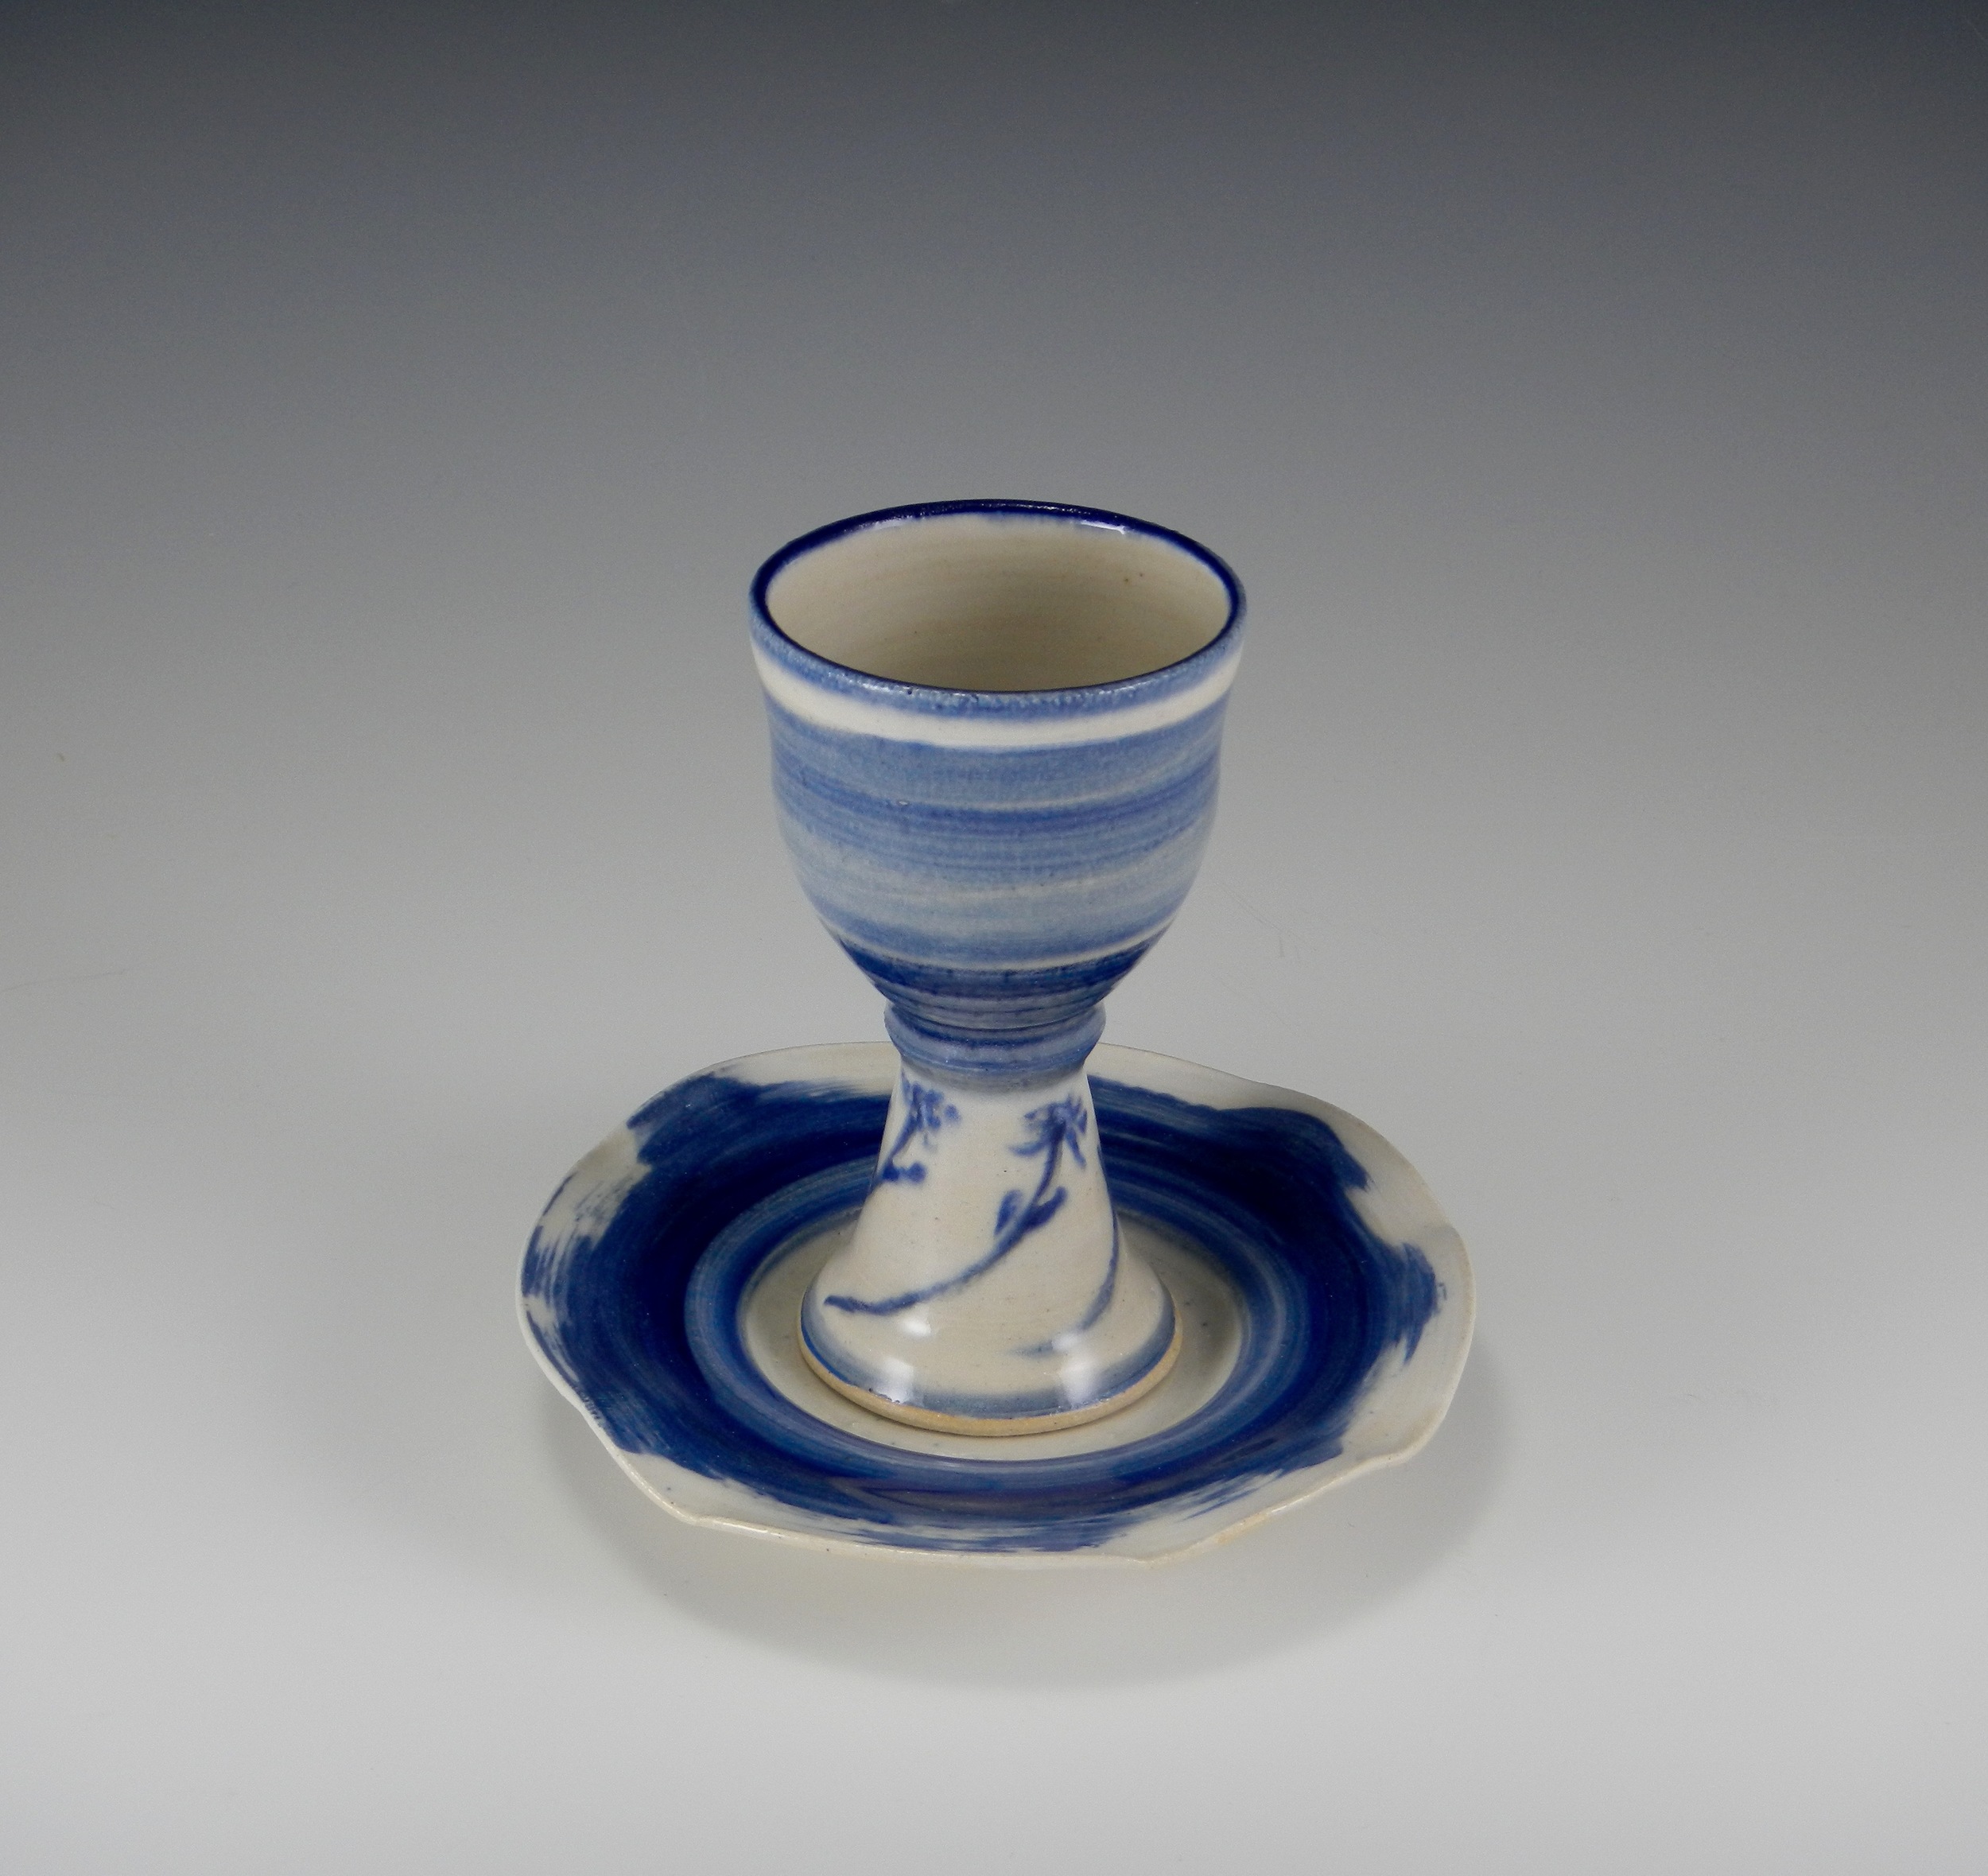
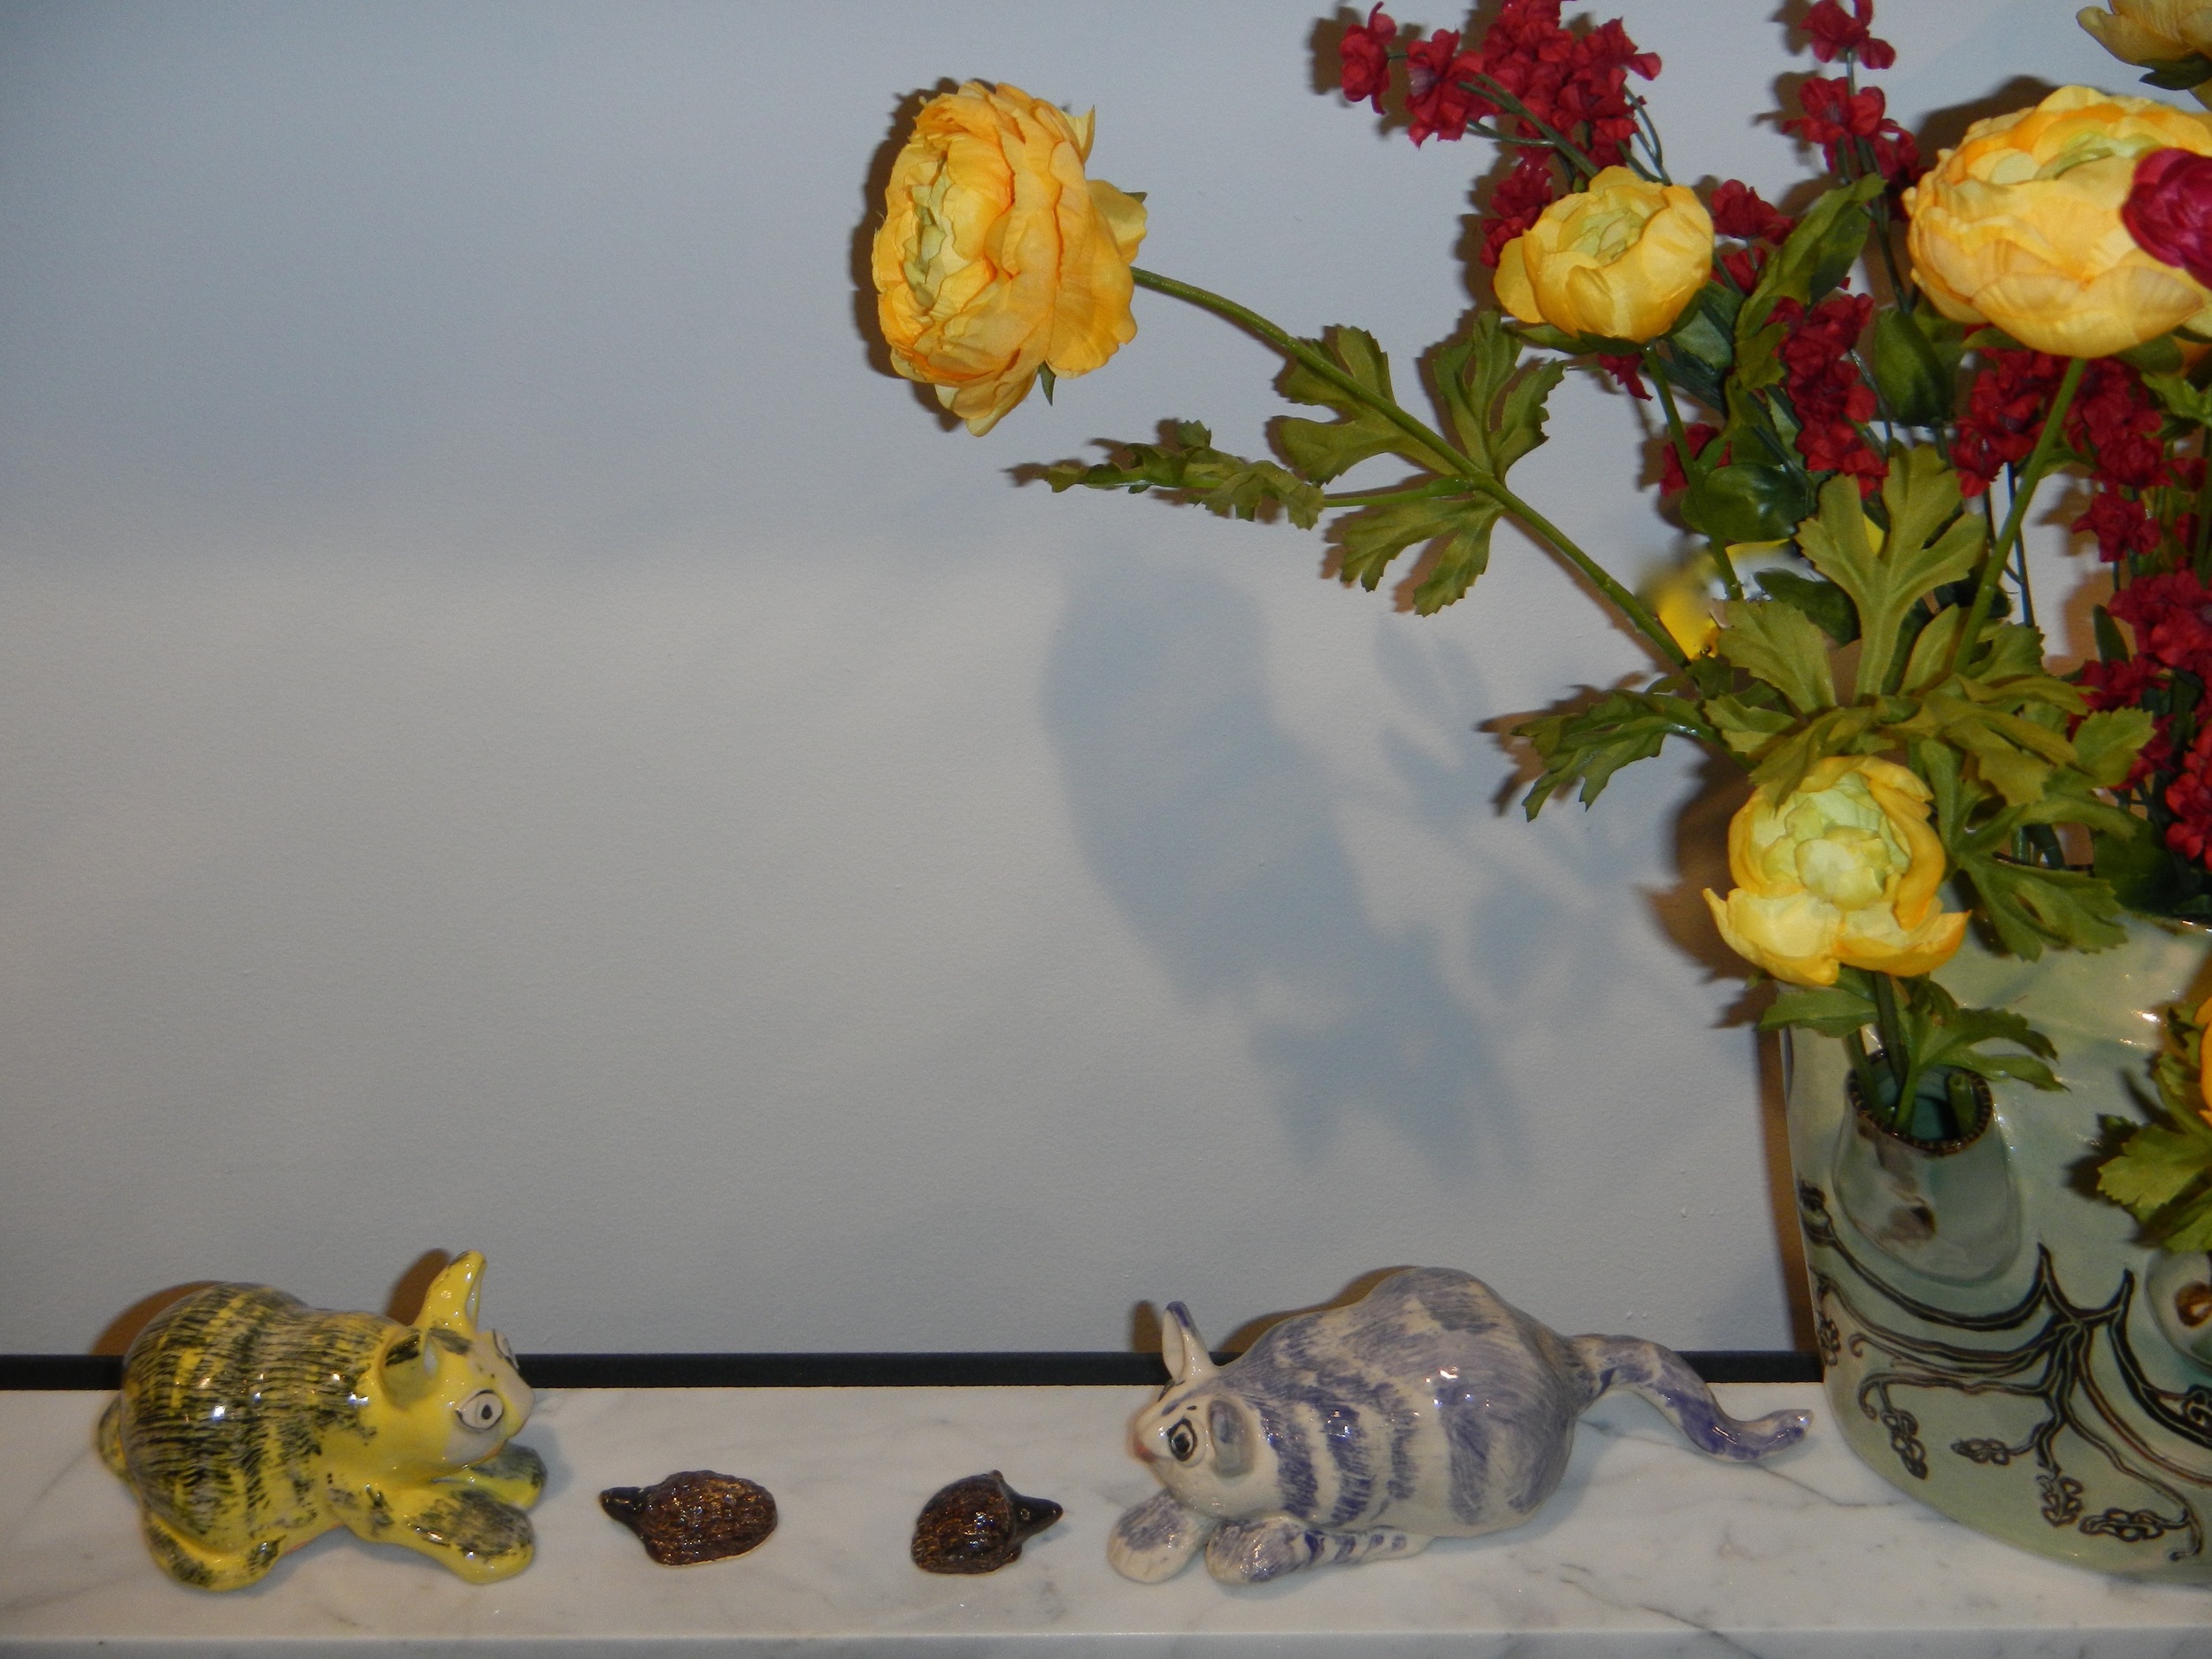
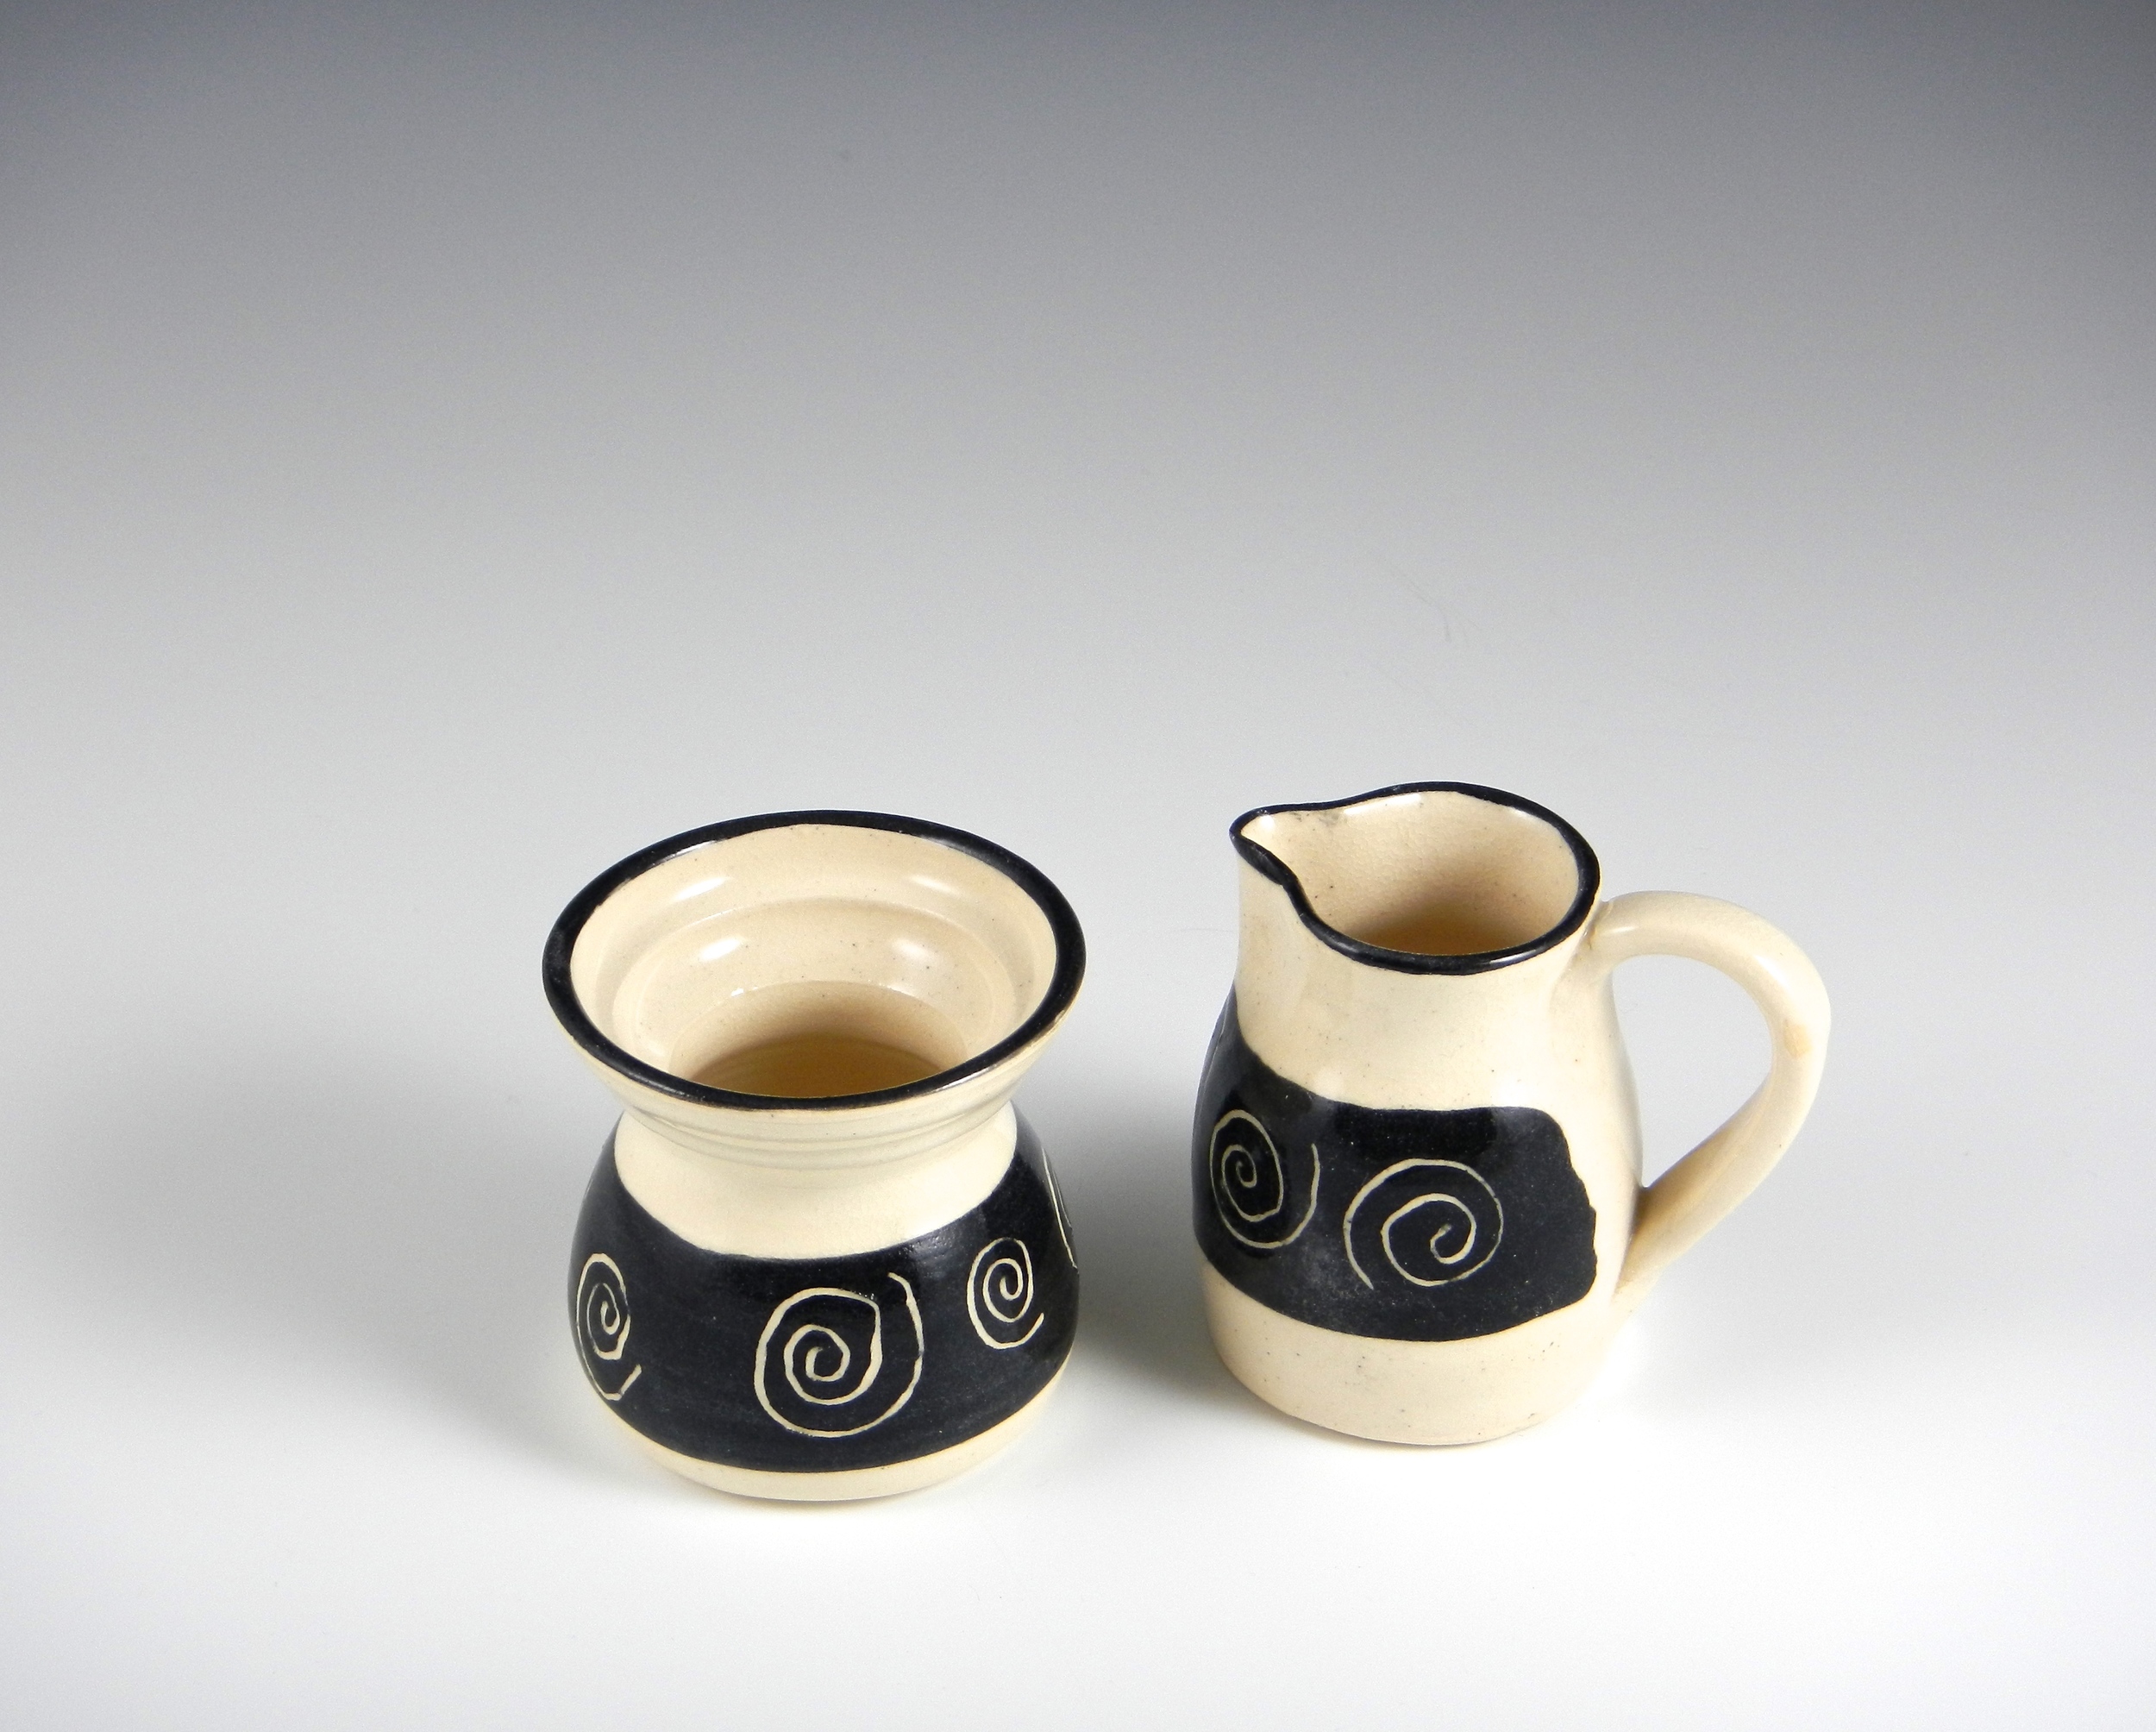
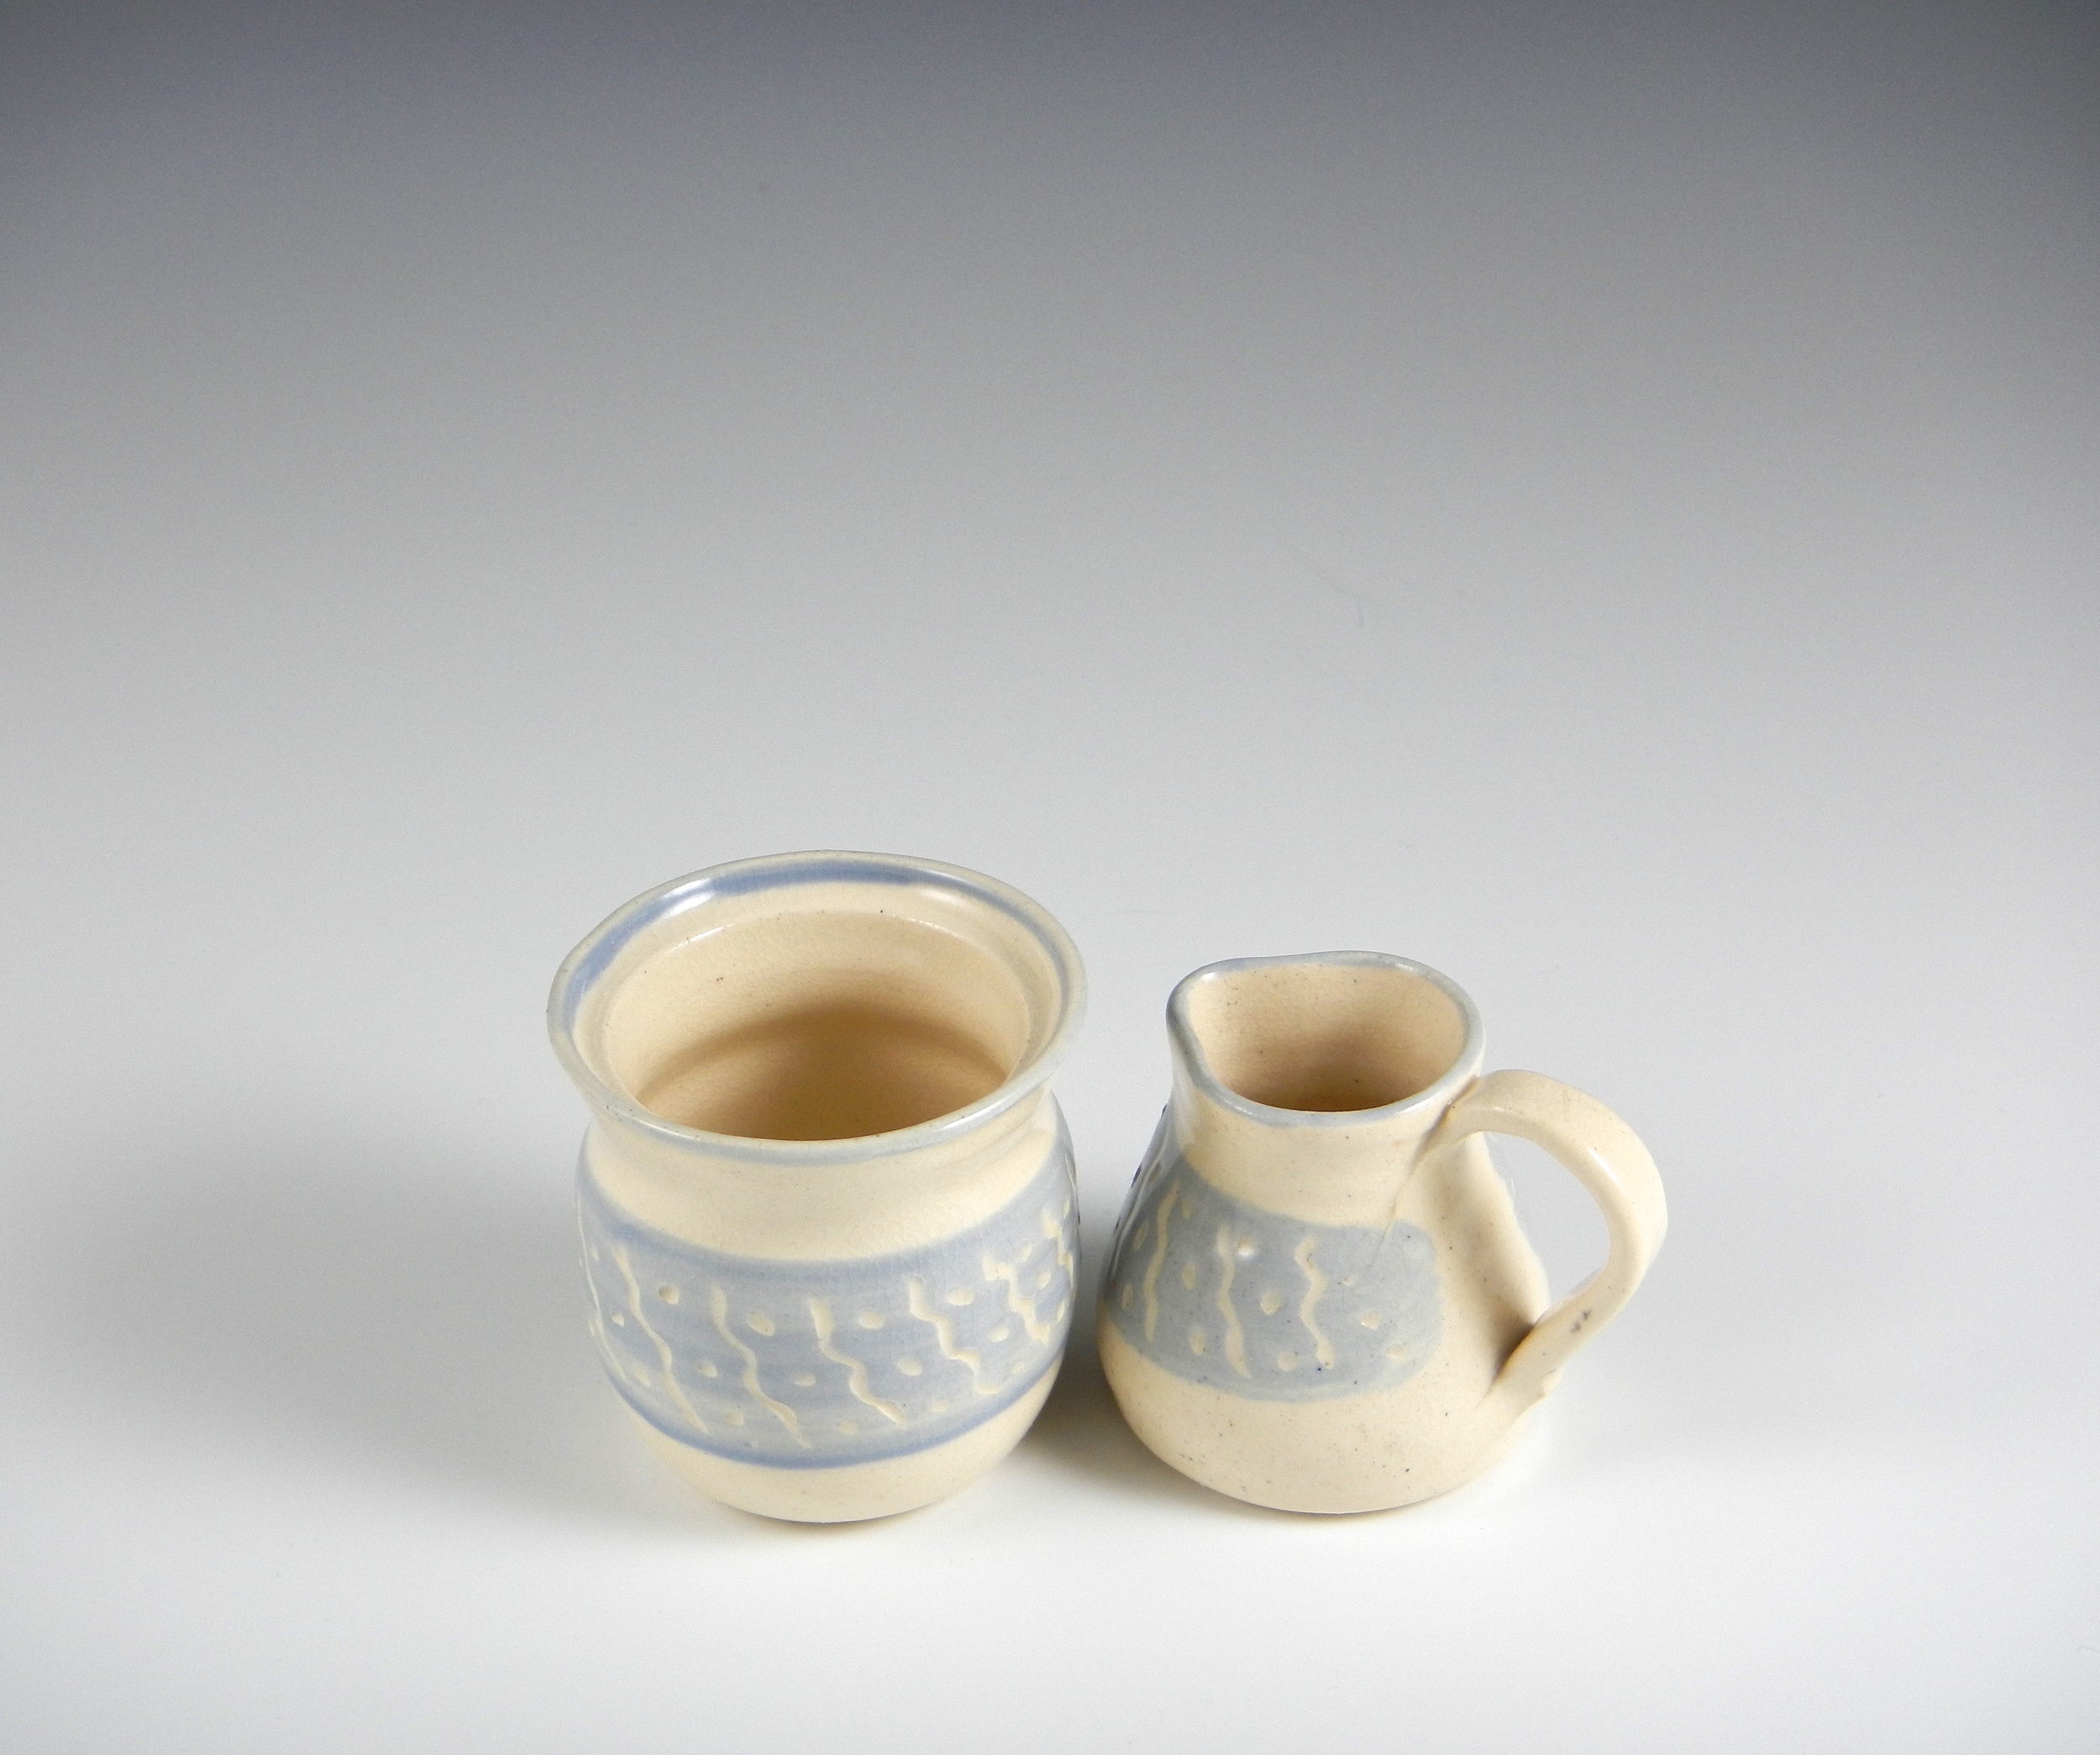
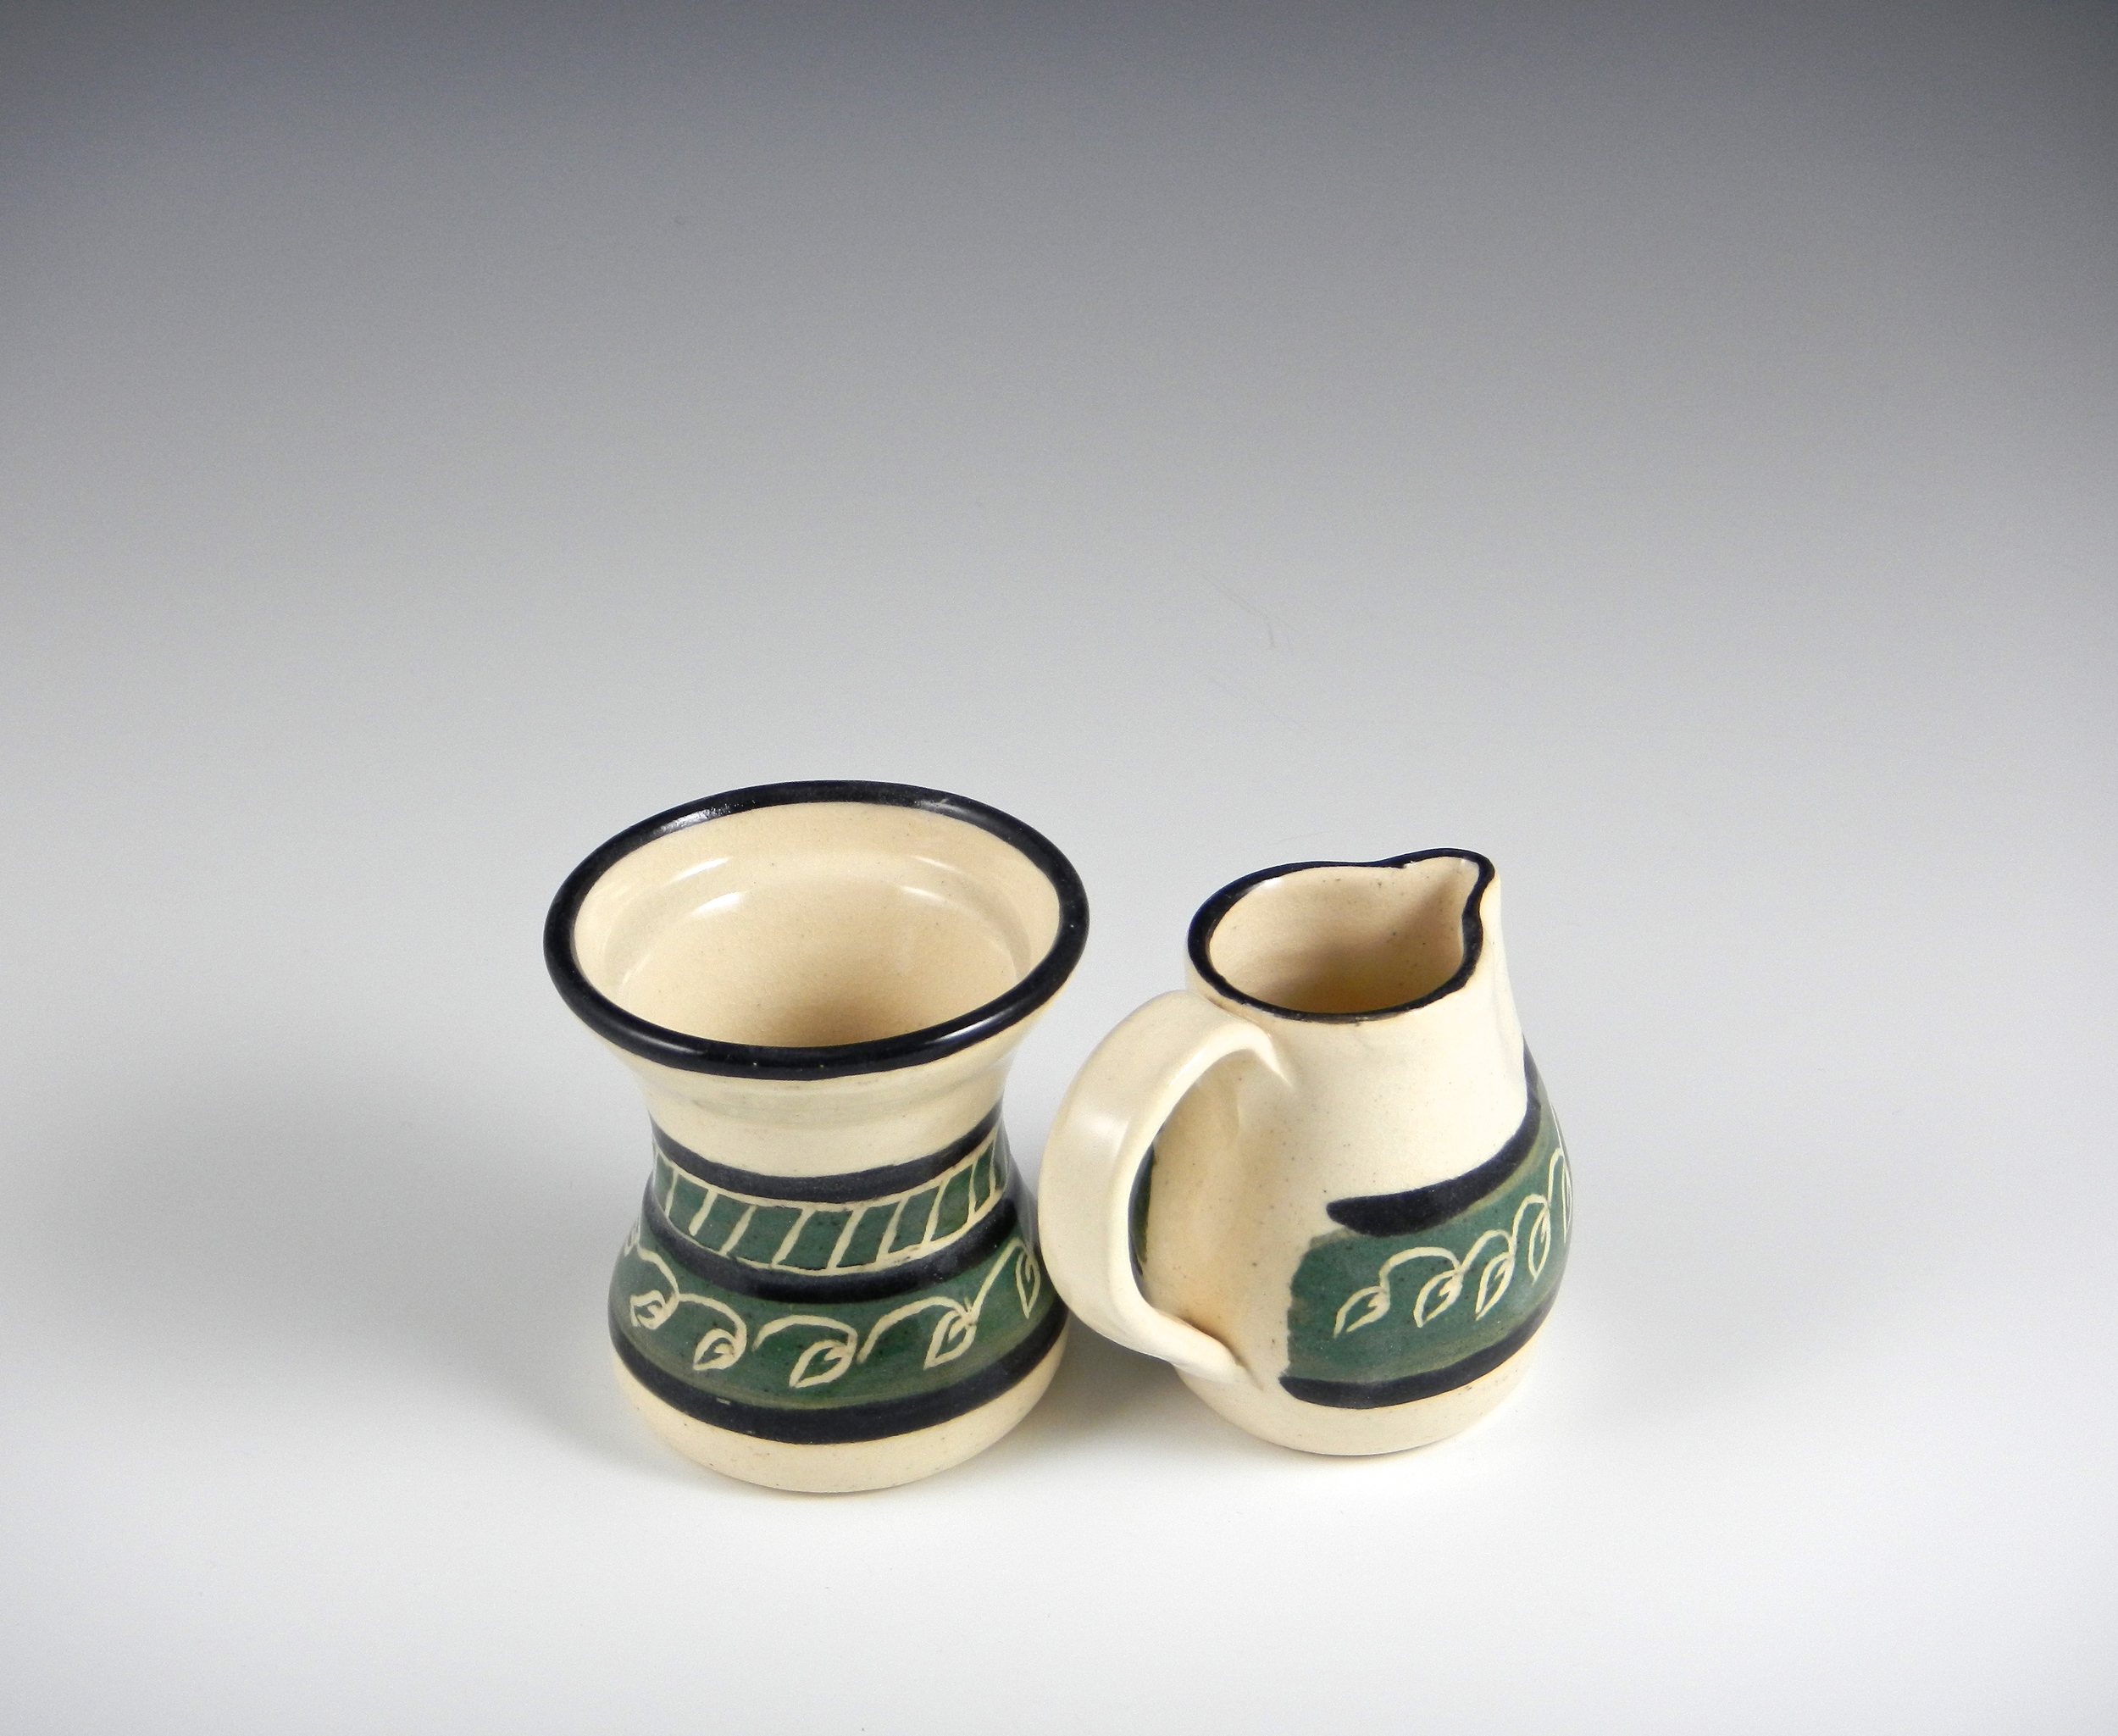
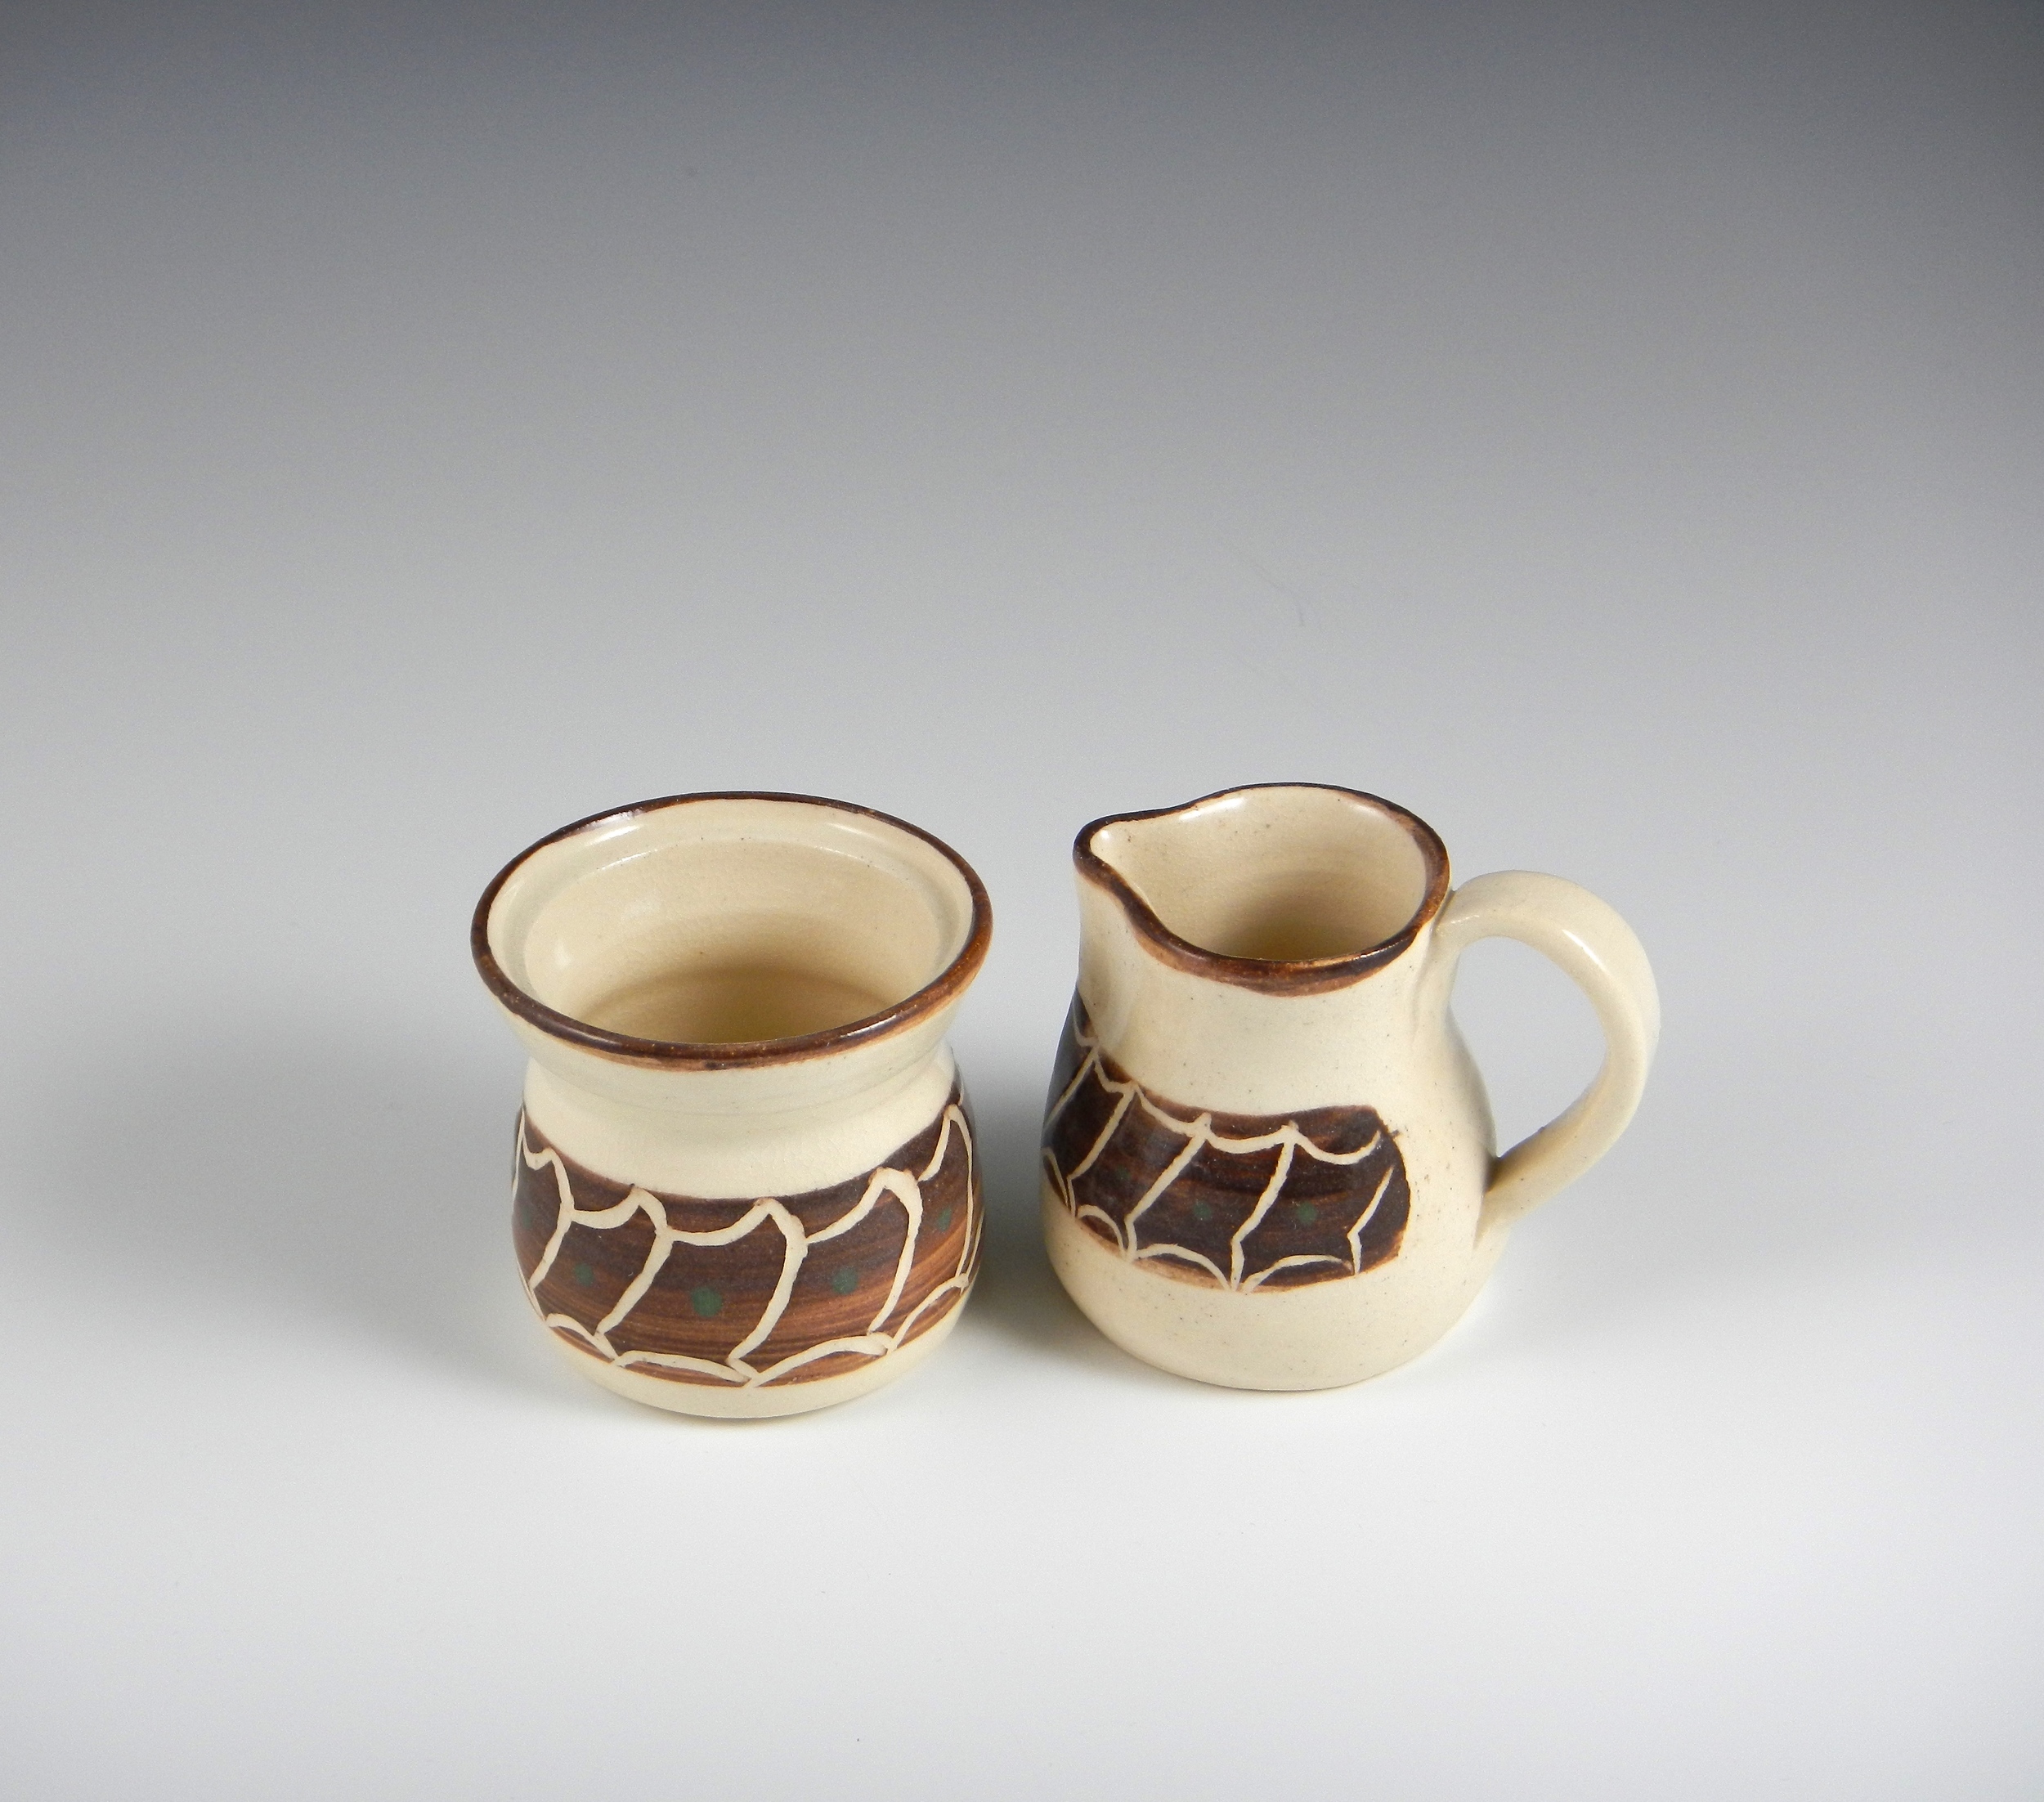
Because I like to leave you with pictures, here are four new tureens, small and I think kind of snazzy; a goblet in ever popular blue and white; and a pair of green salt & pepper birds.

See you in 2016!


Posted on December 22, 2015 .

The Selling Season, Not All About Money

The "selling season" arrives twice, in November-December and March-April. The pre-winter one is all about "holiday shows and sales", and the pre-spring one is before Passover and Easter and the new spring leaves on the trees, which seems to make people desire something new and fresh.

For the potter, this pottery business is most happily about the making. This photo from around 2011 says it best. Making is engrossing. Here I am at the very beginning of a goblet.

(Before the studio reno, on my trusty Lockerbie kickwheel, ca. 2011)

But selling is the other bookend bracketing my business. Selling; that's as challenging as making. It would be great if everyone loved handmade pottery and wanted to own it. But here's how it really  goes: The handmade aspect attracts the relatively few who, in their unsnobbish way (as I make and sell unsnobbish pots, which they seem to understand), are kind of select. I understand that and don't expect everyone to jump up and down every time I unload a kiln. (Fortunately, I have one or two who do!) Most all of my buyers just come along here and there, at random times including times of need-of-gift, and are individuals who have curiosity and willingness to not always be like everyone else and go for the thing everybody has. 

I like the part where I get to talk with people. It might be the same conversations many times over- 'How long did it take you to make that? How do you get the shiny finish on the piece? What is the oven like that "bakes" it? Why is there no glaze on the bottom? Do you draw this freehand?' I'm OK to have that conversation repeatedly. It's education and connection, after all; most people don't have 30 years of pottery education to know these things without having to ask. 

The people are unique and separate individuals. Even if the piece doesn't get bought after, the conversation is still good. Most of the time in my working life, except while I am teaching, I am in semi-seclusion in the studio. But people, after all, are at both ends of the handmade pottery transaction. Potter>>>allthatprocess<<<Buyer! In the end it becomes a sociable transaction. The pot didn't come off an automated assembly line, and neither did the person who made it, or the person who bought it. 

I think about the person enjoying using or giving this thing I've made, that they liked enough to think about and want to touch and purchase. The pottery connects, as does every handmade thing. It bridges gaps. It finishes a circle between people. 

Posted on December 8, 2015 .

Chanukiah Designs Over the Years

1986. First Chanukah menorah (known as a "chanukiah") design. Worked on it so long... I had just taken Ceramics II at Kean College. I threw a basic bottomless cylinder from earthenware on the wheel, cut it right down the middle from top to bottom, and attached the halves end to end. Then I rolled a slab and cut out the stand-up part with the lettering carved in it, assembling and glazing everything in my own first pottery workshop in a corner of the basement.

("These candles"... (side 1))

Here's the other side.

(..."are holy." (side 2))

(..."are holy." (side 2))

I made small white cups for it that, when Chanukah came around, I filled with olive oil and put a wick into. I no longer have the cups. They rested on the strip in the center of this chanukiah base. Honestly, if you make a cylinder, it's going to be round. If you don't flatten it out somewhere, it's not the best place to rest little cups on top of, at least if you want them to sit securely. Truth- I ended up just melting the candle ends in place on the top of this chanukiah, not using oil cups. ...Notable with this one: it was my first time using gold luster. (Tip: Do not attempt to place a pottery chanukiah with metal luster in the microwave to soften the wax on it for cleanup. Unless you like to watch sparks fly.) I have hardly used metal luster since. It has stinky, toxic fumes when raw, best applied out of doors, and it is finicky.

1986-87. Played with small versions just to see how they would come out. My kids have them now, so few photos were quickly available for this story. Here's one I still have, that my son did with me when he was 9. I gave him the idea of a bent slab, and he did the work. Pretty neat for a 9-year old. It's supposed to resemble the Western Wall in Jerusalem. I think all I did was fasten a coil around the edges to clean up the form.

(It blends into the countertop too well, so here it is against a paper towel...)

1987. My second large design. Reddish stoneware, heavily pebbled ("grogged"). It was built as a castle-like construction and was lots of work. Learned: clay slabs distort easily. They move and crack if not handled "just so". Also, it was an interesting foray into staining clay with metal oxides. I made another, similar one. As a design idea, it was received in an unexpected way: a Holocaust survivor was reminded by the similar one to this Chanukah menorah of the wall at Matthausen concentration camp where he had been imprisoned, when young, during WWII.

(Candle placement is not quite correct. The red candle should be in the candleholder spot on the right, next to the tower. Photo taken in haste before work for the purposes of this blog :)

Drawings, attempts, a carved sculptural chanukiah that cracked in the drying, wheel thrown elements I attempted to assemble into something cohesive... It has been a long, long journey to make a Chanukah menorah I want to make again and again. This is my Everest.

Here's a candle chanukiah I tried a few years ago. This had stresses in the drying as it is made of layers and attached bits, but I dried it slowly so it was unable to really warp as it could have. The glaze was interestingly runny and played peek-a-boo with my lettering, which reads "Chanukah" in Hebrew. I have this at $45 in Jewish Life on my site at the moment.

Last year came these, made on the wheel, altered and glazed in untraditional fashion. I have them on special sale till December 14. ($110-$125, less 10%)

(Leaf chanukiah, for candles)

(Flower chanukiah, for candles.)

(Wing chanukiah, suitable for candles.)

They work well with standard candles melted/stuck into place, then lit. They are the best design concept yet in my studio. But now I am working with the promise of next year in mind. (I am always working with the promise of next year in mind.) I am working on the sort of Chanukah menorah that will operate at the whim of its owner with either candles or the little glass cups that come pre-set with olive oil and wicks in them. That design idea is still developing, although here is the first one of those, that works pretty well. I found rubber inserts that accommodate retrofitting for glass oil cups, and tried them out in the channel at the top of the chanukiah. The shamash (the "middleman" candle used to light the others) will sit in the holder on the front.

DSCN8681.jpg

A certain amount of engineering/problem solving is needed in the making of a thrown piece where the top has to stay level all through shrinkage and its accompanying slight movement and distortion in the kiln. This has been a bit of a challenge, but I'm on it.

Developments as they transpire...

Posted on December 1, 2015 .

Dinnerware Explorations Continue

I've been making different dinnerware pieces on and off since March. Lots of different permutations are possible using my GR Pottery Forms hump molds with rolled out clay slabs, and experimenting with textures and colors. I'm adding to the GR ones other infrastructural forms I've made myself. Potters are hands on by nature (or we would not be potters), and we make or adapt tools so that we can give expression to our own work. I don't want my pottery to look like the next potter's, but the next potter might use these GR forms for shape continuity through a set. So I use my own additions and subtractions and changes to express my ideas as the next potter would probably not.

Here were the first items made, with medium and small plates done using GR Forms, and bowls made using my own paper template. It was a sweet set, a bit on the smallish side, with extremely simple color- just an inlaid black line and a few strokes of pale rainbow here and there.

(8.5" plate, 7" plate, 5" square bowl, side dish shallow bowl 7". Mimi Stadler 2015)

Tried a few colors. Added a thrown and squared 8 oz mug.

Next, lace texture. A good try, but on the larger (8.5") plate, where you might want to use a knife and fork, less detailed texture would be better. Kind of nice looking though:

I wanted a bigger version of the dinner plate, so I broadened the rim of the next one I made using the basic GR plate hump plus a larger wooden square under it that added 2" to the diameter, to 10.5". Here it is below in red, with stamped decoration. Surface and color possibilities are only limited by my materials, firing methods and expertise.

Adding more set components, I made a rectangular serving platter using a GR Form, which fired out to 12" x 7.5". I added a pickle dish, too, using a hump form I made myself from plaster a few years back, to lay the clay over. Not as good as the GR Forms because plaster chips, but a useful shape and size:

Then I made the platter again, and this time the lace impression was shallower, which works well- kind of elegant, I think! I can add handles for another, different look and feel. That's on the "to try" list.

Thinking of the table service, I wheel-threw and altered my own salt shakers. Next time I'll do some in coordinating colors!

(salt and pepper birds, wheel thrown and altered, underglazes and glaze, 2015. Mimi Stadler Pottery)

When I take GR's basic hump forms and build over them with slabs, I can repeat sizes and shapes of wares. Everything I add beyond the basic form is what makes the work mine. 

Posted on November 17, 2015 .

Studio Assistant

October 22: I have a studio assistant for the first time in all these potting years. She's a local college student. Teaching someone who never has wedged clay before is challenging, but I've done it before. I intend to give her the chance to practice, practice, practice...

All I want to say is, today (another first) I was not the one to mop the studio floor at the end of the day.

November 5: Have been continuing with studio assistant once a week. Studio is being maintained and someone who was not me weighed out and mixed up test samples of glaze (from recipes) for me to glaze fire on sample tiles. (Maybe a decent celadon will finally come out of this effort..?) Today I am going to make a mess glazing pots. But later someone will help me mop. Then I am going to do inventory for two upcoming events, and choose pots, price, list, and pack them- with help. 

I'm pretty psyched. 

Here's a pottery photo or two just to keep things lively.

cups and saucers for a good customer, bisqued and ready to be glazed

brushing wax resist on pot feet before glazing

Posted on November 5, 2015 .

Cups and Saucers in the Process

A good customer asked asked me to make a dozen mugs and saucers. I wonder which of my glaze colors she'll choose? I gave each one the handle it seemed to want. As for overall form, these mugs are lightweight yet sturdy, with a simple shape. I own so many mugs, from very fine potters, yet I am surprised to find that the mug I use to most is a very simple one of my own making, something like these. Mine is a luscious blue with green speckles. With a shape this simple, the glaze will need to be at least a little special.

As always with a set, I made some spares in case of breakage or different handle preferences. Everybody likes a choice! I never know what cup and handle will feel best in another person's hand.

Looking forward to firing and decorating them.

Posted on October 22, 2015 .

Decades in Clay


One Sunday evening in the late '70s, early in our marriage, H and I were strolling in Greenwich Village and caught the tail end of a street fair. I stopped and talked to a potter, and I bought the last four mugs she had. They were blue and gray and could be nested into a stack. I found myself thinking, "I'll bet I can learn to do this." After all, I could draw passably, and write reasonably well. Why not make mugs and bowls? But when kids came, the journey became very busy in other ways.

Seven years after the street fair, H was building his career. We were building a family together; two small children, one in the stroller and one alongside, and another to come in a few years. I was a full time mother and cook-and-bottle-washer. I did not want to fold another piece of laundry or cook another thing till I at least looked for my groove, as they used to say in my childhood back in a different day. 

I found a private teacher, who was a grad student at the nearby college. (I couldn't get into Ceramics I at the college without being a full-time matriculated student.) One evening a week for three months, I went to her studio in East Rutherford, NJ and Wendy taught me how to "throw" on the potter's wheel. The next semester I matriculated as an English major, and enrolled in Ceramics I class at the college. Within a year I bought my first kickwheel, followed it with my first electric kiln, and a single metal shelf unit to hold wares in progress. I set up in a different corner of the basement from the sump pump or the washer and dryer. Even if I couldn't give it enough time, clay became my new best friend. Sometimes when I was too busy to work with clay I just went down and sat on a lower step to the basement and looked at what had been made so far and thought about what I would do next.

I wish I could tell you I became a potter right away, but it took a really long time. I continued at the ceramics studio at the college for six semesters, always taking classes in the the evening so I could still do most everything else at home. I went through Ceramics I, Ceramics II, Advanced Ceramics, and Whitewares- white earthenware, stoneware and porcelain. Between semesters I once took a two-credit class where we students built a brick gas kiln for the studio. At the end of my sixth semester, all us long-timers (by then we had a group of probably six enthusiasts) got tossed out of the Ceramics department for using too much clay and glaze materials, and taking up wheel and table spaces new students could use. I was 30 years old by then, with three little ones, and no sense of who I was in clay... except that I really liked to make bowls and loved working on the wheel. 

Potter, ca perhaps 2002. (Photo credit: David Stadler)

I was a young, energetic, fired-up 27 years old when I starting honing my pottery skills. I returned and finished my BA in English at age 39 (cum laude, yo!), but seemed to have no time to sustain a couple of hours in my basement studio most days till the tired haze of evening. I began writing children's picture books (still unpublished- priority someday??), and got communally involved.  

At very long last, when the kids got into their teens, I made clay into my day job. By the time I got my BA, I had belonged to the Potters Guild of NJ for a dozen years, gone to good clay workshops, accumulated a decent library of ceramics information, and watched many how-to videos. I had drawn hundreds of sketches, thought through many design ideas, and logged hundreds of hours at the wheel and glaze table. I had met some wise people along the way who said or did something to make me stretch further as a maker of objects. It all took some time to settle into my full time work.

Half a lifetime after first touching clay, I finally built my gallery and website.

I had lots of physical strength when I had little ones in my arms. All these years later, I teach private students, work to market my pottery to stores, and maintain my own display space. Marketing the work is probably my biggest challenge, although the physical labor is not simple either. Because I am middle aged, I have to work smarter. Working on new designs has to come after I've done what is on the already-proven design list, but I also keep planning new work. In a bigger picture, one must keep to a seasonal production schedule, driven by sales patterns, holidays, and trends (tureens in October, ice cream bowls in May). It isn't simple. But most of the time I am working towards a goal I love, like the many other potters I know. It is deeply habit forming.

Posted on October 16, 2015 .

Found a Good Little Vase

Found this oval vase at Maine Potters Market (on Fore Street in the Old Port) in Portland.

It was made by David Orser, a Maine potter. This is salt-kiln-fired, and although it has bigger presence, it is 7" tall. It's got great texture, a nice juxtaposition of silky and gritty. I like the earthy, toasty colors and the one greenish side- the side in the path of the flame and salt in the kiln.

I love buying a really good pot.


Posted on July 3, 2015 .

Women Working With Clay Symposium, 2015

June 8-11, I was back  for the fourth year in a row in Roanoke, Virginia for the Women Working with Clay symposium at Hollins University. 

I compare this 4-day event to the enormous annual NCECA (National Conference for Education in the Ceramic Arts) gathering, which this year had around 5,000 attendees in Rhode Island. My second time at NCECA (after 14 years), I found it overwhelming, though fascinating. By contrast, the also-fascinating, small Hollins symposium has an intimacy in which people can connect, both in the symposium environs and at meals in the university cafeteria. Donna Polseno, who created WWWC and has kept it going in for four days in early June for the last five years, intends to maintain the cap number at 50 attendees, at least for the two more years she intends to run it. Fifty suits the size of the studio rooms to be used at Hollins and, I'm sure, keeps costs manageable. The presenters at the symposium (four presenters this year) can see and interact with everyone attending if they want to, without it getting overwhelming.

One note: The scope of this article does not cover an impressive opening lecture by Leila Philip, concerning her yearlong apprenticeship in a pottery workshop in Japan as a woman of 21 some years ago. With apologies to Leila for giving her short shrift, because she comes from both an artist's and a writer's perspective (and I relate to that,) I recommend her book about this engrossing experience, The Road Through Miyama (Random House). Her second book is coming out shortly, Apprenticeship in Two Cultures: Writing and Ceramics. (I will be getting them both for summer reading.)

Linda Christianson was the only wheel thrower, making the type of wood-fired functional wares she is known for.

(LInda Christianson; http://christiansonpottery.com)

A lot of the current ceramics I see have a great deal of surface decoration, sometimes quite slick and perfect looking, now that laser decals can be fairly easily made, or commercially pre-made decal patterns bought, and all sorts of glaze colors and enamels easily acquired. This sort of work can be really beautiful, or border on slick shtick. Some of it is pre-cast, repeat ware that is decorated with decal sayings or sometimes-kitschy images, and it is quite popular to judge by Etsy sites.

Well, Linda is the living embodiment of the anti-slick-shtick. She works on a treadle wheel, not an electric one, and fires her work in a labor-intensive wood kiln. She uses clay slips as decoration, and a little glaze, for the most part letting the ash in the wood kiln paint the exterior surfaces of her pottery  as it fires very, very hot- perhaps cone 12 or 13 {something like 2400 degrees Fahrenheit, around 1325 C).  

(Linda Christianson, Large Oval Baker, ca. 2015)

(Some good handlemaking discussion ensued...)

(More work on the handle, which will be a bit&nbsp;further blended into the body of the "mango chutney dish")

(More work on the handle, which will be a bit further blended into the body of the "mango chutney dish")

Linda also formed a loaf of clay into a shape she found pleasing (I did, too), then sliced it with a textured wire into these plates. A discussion of these simple, perfectly suited feet followed.  

(Linda Christianson, Plates, ca. 2015)

Linda talked about seeing inspiration in all sort of forms, as in a striped paper fast food container, for example, that when pulled open into its basic template made her think of other vessel possibilities; or a sculptural bit of wire attached to a clump of leaves and grass, like the one above on the wall behind Linda at her wheel (scroll up to the first photo), which she foraged early on the morning that she began her first demo for us. Her perspective is uniquely personal, fresh and funny, and so outside the box that I found it hard to step away. It's very freeing to listen to someone who makes and revels in a bit of art from a clod and a cord. (It took me back to a picture I made on a pane of glass found in an empty lot, in my childhood, and painted with nearby mud "glue" and wildflower petals.)

I did step away often, though, to see all four presenters over the three days they worked. They have in common that they think all the time about their work, and have developed very strong ideas. The artists demonstrating in this symposium every years so far are all about ideas, and ways of working.

(Shoko Teruyama; http://www.shokoteruyama.com/Shoko/Shoko_Teruyama.html)

(Shoko Teruyama, flower-shaped vessel in progress, June 2015. You can see where Shoko removed clay to refine the interior of the "petals", and also where she pinched the edges thinner and left undulating pinch marks. Complex surface decoration will come next.)

(Bird shaped vessel and flower shaped vessel, complete with raised feet and added, pinched rims.)

I was very interested in watching Shoko Teruyama construct vessels from slabs of clay. She shapes the basic origins of some of her forms using bisqued hump molds she and her husband make themselves. (Others she build free-hand.)

We passed around one of those bisqued hump molds. It had been formed as a solid shape then hollowed out, and the surface both inside and out had been finished carefully and beautifully. Of these molds, Shoko said, "This is also our work." Imagine that: the infrastructure (the mold) should be beautiful as well. It is part of the building of the pieces. 

The slab for each basic vessel form is very thick, just under 1/2". Shoko adds coils to the essential form to enlarge it. The handmade mold has been a starting point, but each piece will become different as Shoko works it, somehow different from its predecessors formed in that same mold. Set-up time for the clay, in which it firms up somewhat, is necessary at every juncture. Timing is extremely important because it determines moisture  content (and therefore workability) of the clay vessel. Shoko removes material from the thick form with a Surform scraper, and this must wait to be done on the second day when the clay is not too malleable. It's a very meditative process, much slower than my own, although what she does is, considering that it is hand-building, fairly rapid. At a certain point Shoko pinches the clay from the bottom of the piece out to the rim line. Pinching gives her work a gently complex texture.

(Shoko Teruyama, ca. 2014-2015. Hand built, pinched, sgraffito through slip, glaze and glaze runs)

Ms. Teruyama was born and raised in Japan, but received her higher education in the United States. She does not relate very well to what she sees in contemporary Japanese ceramics, although she admits not knowing enough about it. She considers what she has seen as too finished, too interested in perfection, so it loses its human connectivity. She is, however, interested in learning more about it. 

Of the slow forming process, she said, "some people call it disease."  She added, "Whatever I do, I overwork. ...I just have to learn to accept that." Although it was not possible for Shoko to complete all the pieces in the three working days of the symposium, we were able to see her form the clay a good part of the way through to completion in the raw stage, at least. Here is partial sgraffito through white slip, on a plate in the cat series she is working on currently.

(Shoko Teruyama. A view into the creative process. Red earthenware and white slip, June 2015)

(Shoko Teruyama. Sheep plate, earthenware, slip and glazes, ca. 2014- 2015)

(Flower shaped vessel with hollow petal-like handles, decorated with slip, sgraffito and glazes, ca. 2014-2015)

Donna Polseno, who is the heart of this symposium, built hollow vessels as well as sculptural female figures. She pointed out that the female form in art is often made to represent beauty, or sex; but she wants her figures to say something else. 

(Donna Polseno; http://www.donnapolseno.com. The beginning of a female figure, with the beginning of two more sculptural figures beside it.)

(Base of Donna Polseno figure that is like the patchwork decorated figure several images below.)

(Donna Polseno figure on its armature; it gets a skirt and the very rough beginning of an arm.)

Sometimes a figure may represent a journey, as in this figure below on its boat, with energetic, pushing-up stance indicating balance;

(Donna Polseno, figure, ca. 2015)

or her own version of a caryatid, with the figure more self-enclosed or self-sustaining, and the vessel she holds more about the thing itself than what it contains; ("I present not just the water inside but the vessel itself"), and her figure is generous yet contained;

(Donna Polseno, sculptural form ca. 2015-2015)

or (below) wearing a patchwork that seems to hint at full and complex life of many parts. (If you look at the photo four images above this, you can see the beginning of the construction of a base of another sculpture like the base of this patchwork woman.)

(Donna Polseno, sculptural work ca. 2015)

Two of Donna's vessels at the museum show accompanying the symposium were hollow, volumetric sculptural forms, using similar surface glaze and textural designs to that on her sculptures. 

(Donna Polseno; one hollow vessel begins like this one, with slip-molded squared bowl shape, attached to a slab, and built up with large coils.)

(Donna Polseno, red earthenware, glazes, ca. 2014-2015)

When her sculpture and vessel forms merge, they are more mysterious yet, like sky constellations with their own order.

(Donna Polseno, red earthenware, glazes, ca. 2014-2015)

The most monumental sculpture of the symposium, a head and torso, was built over three days of the symposium by Cristina Cordova:

(Cristina Cordova;&nbsp;http://cristinacordova.com)

(Cristina Cordova; http://cristinacordova.com)

We were able to watch Cristina build this sculpture, a bust perhaps two-thirds or more as tall as herself, from the drawing idea to the partly finished form.

She builds from the bottom up, using paper clay, and fires the pieces in an electric kiln. She makes multiple drawings first to make sure the 3-D is accurate. She just "goes for it", knowing she has plenty of information to work with, and usually with lifting help from an assistant in her studio. The pieces, Cristina says, are made in "little cumulative steps that bring a piece to where it needs to be." Timing of drying is what clay is all about, she adds.

Influenced by memories of the shape and flavor of a disappearing neighborhood and life she once knew in Puerto Rico, where she grew up, her figures have an emotional richness partly about connection, partly celebration, and partly loss. Over time, her working life involved some intensive years of 8 a.m. to 5 p.m. plus evenings and additional hours where necessary to complete her works, but eventually she created a shift in her work habits to make room and balance for family life. 

This was not a hands-on workshop for attendees, in that we did not touch clay as we would in our own studio practices, or might in a typical one-person demo over two days. But the volume and quality of first-person demonstration and powerful trains of thought, especially if attended over consecutive years, makes this a great happening that is all about the diversity and accomplishment of contemporary women working in clay. 


Posted on June 23, 2015 .

Explorations in Dinnerware

I've been thinking for some time about offering dinnerware on my website and through my gallery. A couple of months ago I bought these pottery hump forms at NCECA (National Conference for Education in the Ceramic Arts) to help along the project. These are made to drape slabs over to make dinner and salad plates.

(The "corn-ear holder" is to make a foot profile.)

With my stoneware clay's 12% shrinkage, these proved to make vessel sizes that are just a little smaller than I wanted, but the shape is really good, and decoration possibilities are endless: 

(First effort at dinner and salad plates.)

I have since ordered a larger dinner plate hump form so that the next dinner plates will be closer to 10" than the 8.75" they end up being when using the current hump form. But I found a different solution to fixing the hump forms for salad plates, using an unpainted wooden frame I bought a while back at Michael's Crafts. This way the salad plates have bigger rims:

The first prototypes, with vegetable dish and serving platter (these items made over other GR Pottery Form humps), mug, bowl and a few serving pieces of my own design (mugs made on the wheel and bowls and olive boats from my own handmade template):

Exploration continues. Nothing is "etched in stone(ware)" for sure yet, but there are some nice lights I can visualize at the end of a shortish tunnel.

Posted on June 3, 2015 .

An Intimate and Sociable Art: Pottery

Vessels, or sculptures, or objects that straddle and erase that line; that's what potters make. But whatever the end result, the circuit always begins with the lump of clay and the artist's idea of the object-to-be. But that's just the beginning of a circuit. The circuit is not complete until another person looks at, thinks about, and perhaps touches and/or uses the finished object. Objects can be "stuff", or they be more. I aim for "more".

As a maker, I look for that sense of completion. I think about texture, shape, function, color and portability. I look to share the object with someone else in the end. I know it comes at an initial cost to the user- after all, the object must be located, paid for, and somehow received. I note that it comes at a cost to me, too- not just the layout for clay, glaze, kiln firings, and expenditure of effort, but also the strength of will to start the object and see it through from idea to fruition. But as a maker all my life, the will is second nature.

Makers need to make objects.

(Click on the photo to get the next photo in the slideshow)

My various costs have great meaning to me. I embrace them knowingly. My heart is in the process. Still, I do not come full circle until someone has willingly accepted the created object as his or her own. 

Creating pottery is so often a solitary occupation. But in the end it has to become an interaction, or it is an incomplete thing. It really needs to be defined as an intimate and sociable art. 

Posted on May 27, 2015 .

On Not Being Blocked

Maybe there's a bit of a writing block. So it's hard to blog just now. But the rest of the work is not blocked. My creative focus is diverted into all of the other work- the art of making and the business of promoting and selling. 

Here is the kiln I opened this morning. The first glimpse is a blank of beige fire brick and beige shelves. It's like when you start a new book; it's the no-frills front paper before a story begins.

After lifting the cap shelves off and unloading the first pieces of student work (that's for a different blog post), I found that the red bowls had come out well:

(The red is bluish where it pools)

both inside and out-

(Interesting...the green glaze on bare rim, vs the green glaze over the red glaze)

and the greeny-blue pieces were good, too.

(Hellooooo Beautiful)

A platter further down was softer red than expected. I think it's a winner:

(underglaze on the bird made some necessary contrast)

(underglaze on the bird made some necessary contrast)

Altogether, the reds were a nice group. These bowls were the textured ones (chattered, grooved with a lemon zester) you saw before today in these pages, in their various stages of development.

(Got a bird motif going on)

The next glazed pots are on the cart waiting to go into the kiln next week. Different color group. That's a bit of a different adventure from these.

In the fresh clay section of the studio, more dinnerware will be in the works on Tuesday of next week. (I will have a few days off before then for family graduations.) Back to you next week!

Dinnerware

After years of mostly creating my pottery by throwing the pieces on the potter's wheel, in recent times I've also been doing lots of hand-building as well, making platters, plates and other vessels from slabs. Nowadays my workshop has a few varied techniques going on at once.

Here's an effort much like I've been doing for years- these bisqued bowls, awaiting glazing.

And below is my newest effort, dinnerware. Square dinnerware, in fact. So far I've worked on dinner plates, salad plates and bowls. I still have to sand these a little, and glaze and fire them to completion, so you are not seeing them in their final, ivory color, with glossy finish. But what you ARE seeing is the first prototype of these shapes, and a look at the first decoration option. I plan to have dinnerware available in limited quantities, by order, and I will have a registry for sets by late September.

This one has some simple carving and inlaid underglaze color. You get the gist:

(Dinner plates, salad plates, bowls and one vegetable server, plus a few oval incidental bowls)

Still to come: cups for this shape set, and serving pieces- a serving platter to add to the vegetable serving dish (veg dish can be seen under the single bowl) shown here. Also, I will be developing other color choices, which will make each set look different from each other while retaining the same shapes. 

Before cup designs and color choices and the creation of platters, though, I've got to carry on with the regularly scheduled program. This week, the calendar just reads: glazing. 

If you're in the market for a salad and serving bowl, I'll have really good new ones when the glaze fire is finished late in the week! Prices around $45.

Posted on April 28, 2015 .

Spring, Bisque, Glaze, Potters Guild of NJ show

Spring is springing very quirkily this year. There's no placid progression. We get blossoms...and pounding rain that knocks them off the trees. A warm day, then three chilly ones. First thing this morning I needed gloves on my brisk walk, the air felt like late fall. That's what we get for living where the seasons change. We get...change.

In the studio, that alternate reality space, I put the bisque kiln through its motions twice this week, bringing me a pretty big load of pieces to glaze over the next week and fire over the next two weeks. Because bisqued pots can touch each other or even be stacked in the kiln, but glazed pots can't, I will have three kilns full to glaze fire. 

This part of the job- glazing- is a big slog. I just bite the bullet and do it, because the results are usually worth it. It beats the heck out of my hands, which will be like sandpaper even with judicious use of Working Hands, my recent healing balm purchase to help with the rough mitts. You just can't have lotion on your hands when you glaze. If you handle the bisqued ware with it on your hands, you make spots where the glaze says, "Nuh uh, not sticking here." And though I may wear disposable gloves through parts of the process, other parts require touch. Just the facts of the job.

I'm not showing work with my guild at their twice a year show and sale this weekend in Mountainside, NJ, at the Presbyterian Church on Deer Path, but if you want to see lots of good pots, some pretty innovative and some quite classical, the church is straight up Deer Path (New Providence Rd exit) from Rte 22, and the hours Sunday are 12-5. (They are there 11-5 Saturday as well.) You can find some interesting and happy purchases there if you give it a chance, in all price ranges. 

I'm going instead to visit an NCECA friend in Long Island at her potters' group meeting, for a change. This is my time to meet people and talk talk talk clay. Pot on!


Posted on April 24, 2015 .

Using New Tools

Using some of the new tools bought at NCECA, along with items of my own fabrication and collection, here's what I'm working on this week: bird things. 

Posted on April 15, 2015 .

Adding Great Tools

Never mind jewelry and new shoes. Who cares? I went shopping for studio tools.

Bought some nifty and extremely useful items from vendors at NCECA 2015, and also added some items from elsewhere.

There's this wheat etched roller from www.4clay.com. Their booth was fun to check out.

(Texture roller for clay from Socwell LLC)

I'm thinking about having them make me a signature stamp for signing my work. We'll see. I blew the budget for now on this NCECA trip!

And these hand cut wheels and stamps from Stanley Hurst at meccapotterytools.com, whose motto is "Impressions last a lifetime; make a good one!"

(Mecca Pottery tools. The square and rectangle stamps have different designs cut into the other ends.)

They have a beautiful handmade feel which is unlike the neat laser-like etching of the wheat design roller tool. There's a place for both in my work.

Can't wait to use this brush with the copper ferrule (below at bottom) handmade by Joe Campbell. I tried out many of his brushes using water on colored paper, and chose the one that made the mark I liked best. I came back the next day and bought the other brush for a friend.

(Joe Campbell brushes)

It's going to be extremely helpful to use these dinnerware hump forms (below). In fact, I intend to start using them next week.

(Hump forms for making square dinnerware)

They're from GR Pottery Forms (www.grpotteryforms.com). I will roll slabs and drape the clay over the forms to shape square plates in two sizes, salad and dinner. The forms are very dense grained, the clay won't stick to them, and this set comes with an edge finishing tool for the vessels I will make from them. I'll throw bowls and cups on the wheel to create full place settings. My head was buzzing with designs and plans while I pondered buying these. Once I have some color and surface ideas planned, which I hope to have by June, I'll be offering a wedding registry! (Look for developing information about that on this blog over the coming weeks.)

I had already ordered this set of 11 biscuit cutters online before going to the conference, from Bill van Gilder's excellent site (www.vangilderpottery.com), to facilitate handbuilding perfect circular components for lids and bases and foot rings.

(Biscuit cutter set for making round components on handmade pieces)

And I had just bought this adjustible measurer (below) online from John Fulwood at Kissimmee River Pottery (www.riverpots.com), to measure vessels as I throw them on the wheel. This is a very fancy version of a tombo (Japanese measuring tool) to help me know whether I'm maintaining constant sizes for sets. I won't be making huge numbers of sets, but I will be open to commissions once I have prototypes of the dinnerware up on my website.

(Fulwood Measure from Kissimmee River Pottery in NJ)

I'm continuing to invest in the business, and it's exciting!


Posted on April 9, 2015 .

Surface Marks on Bowls

Simple marks are easy to make, and fun.

These were made by tools that were gifts from friends. 

A simple chattering tool is held angled in the hand in different ways to make larger or smaller marks. This is simply a strap of flexible, bent metal with sharpish edges. Held a little out from the pot, it makes thinner lines. Held about perpendicular to the pot, it makes bigger, wider marks. Little chippy shavings come off as the tool bounces on the turning pot, and it makes a sort of whirring hum.

The little doodad below is a lemon zester. It gets pulled along the surface as you turn the bowl in your hands bit by bit.

Below is one of my usual trimming tools, used to trim excess clay from the bowl after it has firmed up quite a bit post-throwing. It made uncomplicated rings around the bowl.

(This is a Bison trimming tool, handmade in Las Vegas. Expensive, but worth it. It stays sharp.)

Here (below) is a link to a video of much more complicated surfaces made by Ken Standhardt on his beautiful pots, with tools just as simple as the ones above- a pair of can opener/punches, in fact, and a ballpoint pen. So much is possible using the most elementary tools! http://www.opb.org/television/programs/artbeat/segment/sculptor-kenneth-standhardt/

Human ingenuity used for good, not evil. Ohhhh yeah.

Posted on April 7, 2015 .

Simple Bowl

You know it's been too long since you sat at your potter's wheel when the liquid in your throwing-water bucket has evaporated to the thickness of pudding.

It's been at least a month of doing other things around the studio and gallery and teaching area. Plus holiday prep around here, plus NCECA.

I woke this morning thinking about "bowliness" and by 6:30 had gone into the studio to weigh 2-lb balls of clay and throw bowls. I want to bring the essence of "bowl" to the clay. The bowl was my first and favorite form. It is generous. It contains. It offers. 

I made the bottom thin, and the walls, and neatly finished the edge of the rim. Four times, one for each 2-lb ball of clay. I am beginning to explore Bowl again in its simplicity.

Except for making the interior curve with no line of transition from wall to floor, and thinking about a balance of containing and offering, my main intent was to let go and flow with the clay. Maybe they will want to be stamped later. Maybe colored. Maybe left ivory. Maybe I don't know yet. 

Went on and threw a couple of 3-lb bowls. They are thrown equally thin. What a difference a pound of clay makes.

What does 4-lbs of clay do? ...Tomorrow. Early.


Posted on April 6, 2015 .

After NCECA, Pausing

I've been to NCECA! Pronounced "Enseeka", that's National Conference for Education in the Ceramic Arts. It's big (nearly 5,000 people), it travels annually to a new venue (this year Rhode Island), and I hadn't gone in 14 years. And I would like to blog more about it. But it was too darn big and too much to assimilate and just la di da write up, so I'm going to have to think about that for a while. 

All I can say for sure is, I came home with connection to a new friend, and having had interesting conversations with some diverse people, seen good clay techniques demonstrated by really fine artists, and bought some cool new tools and texture items for the studio. My appetite for all things and folks "clay" has only been further whetted. I should be half my age to do all the things I want to do in my field before I hand on my potter's wheel. 

In any case I will go like gangbusters once I get back to work with clay, which will be another 9 days or so. This is the "busy life" time where I pre-budget a break from clay itself and pour my energies into all the things I need to do for our family life. Unlike my earlier days, though, this time is more than compensated for by longer hours and work weeks in the studio before and after the break. I have to say- it's hard to take a break after a flood of new ideas begins to germinate!

In the last week I've visited my 101 year old aunt in Massachusetts (what an impressive woman, lucid and personable), been to NCECA, and also registered for the Women Working with Clay Symposium in Roanoke, Virginia beginning June 8, 2015. Aside from that, I've made some resolutions.

The first is COLOR. Want. Lots. Underglazes to the max.

The second is PASSOVER. I'm on a roll. I can't stop figuring my way through Passover ware suddenly. I'm designing in my head till I can work with clay again. Matzah plates. Seder plates. Other Seder dishes and household vessels. I want to design like crazy and focus for a long while...and see what transpires. Most other things will wait!

The third resolution comes from the realization that working with clay is bringing me full circle to the creativity of childhood. I mean the unselfconsciousness, before undue external criticism and don't-do-that-art-thing hampered it. I am more my original art-self than I've been in years. My resolution is, go with it to the max.

There's one matzah plate left; click here. I decided that the slight line along the foot ring was a reason to lower the price from $95 to $75. It does not affect appearance or function, and you can still hang this plate on the wall! It is 19" in diameter, curved to resemble a round handmade matzah, and smooth and glossy. I made it from a slab of clay, used colored washes of underglaze and lettering on it (with clear glaze over it), and gave it a creamy coat of nutmeg glaze on the underside. People always ask, so I must add, it is food safe. All my pottery is. I want you to be comfortable using my pottery. 

Enjoy the holiday!

(19" diameter Matzah Plate)


Posted on March 30, 2015 .

Tripling the Inventory & Pricing it Right

I did not realize how many pots I put away "for later" over the last 15 or so years (half my pottery working life) until I brought them into the light and began wiping them down and putting them on the gallery shelves. Much to my surprise, I believe I've tripled my inventory. 

That is the main reason I've been neglecting my blog these last weeks (except for writing about this year's Passover pottery, which I'm pretty excited about). Who can blog when there is so much to sort and dust, to photograph, measure, weigh and describe, to figure price and put on the website, and price-sticker and put on the gallery shelves? It's been a tiring, time intensive but really interesting journey of rediscovery.

Some are styles I do not do currently. But they have me thinking that I have to do that again, whatever "that" is. Like, for instance, the interior of this cereal bowl- that was a cool effect.

These little personal cream & sugar sets... liking the slipwork I did on them. Have to do more of this sort of decoration on other types of pots.

My "walking jars" (below) were very interesting. Might do more, different but recalling certain elements, like those walky feet.

There are good glazes I hadn't gotten to work for me with my current clay, that were nice on previous clays; like this rusty red (below). (Although I think I may have solved that just lately and will use this glaze again...)

Another example- this black, which has never been this black again on my vessels since I changed from dark clay to light. (I keep working on it, though, testing glazes.)

Don't know why I didn't wake up and see that I had some buried treasure. Anyway, most of the buried treasure is now on sale at ridiculously good prices. The gallery is too stuffed, and besides, I'm rarin' to make new work. You are welcome to browse the web pages here and visit the Gallery Downstairs (here on Windsor Way in Hillside, NJ) and see what I mean. The new "Sale!" web page and the same pots in my physical gallery should stay up a while, but I priced these things to go quickly. I'm putting up more of these pots several days a week. On to your new homes, kids! Mama's got lots of new work to make. 

Posted on March 10, 2015 .